
Lawn Care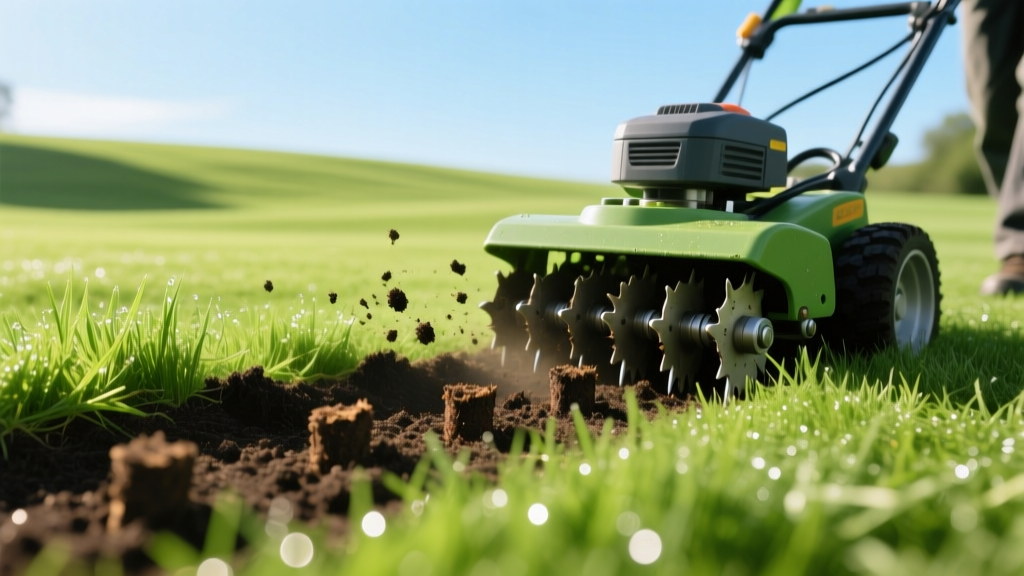
Top Benefits of Aerating Lawn: Step-by-Step Core Aeration Guide
The Science: Quantifying the Benefits of Aerating Lawn
Soil compaction is the silent killer of turfgrass. When soil particles are compressed to densities exceeding 1.6 g/cm³, pore space is eliminated, choking root systems of oxygen and blocking water infiltration. Understanding the true benefits of aerating lawn turf requires looking past superficial aesthetics and examining the subterranean mechanics of your soil profile. Core aeration—the physical extraction of 2-to-3-inch soil plugs—is the only mechanical intervention that permanently alters soil bulk density in established lawns.
Data Highlight: The Compaction Threshold
According to turfgrass research, when soil penetration resistance exceeds 300 PSI, root growth slows by up to 50%. A standard walk-behind core aerator applies over 400 PSI of downward force via its tines, fracturing compacted clay layers that manual tools cannot penetrate.
Primary Physiological Benefits
- Enhanced Gas Exchange: Turfgrass roots consume oxygen and expel carbon dioxide. Compaction traps CO2 in the soil profile, creating a toxic environment for roots. Extracting cores creates direct atmospheric channels, restoring the O2/CO2 balance required for cellular respiration.
- Thatch Biodegradation: The benefits of aerating lawn thatch layers are often misunderstood. Aeration does not physically remove thatch; instead, the extracted soil cores deposited on the surface act as a microbial inoculant. Soil-dwelling bacteria (specifically Actinomycetes) migrate from the plugs into the thatch layer, accelerating the decomposition of lignin and cellulose.
- Hydraulic Conductivity: Compacted clay soils often exhibit percolation rates of less than 0.1 inches per hour, leading to surface runoff and shallow rooting. Core aeration increases infiltration rates to over 2.0 inches per hour, driving water and dissolved nutrients deep into the subsoil.
Equipment Matrix: Selecting the Right Aeration Tool
Not all aeration methods yield the same results. To maximize the benefits of aerating lawn areas, you must select equipment that physically removes soil mass rather than merely displacing it laterally.
| Method | Mechanism | Impact on Compaction | Estimated Cost (2026) |
|---|---|---|---|
| Walk-Behind Core Aerator (e.g., Ryan Lawnaire V, Billy Goat Outback) | Extracts 0.5" to 0.75" wide, 2"-3" deep soil plugs via hollow tines. | Excellent. Physically removes mass, relieving lateral pressure. | $85 - $120 / 4-hour rental |
| Tow-Behind Spike Aerator | Pushes solid spikes into the ground via tractor weight. | Poor. Increases lateral compaction around the spike hole. | $60 - $90 (Purchase) |
| Liquid Aeration (Surfactants/Saponins) | Chemical wetting agents intended to reduce soil surface tension. | Negligible for physical compaction. Only aids water penetration. | $30 - $50 / Bottle |
For lawns with heavy clay soils or high foot traffic, the walk-behind core aerator is the only viable option. Rental units from hardware stores often lack sufficient weight; if your rental unit weighs under 200 lbs, place sandbags or cinder blocks on the machine's weight tray to ensure the tines penetrate to the required 3-inch depth.
Step-by-Step Core Aeration Procedure
Executing a flawless aeration pass requires precise timing and preparation. Follow this protocol to ensure optimal tine penetration and turf recovery.
Step 1: Soil Moisture Calibration (48 Hours Prior)
The most common cause of aeration failure is incorrect soil moisture. If the soil is too dry, the tines will bounce off the surface; if too wet, the soil will smear and clog the hollow tines. Water your lawn with exactly 1 inch of irrigation 48 hours before the procedure. Use a digital soil moisture meter to verify a volumetric water content (VWC) between 15% and 22%. If you lack a meter, perform the screwdriver test: a standard 6-inch flathead screwdriver should slide into the soil with moderate resistance, but not pull up muddy residue.
Step 2: Utility Clearance and Mowing
Always call 811 at least three business days in advance to mark underground utilities. While shallow aeration (2-3 inches) rarely impacts deep gas or water lines, it can easily sever shallow fiber-optic, irrigation, or low-voltage lighting cables. On the day of aeration, mow your turf to 1.5 inches. This prevents the aerator tines from tangling in long grass blades and ensures the extracted soil cores make direct contact with the soil surface upon decomposition.
Step 3: The Crosshatch Execution Pattern
- Perimeter Pass: Drive the aerator around the outer edge of the lawn to create a turning buffer, preventing turf tearing when pivoting the heavy machine.
- Primary Pass: Drive in straight, parallel lines, overlapping each pass by 50%. This ensures a density of 15 to 20 extraction holes per square foot.
- Secondary Pass: Drive perpendicular to your first pattern. For severely compacted zones (e.g., along driveways or under swing sets), perform a third diagonal pass.
Warning: Slope Safety
Walk-behind aerators weigh upwards of 300 lbs and possess high torque. Never operate a walk-behind aerator on slopes exceeding a 15% grade. On inclines, always drive straight up and down the slope, never horizontally, to prevent machine rollovers and severe operator injury.
Step 4: Core Management
Do not rake or remove the extracted soil plugs. According to Penn State Extension, leaving the cores on the surface allows rain and mowing to break them down, redistributing vital topsoil microbes back into the thatch layer. If the aesthetic of soil plugs is unacceptable for a high-visibility event, use a leaf blower to break them apart rather than raking them away.
Post-Aeration Protocol: Maximizing ROI
The benefits of aerating lawn turf are transient if the open holes are allowed to collapse before roots can exploit them. The 14-day window immediately following aeration is the most critical period for turf renovation.
- Overseeding Window: For cool-season grasses (Tall Fescue, Kentucky Bluegrass), drop seed within 24 hours of aeration. The open holes provide direct seed-to-soil contact, increasing germination rates from a typical 40% (surface broadcast) to over 85%. Use a slit-seeder or broadcast spreader, followed by a light drag with a chain-link fence to work seed into the cores.
- Fertilizer Application: Apply a starter fertilizer high in phosphorus (e.g., 18-24-12 NPK) immediately after seeding. The aeration holes act as direct conduits, delivering phosphorus—which is otherwise immobile in soil—straight to the developing root zone.
- Irrigation Schedule: Transition to light, frequent watering. Apply 0.1 inches of water three times daily for the first 14 days to keep the seed and soil plugs moist without washing away the seed.
Troubleshooting and Myth-Busting
Myth: Aeration Breaks the Pre-Emergent Herbicide Barrier
Many homeowners delay aeration out of fear that pulling cores will disrupt the chemical barrier established by pre-emergent herbicides (like Prodiamine or Dithiopyr) used to prevent crabgrass. Research from the University of Minnesota Extension confirms that core aeration does not compromise pre-emergent efficacy. The herbicide binds tightly to organic matter in the top 0.5 inches of soil; removing a fraction of that soil via aeration does not allow weed seeds to bypass the remaining chemical shield.
Issue: Tines are Clogging with Clay
If your soil is highly plastic (heavy clay) and the tines are clogging, your soil moisture is too high. Halt operations immediately. Allow the lawn to dry for 48 to 72 hours. Attempting to aerate saturated clay will result in smeared, compacted hole walls that restrict root growth worse than the original compaction.
Issue: Shallow Plug Extraction (Less than 1.5 inches)
This indicates insufficient machine weight or extreme surface hardness. Rent a heavier commercial-grade unit (such as a Billy Goat Outback), or add 50 lbs of ballast to your current machine's weight tray. Ensure the tines are not worn down; replacement tines cost approximately $45 to $60 and are necessary if the bevel edge is rounded off.

