
Lawn Care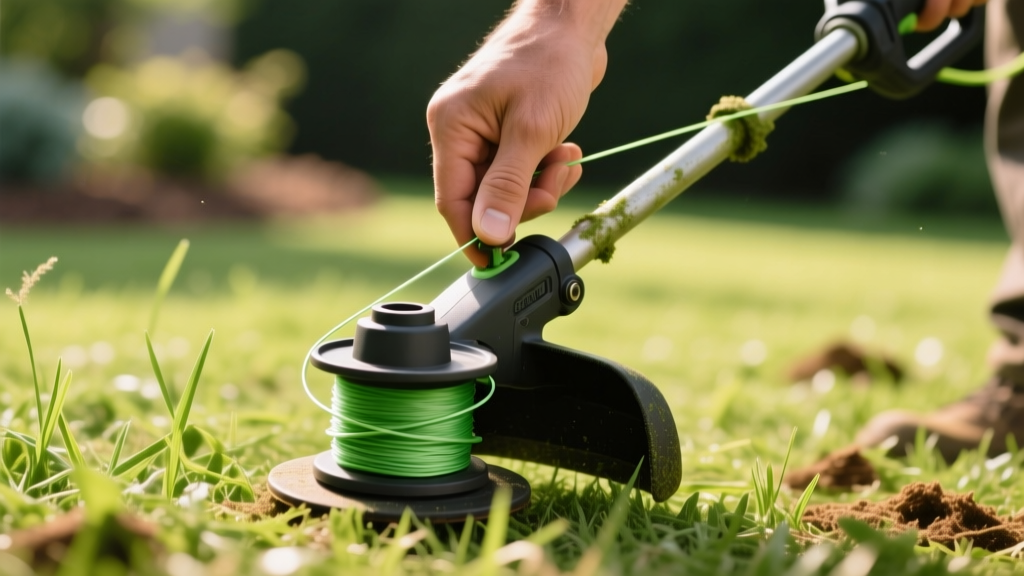
How to Change the Line on a Weed Eater for Weed Spot-Treatment
Effective weed species spot-treatment requires more than just targeted herbicide applications; it demands precise mechanical control. When managing localized infestations of invasive grasses or deep-rooted perennials, your string trimmer is a critical tool. However, using the wrong line diameter can scalp desirable turf, spread weed seeds, or fail to sever tough rhizomes. Understanding how to change the line on a weed eater to match the specific biological profile of your target weed is a foundational skill for advanced lawn care.
Why Line Diameter Dictates Spot-Treatment Success
The kinetic energy transferred from a trimmer line to a plant stem is a function of the line's mass and velocity. A standard 0.080-inch line spinning at 7,000 RPM delivers a clean slicing action ideal for tender annuals. In contrast, a 0.105-inch braided line acts more like a blunt blade, which can shatter the crowns of perennial weeds but will severely damage surrounding turfgrass if used for delicate edging.
According to turfgrass management guidelines from NC State University's Turfgrass Program, mechanical disruption of weed crowns must be precise to prevent stimulating dormant lateral buds. If you use a line that is too thick on a patch of Yellow Nutsedge (Cyperus esculentus), the blunt force can scatter the tiny tubers (nutlets) across the lawn, multiplying the infestation. Conversely, using a thin 0.065-inch line on mature Canada Thistle (Cirsium arvense) will simply shred the top growth while leaving the deep taproot intact to regenerate.
Weed Species to Trimmer Line Matching Matrix
| Target Weed Category | Species Examples | Optimal Line Diameter | Spot-Treatment Technique |
|---|---|---|---|
| Tender Annual Grasses | Crabgrass, Goosegrass | 0.065" - 0.080" (Round) | Light sweeping passes just above soil grade to sever crowns without scalping turf. |
| Perennial Sedges | Yellow Nutsedge, Purple Nutsedge | 0.080" (Round or Square) | Precise vertical edging to cut below the soil line; avoid aggressive bumping to prevent tuber scatter. |
| Tough Broadleaf Weeds | Dandelion, Broadleaf Plantain | 0.080" - 0.095" (Square) | Angle the trimmer head 45 degrees to slice the taproot crown flush with the soil surface. |
| Woody / Vining Perennials | Canada Thistle, Field Bindweed | 0.095" - 0.105" (Braided) | High-RPM base chopping to sever thick, fibrous stalks; follow up with targeted systemic herbicide. |
Step-by-Step: How to Change the Line on a Weed Eater
Modern trimmer heads, such as the Stihl AutoCut 25-2 or the Echo Speed-Feed 400, are engineered for rapid line changes. However, improper winding remains the leading cause of field failure. Follow this exact procedure to ensure optimal tension and feed reliability during spot-treatment sessions.
- Secure the Spool and Access the Hub: For standard bump-feed heads, align the arrows on the top and bottom of the spool housing to lock the mechanism. Unscrew the center retaining knob counterclockwise. For speed-feed heads, align the arrows and pull the outer casing straight off.
- Cut Precise Line Lengths: Do not guess the length. For 0.080-inch line, cut exactly two 15-foot lengths. Using excessively long lines (over 20 feet) increases friction inside the spool, causing the line to melt and weld together during high-RPM operation.
- Anchor and Wind with Tension: Insert the center of the line into the anchor hole in the spool hub. Wind the line tightly in the direction indicated by the arrows (usually clockwise). Critical: Maintain 15 to 20 pounds of physical tension on the line as you wind. Loose winding causes the line to bite into itself, resulting in feed lockups when you bump the head on the ground.
- Seat the Line in Retention Slots: Once wound, leave about 6 inches of line extending from the spool. Snap these tails into the temporary retention notches on the spool's outer flange. This prevents the line from unspooling while you reassemble the head.
- Thread the Eyelets and Reassemble: Feed the retained tails through the metal or reinforced plastic exit eyelets on the outer housing. Screw the retaining knob back on clockwise until it clicks or seats firmly.
- Release and Test Tension: Pull both lines simultaneously to release them from the retention notches. Squeeze the bump head and pull the lines to ensure they extend and retract smoothly.
Warning: Spring Tension Hazards
When opening older or heavily used bump-feed heads, the internal compression spring can eject violently. Always keep the trimmer head pointed away from your face and wear safety glasses when separating the spool from the housing.
When opening older or heavily used bump-feed heads, the internal compression spring can eject violently. Always keep the trimmer head pointed away from your face and wear safety glasses when separating the spool from the housing.
Advanced Spot-Treatment Techniques by Weed Species
Once your weed eater is strung with the correct line diameter, the physical execution of the cut determines the success of the spot-treatment. The Purdue University Turfgrass Science weed identification database highlights that mechanical control must target the specific regenerative structures of the weed.
Managing Yellow Nutsedge (Cyperus esculentus)
Nutsedge is notorious for its subterranean tubers. When spot-treating a localized outbreak near desirable turf, equip your trimmer with 0.080-inch round line. Round line slices cleanly without creating the aggressive 'scalloping' effect of square line. Hold the trimmer shaft perfectly vertical and lower the spinning head until the line just kisses the soil surface. The goal is to sever the nutsedge shoot below the soil line without agitating the soil enough to bring dormant nutlets to the surface.
Managing Dallisgrass (Paspalum dilatatum)
Dallisgrass forms thick, woody crowns that resist standard mowing. For this species, switch to a 0.095-inch square or star-shaped line. The sharp edges of the geometric line act like micro-serrated blades. Tilt the trimmer head to a 45-degree angle and use a short, controlled 'chopping' motion directly at the base of the Dallisgrass clump. This severs the crown from the root system. Because Dallisgrass crowns are dense, a thin round line will simply bounce off or snap upon impact.
Troubleshooting Trimmer Line Failures in the Field
Spot-treatment requires uninterrupted precision. If your trimmer line fails mid-task, you risk abandoning the mechanical control phase and relying solely on chemical treatments, which delays eradication. Use this diagnostic framework to resolve common line issues.
- Symptom: Line Welds Together Inside the Spool
Cause: Friction heat generated by high RPMs and loose winding.
Fix: Rewind the spool with higher manual tension. Upgrade to a premium copolymer line (e.g., Oregon Gatorline or Stihl X-Line), which has a higher melting point than standard nylon. Expect to pay $8 to $14 for a high-grade copolymer spool. - Symptom: Line Snaps at the Eyelet Upon Impact
Cause: Using a line diameter too thin for the target weed's tensile strength, or the eyelet is burred from hardscape contact.
Fix: Inspect the metal exit eyelet. If it has a sharp groove worn into it, file it smooth with a round metal file or replace the eyelet insert. Increase line diameter by 0.015 inches for woody weeds. - Symptom: Line Will Not Advance When Bumped
Cause: The line was wound in the wrong direction, or dirt has impacted the bump-feed mechanism.
Fix: Disassemble the head, wash the internal components with a garden hose to remove compacted clay and grass clippings, and rewind following the directional arrow. Apply a light spray of dry silicone lubricant to the spool hub—never use wet grease, which attracts abrasive dirt.
Expert Maintenance Tips for 2026 Trimmer Models
Recent advancements in trimmer technology, particularly in brushless electric models from brands like EGO and Milwaukee, deliver torque curves that differ significantly from traditional 2-stroke gas engines. Electric motors provide instant peak torque at 0 RPM, which puts immense shear stress on the trimmer line the moment you engage a thick weed stalk.
When using high-torque battery-powered trimmers for heavy weed spot-treatment, always utilize a braided or twisted line profile rather than a solid round profile. The aerodynamic drag of a twisted line reduces the initial startup load on the electric motor, preventing the internal controller from tripping the thermal overload switch during aggressive spot-treatment of dense perennial patches. Furthermore, store your unused trimmer line spools in a sealed container with a damp sponge; nylon line becomes brittle and prone to shattering when it loses its factory moisture content over the winter months.

