
Lawn Care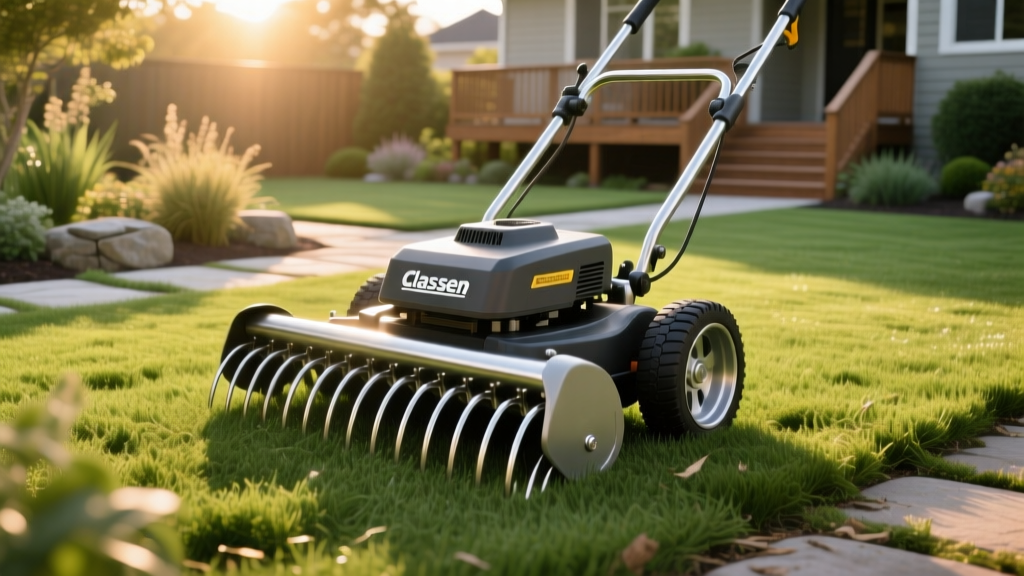
Classen Power Rake Selection, Calibration, and Maintenance
Thatch accumulation exceeding 0.5 inches creates an impermeable barrier that blocks water, oxygen, and nutrients from reaching the root zone. While manual dethatching is feasible for small patches, commercial and large residential lawns require mechanical intervention. The Classen power rake lineup remains the industry standard for turf renovation in 2026, utilizing a flail-blade design that pulverizes thatch rather than merely pulling it to the surface. However, selecting the correct model, calibrating the cutting depth, and maintaining the flail assembly are critical to avoiding severe turf scalp damage.
Selecting the Right Classen Power Rake Model
Classen manufactures three primary power rake configurations tailored to different acreage and terrain requirements. Choosing between walk-behind and tow-behind units depends on your lawn size, slope gradient, and storage capacity.
| Model | Type | Engine | Cutting Width | Weight | Estimated 2026 Price |
|---|---|---|---|---|---|
| PR-18H | Walk-Behind | Honda GC160 (160cc) | 18 inches | 135 lbs | $1,250 - $1,400 |
| PR-20H | Walk-Behind | Honda GX200 (196cc) | 20 inches | 155 lbs | $1,500 - $1,750 |
| TR-20H | Tow-Behind | Honda GX200 (196cc) | 20 inches | 185 lbs | $900 - $1,100 |
The PR-20H is the optimal choice for properties between 10,000 and 25,000 square feet. The Honda GX200 commercial-grade engine provides superior torque under heavy thatch loads compared to the GC160 found on the PR-18H. For properties exceeding one acre with flat terrain, the TR-20H tow-behind unit saves significant operator fatigue, provided your towing vehicle (UTV or heavy-duty garden tractor) has a minimum 18 HP output and a Category 0 or 1 hitch.
Expert Tip: If you are renting a Classen power rake from a local equipment yard in 2026, expect to pay between $75 and $110 per day. Always inspect the flail blades before leaving the rental yard; worn blades will result in uneven thatch removal and require double the passes.
Calibrating Blade Depth: The Make-or-Break Step
The most common failure point in power raking is improper depth calibration. Setting the flails too deep will rip out healthy turfgrass crowns and sever lateral stolons, particularly in warm-season grasses like Bermuda and Zoysia. According to North Carolina State University Turfgrass Extension, mechanical dethatching should only penetrate the thatch layer and lightly scarify the top 1/8 inch of soil.
Step-by-Step Calibration Procedure
- Find a Level Surface: Move the power rake to a flat, paved surface (driveway or sidewalk) to establish a true baseline.
- Disengage the Flails: Ensure the blade engagement lever is in the disengaged (up) position and the engine is off.
- Set the Depth Lever: Locate the depth adjustment lever on the handle. Set it to the highest setting (shallowest cut).
- Measure Clearance: Lower the handlebars to the operating position. The flail tips should just barely kiss the pavement or hover exactly 1/16 inch above it.
- Test on the Lawn: Make a single 10-foot pass on the lawn. Inspect the debris. You should see brown thatch and minimal green, living grass blades. If you see white soil or torn green roots, raise the depth lever one notch immediately.
"Power raking is an aggressive practice. Unlike core aeration, which removes soil plugs, power raking relies on impact. If your thatch layer is less than 0.5 inches thick, skip the power rake and use a liquid dethatching enzyme or a gentle spring-tine rake instead." - Turf Management Best Practices Guide
Essential Maintenance Schedule for Classen Dethatchers
Classen power rakes operate in high-debris, high-vibration environments. Neglecting the drivetrain and flail assembly leads to belt slippage, bearing failure, and uneven thatch windrows. Adhere to this maintenance matrix to maximize equipment lifespan.
| Interval | Component | Action Required |
|---|---|---|
| Pre-Operation | Flail Blades | Inspect for bent shafts or missing flails. Replace if worn more than 1/4 inch from original length. |
| Post-Operation | Deck & Chute | Use an air compressor or leaf blower to clear damp thatch from the belt guard and discharge chute to prevent rust and rot. |
| Every 10 Hours | Drive Belt | Check tension. Press the center of the belt span; it should deflect exactly 1/2 inch. Adjust the idler pulley if deflection exceeds 3/4 inch. |
| Every 25 Hours | Pivot Points & Bearings | Apply NLGI #2 lithium-complex grease to the depth lever pivots and flail shaft bearings via the zerk fittings. |
| Seasonal | Honda Engine | Change oil (SAE 10W-30), replace air filter, and run fuel stabilizer through the carburetor before winter storage. |
Flail Blade and Tine Replacement
The flail assembly on the PR-20H utilizes a heavy-duty steel shaft with freely swinging flail blades. Over time, the impact against soil and rocks dulls and shortens these blades. When replacing flails, you must replace the entire set to maintain rotational balance. An unbalanced flail shaft will cause catastrophic vibration, destroying the sealed ball bearings (typically Part # 10232 or equivalent SKF bearing) within a single season. Always use OEM Classen replacement flails or certified aftermarket equivalents made from high-carbon steel; standard mild steel will bend upon hitting buried irrigation heads.
Troubleshooting Common Classen Power Rake Issues
Even well-maintained equipment encounters operational hiccups. Use this diagnostic framework to resolve issues in the field.
- Symptom: Engine bogs down or stalls during engagement.
- Cause: Thatch layer is excessively thick, or depth is set too aggressively.
- Fix: Raise the depth lever two notches. Make a shallow first pass to remove the top layer, then lower the lever for a second, deeper pass in a perpendicular direction.
- Symptom: Uneven thatch windrows (heavy on one side).
- Cause: Worn flails on one side of the shaft, or the machine is being tilted by the operator.
- Fix: Inspect the flail shaft for missing blades. Ensure the operator is keeping the handlebars level and not leaning on one side while walking.
- Symptom: Belt squeals and smells like burning rubber.
- Cause: Belt tension is too loose, or debris is trapped in the pulley grooves.
- Fix: Disengage the PTO, shut off the engine, and clean the pulleys with a wire brush. Tighten the idler pulley tensioner bolt until deflection is exactly 1/2 inch.
Post-Rake Cleanup and Overseeding Integration
Power raking generates a massive volume of organic debris. Failing to remove this debris will smother the remaining turf. Use a commercial-grade lawn vacuum or a heavy-duty pull-behind sweep to collect the thatch windrows immediately after raking. According to Classen Turf Equipment guidelines, the ideal time to power rake cool-season grasses (Fescue, Kentucky Bluegrass) is early fall, immediately preceding core aeration and overseeding. The shallow grooves left by the flail blades create excellent seed-to-soil contact zones, dramatically improving germination rates when followed by a slice seeder or broadcast spreader.
For warm-season lawns, schedule power raking for late spring when the grass is actively growing and can rapidly recover from the mechanical stress. Always follow up with a balanced starter fertilizer (e.g., 18-24-12) and deep, infrequent irrigation to stimulate root regeneration.

