
Lawn Care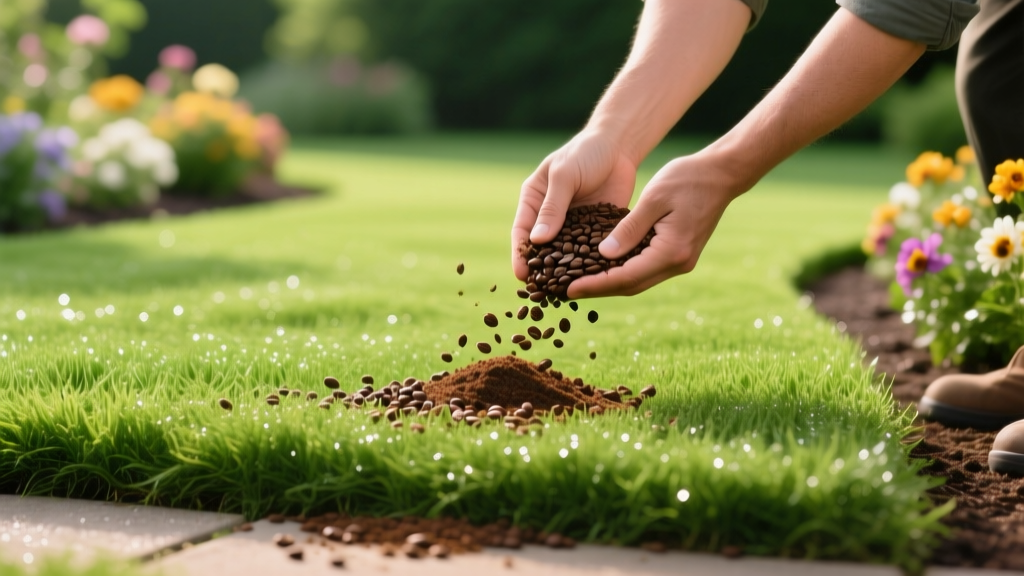
How to Use Coffee Grounds on Lawn: Step-by-Step Application
The Reality of Coffee Grounds on Turfgrass
The practice of applying coffee grounds on lawn surfaces has gained massive popularity as homeowners seek free, organic soil amendments. However, dumping wet espresso pucks or raw filter grounds directly onto grass is a critical mistake that damages turf. To utilize spent coffee grounds effectively as a nitrogen supplement and soil conditioner, you must follow precise preparation and application protocols. This guide details the exact step-by-step procedures for integrating coffee grounds into your lawn maintenance program without suffocating your grass or triggering nitrogen tie-up.
⚠️ Critical Warning: The Hydrophobic Crust Effect
Applying raw, wet coffee grounds directly to your lawn creates a hydrophobic (water-repelling) crust as they dry. This physical barrier prevents water infiltration, suffocates grass crowns, and creates an ideal microenvironment for Pythium blight and saprophytic mold growth. Never dump unprocessed, wet grounds directly onto turf.
Applying raw, wet coffee grounds directly to your lawn creates a hydrophobic (water-repelling) crust as they dry. This physical barrier prevents water infiltration, suffocates grass crowns, and creates an ideal microenvironment for Pythium blight and saprophytic mold growth. Never dump unprocessed, wet grounds directly onto turf.
Debunking the pH and Nutrient Myths
Before executing the application steps, it is vital to understand the actual chemical profile of spent coffee grounds. Two pervasive myths lead to improper lawn applications:
Myth 1: Coffee Grounds Are Highly Acidic
Unbrewed coffee grounds are acidic, but the brewing process extracts almost all the water-soluble acids into your cup. According to soil testing data, brewed, spent coffee grounds have a near-neutral pH ranging from 6.5 to 6.8. They will not lower your soil pH or act as an acidifier for your lawn. If your soil requires acidification, elemental sulfur is the correct amendment, not coffee grounds.
Myth 2: They Are a Pure Nitrogen 'Green' Source
While coffee grounds contain roughly 2.1% nitrogen by volume, their Carbon-to-Nitrogen (C:N) ratio is approximately 20:1 to 24:1. In composting terms, this makes them a balanced or slightly 'brown' material, not a pure nitrogen 'green' source. If applied too thickly, soil microbes will consume available soil nitrogen to break down the carbon structure, causing temporary grass chlorosis (yellowing). Proper mixing ratios are mandatory to prevent this.
Nutrient Profile and Cost Comparison Matrix
How do coffee grounds compare to commercial organic fertilizers in a 2026 lawn care budget? The table below contrasts spent coffee grounds with Milorganite (a standard biosolid organic fertilizer) and synthetic Urea.
| Amendment | N-P-K Ratio | Est. Cost per lb of N | Release Speed | Soil Microbe Impact |
|---|---|---|---|---|
| Spent Coffee Grounds | ~2.1 - 0.3 - 0.3 | $0.00 (Free) | Slow (Months) | High (Adds organic matter) |
| Milorganite (36lb bag) | 6 - 4 - 0 | $2.80 - $3.50 | Slow (Weeks) | Moderate |
| Synthetic Urea (46-0-0) | 46 - 0 - 0 | $1.20 - $1.80 | Fast (Days) | Negative (Salt buildup risk) |
Step-by-Step Lawn Application Procedures
Phase 1: Sourcing and Desiccation (Drying)
Moisture is the enemy of direct application. Wet grounds clump and foster fungal pathogens.
- Collect: Gather spent grounds from your daily brewing or local cafes (many offer free 5-gallon buckets of spent grounds upon request).
- Spread: Lay a heavy-duty polyethylene tarp in a sunny, well-ventilated area.
- Dry: Spread the wet grounds to a depth of no more than 1/2 inch. Turn them with a rake twice daily.
- Timeline: Allow 24 to 48 hours for complete desiccation. The grounds should feel like dry sand and crumble instantly when pinched.
Phase 2: The Decision Matrix (Compost vs. Direct Top-Dress)
You have two viable pathways for introducing the grounds to your lawn. Choose based on your timeline and available materials.
Pathway A: Composting (Recommended)
Mix 1 part dry coffee grounds with 2 parts carbon-rich 'browns' (shredded autumn leaves, cardboard, or straw). The Cornell Waste Management Institute notes that balancing the C:N ratio in this manner accelerates decomposition and eliminates any residual caffeine allelopathy. Apply the finished compost to your lawn after 60-90 days.
Pathway B: Direct Top-Dressing (Advanced)
If you must apply directly, you must dilute the grounds to prevent nitrogen tie-up. Mix 1 part dry coffee grounds with 4 parts topsoil or horticultural sand. This physical dilution ensures the grounds do not form a compacted layer and allows soil microbes to process the material without robbing the turf of nitrogen.
Phase 3: Application Rates and Technique
Whether using finished coffee-compost or the diluted direct-mix, application depth is the most common failure point.
- Maximum Depth: Never exceed a 1/8-inch to 1/4-inch layer. Thicker applications smother the grass crown and block sunlight from reaching the lower leaf sheaths.
- Tool Selection: Use a flexible metal leaf rake or a specialized compost spreader (like the Landzie Compost Spreader) to distribute the material evenly.
- Technique: Broadcast the mixture in a cross-hatch pattern (North-South, then East-West) to ensure uniform coverage. Follow immediately by dragging a lawn leveling rake or a piece of chain-link fence over the area to work the grounds down into the thatch layer and directly against the soil surface.
Phase 4: Integration and Hydration
Once the grounds are raked into the thatch, water the lawn immediately. Apply exactly 0.25 inches of water. This settles the fine particles into the soil profile, prevents them from blowing away in the wind, and kickstarts the microbial breakdown process. Avoid heavy watering that could cause the fine grounds to wash into storm drains.
Expert Insight: Residual caffeine in spent grounds exhibits mild allelopathic properties, meaning it can inhibit seed germination. According to research published by the Environmental Protection Agency (EPA) regarding organic yard waste, composting neutralizes these compounds. Therefore, never use raw or poorly composted coffee grounds on newly seeded lawns, overseeded patches, or areas where you plan to sow grass seed within the next 60 days.
Troubleshooting Common Coffee Ground Failures
Even with careful application, environmental variables can cause issues. Use this diagnostic guide to correct problems.
- Symptom: White, fuzzy mold appearing on the soil surface.
Cause: Grounds were applied too thickly or while still wet, creating a localized anaerobic environment.
Fix: Vigorously rake the affected area to break up the crust and expose the soil to UV light and air circulation. Reduce future application thickness by 50%. - Symptom: Grass turns pale green or yellow 2-3 weeks after application.
Cause: Nitrogen tie-up. The soil microbes are consuming available nitrogen to break down the carbon in the undiluted grounds.
Fix: Apply a fast-acting liquid nitrogen supplement (such as 28% UAN solution) at a rate of 0.5 lbs of nitrogen per 1,000 square feet to bridge the gap until the grounds fully decompose. - Symptom: Water pools on the surface and fails to infiltrate.
Cause: Hydrophobic crust formation from applying un-diluted, fine grounds.
Fix: Perform shallow core aeration (spiking) over the affected area to physically punch through the crust, followed by the application of a liquid soil surfactant (like Yuka or a generic non-ionic surfactant) to break the water tension.
Final Maintenance Integration
Coffee grounds are a supplementary soil builder, not a complete fertilizer replacement. Because their Phosphorus (0.3) and Potassium (0.3) levels are negligible, you must still conduct a standard soil test every 24 months and amend with potassium sulfate or bone meal as required. Integrate the coffee ground top-dressing procedure into your fall aeration and overseeding schedule, applying the composted grounds immediately after pulling cores to maximize soil integration and microbial activity.

