
Lawn Care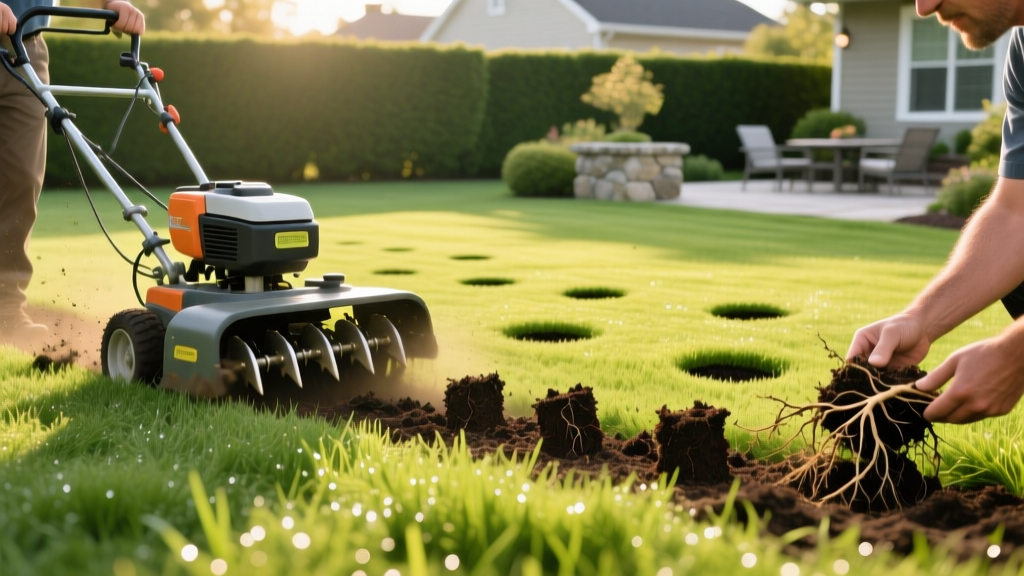
Maximizing Core Aeration Benefits: Step-by-Step Lawn Procedure
The Science Behind Core Aeration Benefits
Soil compaction is the silent killer of residential lawns. When soil bulk density exceeds 1.4 g/cm³, pore space collapses, suffocating roots and blocking water infiltration. Understanding the core aeration benefits requires looking at soil physics. By mechanically extracting cylindrical plugs of soil, you instantly reduce bulk density, creating macropores that facilitate gas exchange (oxygen in, carbon dioxide out) and allow deep water penetration.
Key Metric: Compacted clay soils restrict root growth to the top 1-2 inches. Proper core aeration increases root zone depth by up to 40% within a single growing season, according to NC State University Turfgrass Science.
Unlike spike aeration—which merely punches holes and can actually increase compaction along the hole walls by smearing wet clay—core aeration removes physical mass from the ground. This relieves lateral pressure and allows the surrounding soil to expand into the voids.
Phase 1: Pre-Aeration Preparation and Timing
Timing is the most frequent point of failure in DIY lawn maintenance. Aerating at the wrong time stresses the grass and invites weed invasion.
Seasonal Timing Matrix
- Cool-Season Grasses (Kentucky Bluegrass, Tall Fescue, Perennial Ryegrass): Early fall (late August to late September). The grass is entering its peak growth phase, allowing rapid recovery before winter.
- Warm-Season Grasses (Bermuda, Zoysia, Centipede, St. Augustine): Late spring to early summer (May through June), just as the grass breaks dormancy and enters aggressive vertical growth.
The Soil Moisture Test
Do not aerate bone-dry soil; the tines will bounce off the surface. Do not aerate saturated soil; the machine will tear the turf and create muddy ruts. Perform the screwdriver test: push a 6-inch flathead screwdriver into the soil. It should slide in with moderate resistance and come out with soil clinging to the shaft, but not dripping wet. If the soil is too dry, apply 0.5 inches of water 48 hours before aerating.
Critical Step: Flag all shallow utility lines, sprinkler heads, and invisible dog fence wires with high-visibility marking paint. Aerator tines penetrate up to 3 inches and will easily shatter PVC sprinkler pipes or sever low-voltage wiring.
Phase 2: Step-by-Step Execution
For residential lawns under 10,000 square feet, a walk-behind drum aerator is the standard tool. Rental models like the Billy Goat PL1800H or Classen CP-20H are industry standards.
- Add Weight for Clay Soils: Most rental drum aerators rely on water or sand ballast to achieve the 150-200 lbs of downward force required to penetrate heavy clay. Fill the drum according to the manufacturer's fill line before starting.
- Set the Depth: Adjust the tine depth lever to extract cores that are 2 to 3 inches long and 0.5 to 0.75 inches in diameter.
- The First Pass: Drive the aerator in straight, parallel lines across the lawn, mimicking your standard mowing pattern. Maintain a steady walking pace of about 2 to 3 mph. Moving too fast prevents the tines from fully penetrating and snapping the core.
- The Second Pass (Perpendicular): Make a second pass perpendicular to the first. This cross-hatch pattern ensures plugs are spaced roughly 2 to 3 inches apart, which is the optimal density for maximizing core aeration benefits.
- High-Traffic Zones: Make a third pass over heavily compacted areas like driveways edges, play areas, and pathways where soil bulk density is highest.
Phase 3: Post-Aeration Protocol
The work is not done when the machine is turned off. How you treat the extracted cores and the open holes dictates the success of the procedure.
"Never rake up or remove the extracted soil plugs. As they break down over the next two to three weeks, the microbes in the cores help decompose the thatch layer, naturally top-dressing the lawn." - University of Minnesota Extension
Integrating Overseeding and Fertilization
The open holes are perfect receptacles for seed-to-soil contact. Within 24 hours of aeration, overseed the lawn. For Tall Fescue, apply 3 to 5 lbs of seed per 1,000 sq ft. Follow immediately with a starter fertilizer high in phosphorus to promote root development (e.g., an 18-24-12 NPK ratio). The fertilizer granules will fall directly into aeration holes, delivering nutrients straight to the root zone rather than sitting on the thatch layer.
Cost Breakdown: DIY vs. Professional Service (2026 Estimates)
Deciding between renting equipment and hiring a professional depends on your lawn size, physical capability, and budget. Below is a comparative cost analysis for a standard 5,000 sq ft lawn.
| Factor | DIY Rental (Walk-Behind) | Professional Lawn Care Service |
|---|---|---|
| Base Equipment/Labor Cost | $110 - $160 (Full day rental) | $90 - $140 (Per 5,000 sq ft) |
| Fuel / Transport | $25 - $40 (Gas + truck rental/trailer) | $0 (Included in service) |
| Overseeding & Fertilizer | $80 - $120 (Materials) | $120 - $180 (Materials + application) |
| Physical Effort | High (Machines weigh 200+ lbs) | None |
| Total Estimated Cost | $215 - $320 | $210 - $320 |
Note: If your lawn exceeds 10,000 square feet, professional services become significantly more cost-effective due to their use of tractor-mounted PTO aerators that finish the job in a fraction of the time.
Troubleshooting Common Aeration Failures
Problem: The aerator is bouncing across the surface and only extracting 0.5-inch plugs.
Diagnosis: Soil is too dry, or the drum lacks sufficient ballast weight.
Fix: Water the lawn deeply (0.5 inches) and wait 48 hours. Check the water level in the aerator drum and fill to capacity.
Diagnosis: Soil is too dry, or the drum lacks sufficient ballast weight.
Fix: Water the lawn deeply (0.5 inches) and wait 48 hours. Check the water level in the aerator drum and fill to capacity.
Problem: The tines are tearing the grass and leaving long, jagged ruts instead of clean holes.
Diagnosis: Soil is overly saturated, causing the clay to smear and stick to the tines.
Fix: Stop immediately. Allow the lawn to dry for 3 to 5 days until the top 2 inches of soil crumble when squeezed in your hand.
Diagnosis: Soil is overly saturated, causing the clay to smear and stick to the tines.
Fix: Stop immediately. Allow the lawn to dry for 3 to 5 days until the top 2 inches of soil crumble when squeezed in your hand.
Problem: Plugs are mostly thatch with very little actual soil.
Diagnosis: Thatch layer exceeds 0.75 inches, preventing tines from reaching the subsoil.
Fix: You must perform mechanical dethatching (power raking) before aerating. Aerating a thick thatch layer will not relieve soil compaction.
Diagnosis: Thatch layer exceeds 0.75 inches, preventing tines from reaching the subsoil.
Fix: You must perform mechanical dethatching (power raking) before aerating. Aerating a thick thatch layer will not relieve soil compaction.
Long-Term Soil Health Maintenance
Core aeration is not a one-time fix; it is a critical component of an annual lawn maintenance program. For heavy clay soils, schedule aeration annually in the fall. For sandy or loamy soils that resist compaction, aerating every two to three years is sufficient. Pair aeration with annual top-dressing using compost to progressively improve soil organic matter, ensuring the core aeration benefits compound year over year. For more detailed regional schedules, consult your local cooperative extension office, such as the guidelines provided by Penn State Extension.

