
Lawn Care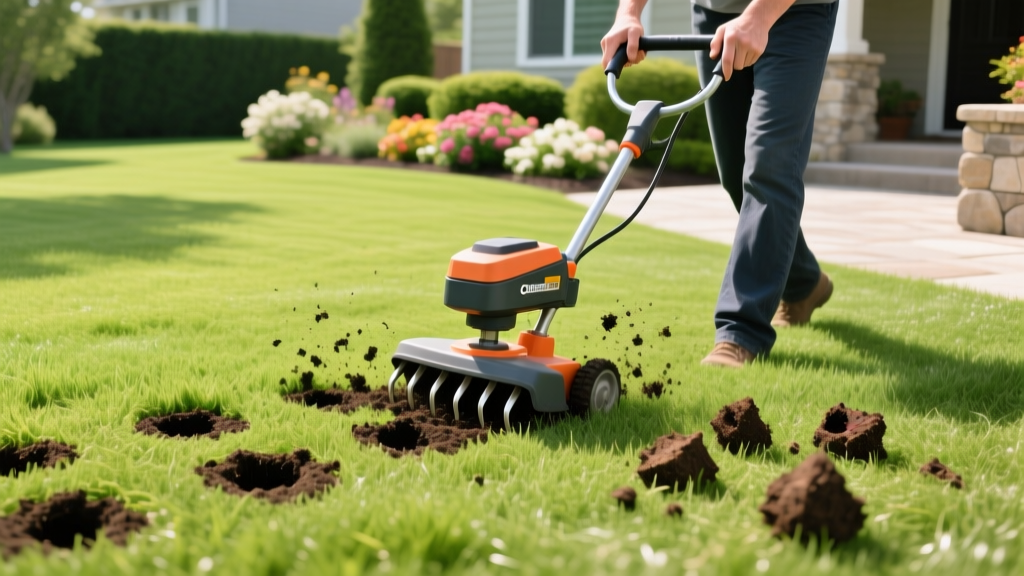
How to Use Core Aerators for Lawns: Step-by-Step Maintenance Guide
Soil compaction is the silent killer of turfgrass. When soil bulk density exceeds 1.4 g/cm³, root penetration stalls, water runoff increases, and fertilizer fails to reach the root zone. While spike aerators merely punch holes that exacerbate lateral compaction, core aerators for lawns physically extract cylindrical plugs of soil, creating vital macropores for air, water, and nutrient exchange. Executing this procedure correctly requires more than just renting a machine and pushing it across the yard; it demands precise timing, moisture management, and strategic post-aeration care.
The Mechanics of Core Aeration: Why Plugs Matter
Core aeration removes 0.5 to 0.75-inch diameter soil cores, typically 2 to 3 inches deep. According to turfgrass research from the University of Minnesota Extension, this physical removal alleviates compaction in the critical upper soil profile where 80% of turfgrass roots reside. The extracted plugs are left on the surface to break down naturally, redistributing beneficial soil microbes and thatch-decomposing organisms back into the turf canopy. This process is fundamentally different from liquid aeration or spiking, as it permanently removes soil mass, allowing the surrounding compacted earth to expand into the voids.
Timing Your Aeration: Grass Type Dictates the Calendar
Using core aerators for lawns at the wrong time of year can invite weed invasion and stress the turf. The golden rule is to aerate during your grass's peak active growth phase so it can rapidly recover and fill the open holes.
- Cool-Season Grasses (Kentucky Bluegrass, Tall Fescue, Perennial Ryegrass): Aerate in late summer to early fall (late August through October). This coincides with natural root expansion and avoids the heat stress of midsummer.
- Warm-Season Grasses (Bermudagrass, Zoysia, Centipede): Aerate in late spring to early summer (late May through July) once the grass has fully greened up and is entering its most aggressive growth cycle.
Selecting the Right Equipment for Your Yard Size
Not all core aerators for lawns are built equally. The machine you choose dictates the depth of penetration and the spacing of the plugs. Below is a comparison matrix to help you select the right tool for your specific property dimensions.
| Aerator Type | Model Example | Best For | Est. Cost / Rental | Max Plug Depth |
|---|---|---|---|---|
| Manual (Step-On) | Yard Butler SPA-4 | Lawns under 1,500 sq ft | $45 - $60 (Purchase) | 3.5 inches |
| Walk-Behind (Gas) | Billy Goat Outback | Lawns 2,000 - 15,000 sq ft | $90 - $140 / day (Rental) | 2.75 - 3 inches |
| Tow-Behind | Agri-Fab 45-0544 | Properties over 1 acre (requires tractor) | $300 - $400 (Purchase) | 3 inches |
Expert Tip: When renting a walk-behind aerator, ensure the rental center has recently sharpened or replaced the tines. Blunt tines will tear the turf canopy rather than slicing cleanly, resulting in jagged holes that heal slowly and invite disease.
Step 1: Pre-Aeration Preparation and the 48-Hour Moisture Rule
The most common failure point when using core aerators for lawns is improper soil moisture. If the soil is too dry, the tines will bounce off the surface, extracting shallow, crumbling plugs. If the soil is saturated, the machine will bog down, tear the turf, and create deep ruts that destroy soil structure.
- The Screwdriver Test: 48 hours before you plan to aerate, test your soil moisture. Push a 6-inch flathead screwdriver into the ground. It should slide in with moderate resistance down to at least 4 inches. If it stops at 1 inch, water the lawn deeply (aim for 1 inch of water volume).
- Mark Underground Hazards: Walk the property with a bundle of neon wire flags. Mark every sprinkler head, valve box, shallow drip line, and invisible dog fence wire. A core aerator tine can easily crush a plastic sprinkler head or sever a shallow irrigation line if struck directly.
- Mow Low: Mow the lawn to a height of 1.5 to 2 inches just before aeration. This reduces canopy resistance, allowing the tines to penetrate the soil more easily and ensuring the extracted plugs can reach the surface without getting tangled in tall grass blades.
Step 2: Executing the Aeration Passes
Operating a walk-behind core aerator requires physical effort and a specific driving pattern to ensure uniform coverage. According to turf management guidelines from Penn State Extension, overlapping passes are critical for high-traffic zones.
The Perimeter and Crisscross Method
- Establish the Perimeter: Start by making one complete pass around the outer edge of the lawn. This creates a turning zone so you don't have to make sharp, turf-tearing pivots in the middle of the yard.
- First Pass (Linear): Drive the aerator in straight, parallel lines up and down the lawn, overlapping each pass by about 2 inches. Keep your pace steady and slow (around 2 mph) to allow the tines to fully engage and eject the cores.
- Second Pass (Diagonal): For areas with severe compaction (like pathways between the driveway and the front door, or near playsets), make a second pass at a 45-degree angle to your first lines. This crisscross pattern doubles the hole density in high-stress zones, aiming for 20 to 40 holes per square foot.
Warning: Never attempt to pull a walk-behind core aerator backward while the tines are engaged in the soil. This will bend the tine shafts and potentially damage the machine's gearbox. Always lift the tine engagement lever before reversing.
Step 3: Post-Aeration Protocol and Soil Amendment
The holes created by core aerators for lawns remain open and receptive for only a short window before they begin to collapse from foot traffic and rainfall. Maximizing this window is the key to a successful renovation.
- Leave the Plugs: Do not rake up the extracted soil cores. Allow them to dry for a few days and then mow over them. The mower blades will pulverize the plugs, filtering the topsoil down into the thatch layer to accelerate decomposition.
- Overseeding (Cool-Season Lawns): If you are overseeding, do it within 48 hours of aeration. The open holes provide perfect seed-to-soil contact, protecting the seed from birds and wind while retaining moisture. Use a drop spreader to apply seed at the recommended rate (e.g., 3-5 lbs per 1,000 sq ft for Tall Fescue).
- Topdressing: For lawns with heavy clay or severe thatch buildup, apply a 1/4-inch layer of screened compost immediately after aeration. Use a leveling rake or the back of a push broom to drag the compost into the aeration holes. This permanently alters the soil profile, improving drainage and microbial activity.
- Fertilization: Apply a high-quality fertilizer immediately after aeration. If overseeding, use a starter fertilizer (e.g., 18-24-12) to promote root development. If not overseeding, a standard nitrogen-rich maintenance fertilizer (e.g., 32-0-10) will fuel rapid turf recovery.
Troubleshooting Common Aeration Failures
Even with careful preparation, you may encounter mechanical or environmental issues while using core aerators for lawns. Here is how to diagnose and fix them on the fly.
| Symptom | Likely Cause | Field Solution |
|---|---|---|
| Tines clogging with wet clay | Soil is too saturated; clay sticks to the inner tine walls. | Stop the machine. Spray the inside of the tines with a silicone-based lubricant or dip them in a bucket of water mixed with a few drops of dish soap to reduce surface tension. |
| Machine bouncing on slopes | Insufficient downward pressure; tines cannot pierce the surface. | Add weight to the machine. Most walk-behind aerators feature a rear weight tray. Fill it with sandbags or concrete blocks to increase downward force by 40-50 lbs. |
| Shallow, crumbling plugs (under 1 inch) | Soil is too dry and hard; tines cannot penetrate. | Halt operations. Water the lawn deeply with 1 to 1.5 inches of water and wait 24 to 48 hours for the moisture to percolate into the subsoil before trying again. |
Maintaining Your Equipment
If you own a tow-behind or manual core aerator, post-use maintenance is critical to prevent rust and ensure the tines remain sharp for the next season. After the soil plugs have dried and fallen out, use a wire brush to scrub the interior of the tines. Coat the entire metal assembly with a light layer of WD-40 or a dedicated agricultural rust inhibitor before storing it in a dry shed. For walk-behind rentals, simply hose off the exterior tines before returning the machine to avoid excessive cleaning fees from the rental yard.
By following this precise, step-by-step methodology, you transform core aeration from a chaotic, messy chore into a highly effective agronomic practice. The result is a turfgrass system with deeper roots, enhanced drought tolerance, and a significantly reduced reliance on chemical interventions to combat soil stress.

