
Lawn Care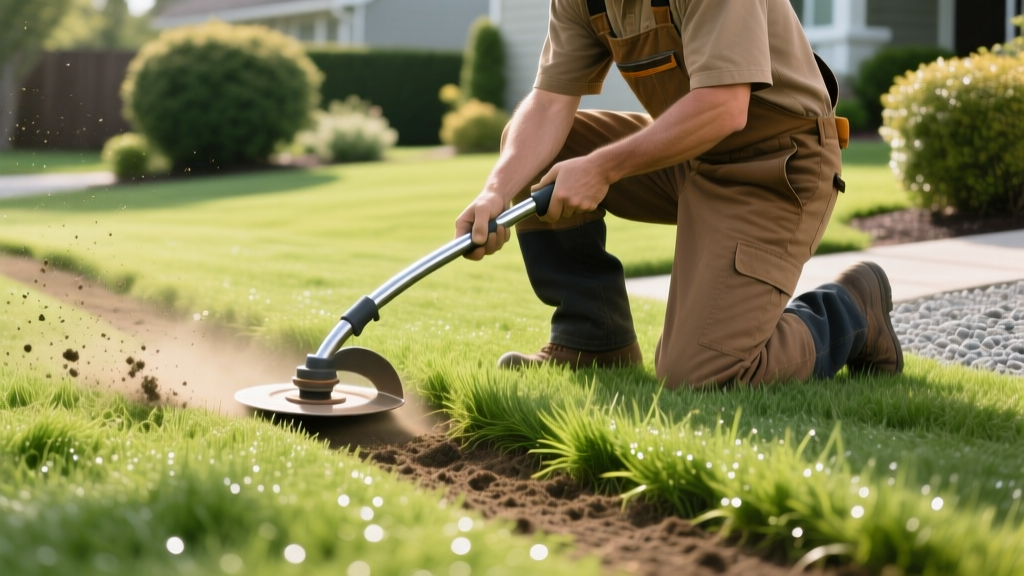
How to Use a Curved Edger for Flawless Landscape Borders
The Biomechanics of a Curved Edger: Why Shaft Design Matters
When homeowners search for a 'curved edger,' they are typically referring to a string trimmer with a curved shaft that features an edging attachment or a dedicated curved-shaft power edger. Unlike straight-shaft models, which use a metal driveshaft to transfer power from a hip-mounted motor to the cutting head, a curved shaft edger houses the motor directly above the cutting head. This design fundamentally shifts the tool's center of gravity.
The primary advantage of this configuration is a reduced overall weight and a lower price point, making 40V to 56V lithium-ion cordless models (such as the Ryobi 40V or EGO Power+ lines) highly accessible for residential use in 2026. However, the trade-off is leverage. Because the motor weight is concentrated at the bottom, edging requires a specific stance and grip to prevent wrist fatigue and maintain a perfectly vertical cutting plane. Mastering this tool is less about brute force and more about understanding weight distribution and line geometry.
Tool Matrix: Choosing the Right Edger for Your Landscape
Before cutting into your soil, it is critical to select the right tool for your specific turf and hardscape layout. Below is a comparison of the three primary edging tools used in modern lawn care.
| Tool Type | Best Application | Weight Distribution | Avg. Price Range (2026) | Limitations |
|---|---|---|---|---|
| Curved Shaft Power Trimmer/Edger | Residential lawns, tight curves, light overgrowth | Bottom-heavy (motor at head) | $150 - $320 | Less leverage for deep trenching; wrist strain on long jobs |
| Straight Shaft Dedicated Power Edger | Commercial properties, deep trenching, long straight runs | Balanced (motor at hip) | $280 - $550 | Heavier, harder to maneuver in tight radii |
| Manual Half-Moon Edger (Curved Blade) | Precision touch-ups, small garden beds, noise-restricted areas | N/A (Manual leverage) | $35 - $65 | Physically demanding; ineffective in rocky or heavy clay soil |
Step-by-Step: Executing the Perfect Edge
Phase 1: Layout and Depth Calibration
The most common mistake made with curved shaft edgers is cutting too shallow, which fails to block aggressive grass rhizomes, or cutting too deep, which damages shallow irrigation lines. Before engaging the trigger, calibrate your depth gauge wheel.
- Initial Trenching: Set the depth gauge to 3 inches. This is the universal baseline for establishing a new border.
- Maintenance Edging: Once the trench is established, raise the gauge to 1.5 or 2 inches to simply clean out debris and grass creep without over-excavating.
- The Hose Method: For curved landscape beds, never eyeball the radius. Lay a flexible garden hose along your desired curve, stepping back 10 feet to check the visual flow. Spray the grass along the hose with marking paint, then remove the hose before cutting.
Phase 2: The Curved Shaft Grip and Stance
Because the motor is at the cutting head, a curved edger will naturally want to twist when the nylon line hits dense soil or roots. To counteract this torque:
- Adjust the D-Handle: Position the secondary loop handle so that your lead arm is slightly bent at a 120-degree angle. This allows you to push forward rather than just hold the weight.
- The Pivot Stance: Keep your feet shoulder-width apart. Do not walk while actively cutting a curve. Instead, plant your feet, cut a 3-foot section, stop the tool, walk forward, and plant again. This 'plant-and-cut' method guarantees a uniform trench depth.
- Edge Orientation: Rotate the shaft so the cutting head is perfectly vertical (90 degrees to the ground). The string should spin parallel to the hardscape or bed edge, not horizontally across it.
Mastering the Radius: How to Edge Curved Landscape Beds
Cutting a straight line along a sidewalk is straightforward, but edging a curved mulch bed with a bottom-heavy curved edger requires a specific technique to avoid 'scalloping' (creating wavy, uneven divots in the soil).
Pro-Tip: The 'Outside-In' Sweeping Technique
When edging a curve, never push the tool directly forward along the arc. Instead, stand on the grass side (the outside of the curve). Angle the cutting head slightly toward the mulch bed (about 15 degrees off vertical). Use short, sweeping pull-motions toward your body, removing 1/4 inch of soil per pass. This prevents the spinning line from catching the edge of the bed and throwing mulch onto the turf.
Rhizome Blocking: Depth Requirements by Grass Type
A pristine edge is useless if aggressive grasses simply grow under the trench. According to turfgrass research from institutions like University of Minnesota Extension, understanding the root and rhizome structure of your specific grass is mandatory for long-term border maintenance. If your trench is shallower than the grass's rhizome depth, you will be edging every single week.
- Bermudagrass (Cynodon dactylon): Highly aggressive. Requires a minimum 4-inch deep trench. Consider installing a physical plastic or metal edging barrier if a 4-inch trench is unfeasible.
- Zoysiagrass: Moderate spread via stolons and rhizomes. A 3-inch trench is generally sufficient to block lateral movement.
- Kentucky Bluegrass: Spreads via shallow rhizomes. A 2-inch to 2.5-inch trench will effectively contain it.
- Tall Fescue: Bunch-type grass. Does not spread via rhizomes. A 1.5-inch aesthetic trench is all that is required to keep it from flopping over into hardscapes.
Troubleshooting Common Edging Failures
Symptom: String Shatters on Contact with Soil
Cause: You are using round, low-grade nylon line, or the RPM is too high for the soil density. Round line tends to bounce off hard-packed clay, causing it to snap under tension.
Fix: Switch to a 0.080-inch or 0.095-inch twisted or star-shaped line (e.g., Oregon Gatorline or Husqvarna Titanium). Twisted lines have aerodynamic edges that slice through soil and roots rather than bludgeoning them. Additionally, reduce your throttle to 75%; edging requires torque, not maximum RPM.
Symptom: Uneven, Scalloped Trench Walls
Cause: Walking continuously while edging a curve with a curved shaft tool, causing the heavy motor head to dip and dive with your footsteps.
Fix: Adopt the 'plant-and-cut' stance mentioned in Phase 2. Furthermore, ensure your depth gauge wheel is actually resting on a solid surface. If you are edging along a soft mulch bed, the wheel will sink, causing the cutting string to dig erratically into the lawn.
Symptom: Grass Tearing Instead of Cutting
Cause: Dull nylon line or cutting wet grass.
Fix: Never edge immediately after a rainstorm or heavy irrigation. Wet grass bends away from the nylon line and tears, leaving a ragged, brown edge that is highly susceptible to fungal pathogens. Always edge when the turf is completely dry. If the line is dull, snip off the last 2 inches with wire cutters to expose fresh, sharp edges.
Maintenance and Line Selection for 2026 Models
Modern cordless curved edgers rely heavily on battery management and spool maintenance. To maximize the lifespan of your tool and the quality of your cut, follow these operational guidelines:
- Spool Tension: When reloading the spool, wind the line tightly and evenly. Loose winding causes the line to fuse together under the heat generated by high-RPM friction, leading to feed jams mid-job.
- Battery Temperature: Lithium-ion batteries degrade rapidly when pushed to their thermal limits. If your 4.0Ah or 5.0Ah battery feels hot to the touch, allow it to cool for 15 minutes before swapping it. Edging draws a continuous high-amp load, much higher than light string trimming.
- Debris Clearing: After every use, use a stiff bristle brush to clear soil and grass clippings from the motor housing vents. Curved shaft models have their motor vents positioned dangerously close to the ground, making them highly susceptible to clogging, which leads to premature motor burnout.
For more comprehensive turf management strategies, including how edging impacts overall soil health and water runoff, refer to the landscape management guidelines provided by Penn State Extension. Proper edging not only elevates the aesthetic of your property but creates vital micro-trenches that can help direct water flow away from hardscapes and into your root zones, promoting a healthier, more resilient lawn.

