
Lawn Care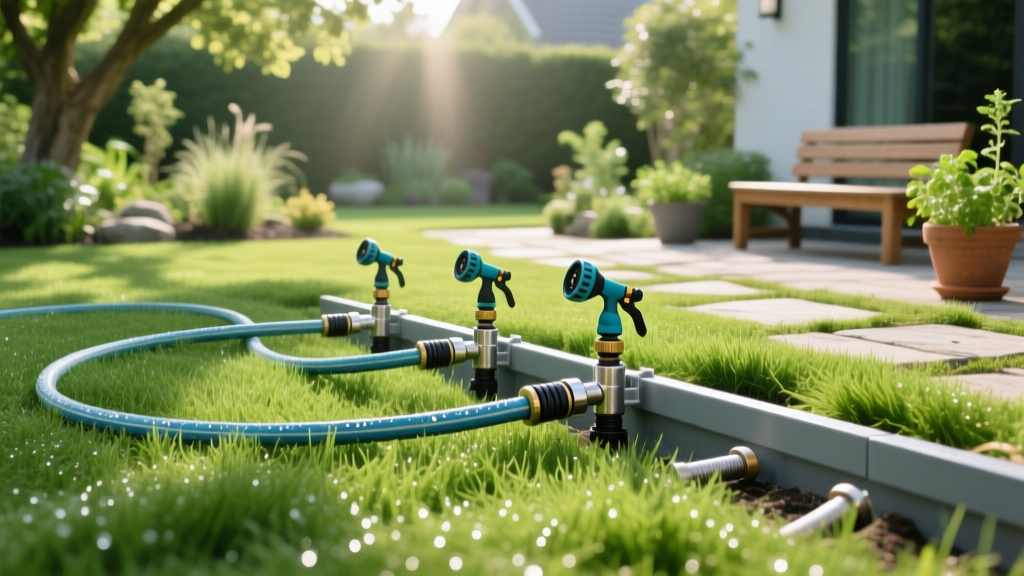
How to Build a DIY Above Ground Sprinkler System for Organic Lawns
Most homeowners view above-ground sprinklers as a temporary, messy alternative to buried PVC irrigation. However, for dedicated organic lawn care enthusiasts, a permanent DIY above ground sprinkler system is a strategic asset. Trenching a yard for in-ground pipes severs the delicate mycorrhizal fungal networks that organic lawns rely on for nutrient uptake. Furthermore, surface-level systems allow for the direct injection of organic liquid amendments—like compost tea and neem oil—without the risk of contaminating municipal water supplies through faulty backflow preventers.
Building a customized, semi-permanent above-ground manifold gives you the precision required to manage soil moisture, prevent fungal pathogens without synthetic chemicals, and integrate rainwater harvesting. Here is the definitive guide to engineering an above-ground irrigation setup specifically optimized for chemical-free turf management.
Why Surface Irrigation Protects Organic Soil Biology
Organic lawns depend entirely on the soil food web. Mycorrhizal fungi form symbiotic relationships with grass roots, extending their hyphae to mine phosphorus and micronutrients from the soil matrix. When you trench a yard to install traditional in-ground sprinkler lines, you physically slice through these fungal highways. While grass roots can regenerate relatively quickly, complex fungal networks can take years to re-establish.
By utilizing a DIY above ground sprinkler system, you preserve the structural integrity of the topsoil. Additionally, above-ground systems eliminate the risk of deep-soil anaerobic pockets that often form around leaking buried PVC joints, which can harbor root-rot pathogens like Pythium. Surface irrigation keeps the delivery mechanism visible, allowing you to instantly identify leaks, adjust spray patterns, and ensure water is only hitting the turf, not the pavement.
Organic Insight: The Backflow Advantage
In-ground systems require backflow preventers to stop irrigation water from siphoning back into your home's drinking water. When you apply organic liquid fertilizers, kelp extracts, or horticultural oils through an in-ground system, residue builds up in the backflow valve, leading to costly failures and potential municipal code violations. An above-ground hose manifold completely bypasses this issue, allowing you to safely inject any organic amendment directly from the spigot.
In-ground systems require backflow preventers to stop irrigation water from siphoning back into your home's drinking water. When you apply organic liquid fertilizers, kelp extracts, or horticultural oils through an in-ground system, residue builds up in the backflow valve, leading to costly failures and potential municipal code violations. An above-ground hose manifold completely bypasses this issue, allowing you to safely inject any organic amendment directly from the spigot.
Component Selection and Sizing
To build a reliable system that maintains adequate pressure across multiple zones, you must match your hose diameter to the sprinkler head's Gallons Per Minute (GPM) requirements. A standard 5/8-inch garden hose delivers roughly 4 to 6 GPM at 60 PSI, while a 3/4-inch hose delivers up to 9 GPM. For organic lawns that require deep, infrequent watering (typically 1 inch per week), higher GPM is essential to prevent the water from evaporating before it penetrates the thatch layer.
| Component | Recommended Model | Purpose in Organic Setup | Est. Cost |
|---|---|---|---|
| 4-Way Manifold | Melnor 65079-AMZ | Splits spigot into zones; heavy brass prevents cracking under pressure. | $18.00 |
| Impact Sprinkler | Orbit 56233D Brass | Full-circle coverage; brass resists UV degradation and organic acid corrosion. | $22.00 |
| Hose-End Siphon | EZ-Flow Fertilizer Injector | Siphons compost tea directly from a bucket into the sprinkler stream. | $15.00 |
| Digital Timer | Orbit 62061Z Single Dial | Automates early-morning watering to prevent fungal germination. | $35.00 |
| Heavy-Duty Hose | Flexzilla 3/4-in x 50ft | High flow rate; crush-resistant aluminum fittings. | $55.00 |
Total estimated cost for a single-zone, high-flow setup: $145.00. Add $40 for each additional zone manifold splitter.
Step-by-Step Manifold Assembly
A properly assembled manifold acts as the central nervous system of your DIY above ground sprinkler system. Follow these steps to ensure leak-free operation and optimal flow dynamics.
- Install the Anti-Siphon Valve: Attach a brass anti-siphon valve directly to your exterior spigot. This is a critical safety measure when using organic liquid feeds, ensuring no siphoning occurs if municipal water pressure drops.
- Attach the Digital Timer: Thread the Orbit timer onto the anti-siphon valve. Use PTFE (Teflon) tape on all male threads to prevent micro-leaks that can wash away topsoil over time.
- Connect the 4-Way Manifold: Secure the Melnor manifold to the timer. This allows you to run your sprinkler on Zone 1, while keeping Zone 2 open for a hose-end siphon injector or a drip-line for garden beds.
- Run the Primary Trunk Line: Connect your 3/4-inch Flexzilla hose to the primary manifold port. Lay this hose along the perimeter of your property, hiding it behind shrubs or along fence lines to protect it from UV exposure and lawnmower blades.
- Position the Sprinkler Heads: Attach the Orbit brass impact sprinklers to tripod bases. Elevating the sprinkler 24 to 30 inches above the turf ensures the water arc clears tall, organically grown fescue or bluegrass, preventing the water from being intercepted by the grass blades and evaporating before hitting the soil.
The Rain Barrel Reality Check: Pressure Physics
Many organic gardeners want to integrate rain barrels into their DIY above ground sprinkler system to conserve municipal water. However, this is where most DIY projects fail due to a misunderstanding of fluid dynamics. According to the EPA WaterSense program, outdoor water use accounts for nearly 30% of household consumption, making rainwater harvesting highly desirable. But gravity-fed water lacks the pressure required for standard sprinklers.
Water generates 0.433 PSI per foot of elevation. If your rain barrel is elevated on a 3-foot stand, you only generate 1.3 PSI at the hose bib. A standard brass impact sprinkler requires a minimum of 20 PSI to rotate and atomize the water properly. If you connect a standard sprinkler to a gravity-fed barrel, the water will simply drool out of the nozzle, creating a localized mud pit and drowning your turf.
The Organic Solutions for Low-Pressure Watering
- Option A (The Pump Route): Install a 1/2 HP shallow well pump (like the Flotec FP5172) between the rain barrel and the hose manifold. This will boost the pressure to 40+ PSI, allowing you to run multiple impact sprinklers simultaneously. Cost: ~$180.
- Option B (The Low-Pressure Wobbler): Ditch the impact sprinklers and use low-pressure wobbler heads, such as the Nelson 818653-1001. These require only 10 PSI to operate. To achieve 10 PSI from gravity, your rain barrel must be elevated at least 23 feet in the air, which is structurally impractical for most homeowners.
- Option C (Drip Conversion): Reserve the rain barrel exclusively for 1/4-inch drip tubing laid in garden beds, and use municipal water for the above-ground lawn sprinklers. This is the most cost-effective and reliable method.
Organic Disease Prevention via Timing Matrix
Because organic lawns cannot rely on synthetic fungicides like azoxystrobin or propiconazole to cure diseases, cultural control through precise watering is your only defense. Fungal pathogens like Brown Patch (Rhizoctonia solani) and Dollar Spot (Clarireedia jacksonii) require extended periods of leaf wetness to germinate and infect the plant tissue.
The University of Minnesota Extension emphasizes that watering in the evening leaves the grass canopy wet for 12+ hours, creating an ideal incubator for spores. Your DIY above ground sprinkler system must be programmed using the following timing matrix to naturally suppress disease:
| Season | Optimal Start Time | Duration (Per Zone) | Target Moisture Depth | Disease Risk Factor |
|---|---|---|---|---|
| Early Spring | 5:00 AM | 15 Minutes | 2-3 Inches | Low (Cool temps inhibit spores) |
| Peak Summer | 4:00 AM | 30-40 Minutes | 4-6 Inches | High (Brown Patch thrives if wet at night) |
| Early Autumn | 5:30 AM | 20 Minutes | 3-4 Inches | Medium (Dollar Spot risk increases) |
Warning: The 'Syringing' Myth
Some organic guides recommend 'syringing' (watering lightly in the middle of the day) to cool the turf during heat stress. While this temporarily lowers canopy temperature, it actively promotes fungal growth by providing multiple short wetting cycles. Instead, rely on deep, infrequent morning watering to build deep root systems that can access cooler, subterranean moisture reserves naturally.
Some organic guides recommend 'syringing' (watering lightly in the middle of the day) to cool the turf during heat stress. While this temporarily lowers canopy temperature, it actively promotes fungal growth by providing multiple short wetting cycles. Instead, rely on deep, infrequent morning watering to build deep root systems that can access cooler, subterranean moisture reserves naturally.
Injecting Organic Liquid Feeds Safely
One of the greatest advantages of a surface-level manifold is the ability to apply liquid organic amendments. Using the EZ-Flow hose-end siphon, you can apply aerated compost tea, liquid kelp, or humic acid directly through the sprinkler head.
To do this safely, attach the siphon to the secondary port on your 4-way manifold, downstream from the timer. Place your 5-gallon bucket of compost tea next to the spigot. Turn on the secondary port manually. The siphon will draw the liquid at a ratio of roughly 1:16, mixing it with the water stream and broadcasting it evenly across the lawn. Because the siphon is downstream of the anti-siphon valve and timer, there is zero risk of organic matter backflowing into your home's plumbing or clogging the delicate internal diaphragms of your digital timer.
Winterization and Storage
Unlike buried PVC systems that require an air compressor blowout, winterizing a DIY above ground sprinkler system takes less than ten minutes. Before the first hard freeze, disconnect all brass impact sprinklers and the EZ-Flow siphon. Drain the 3/4-inch trunk line by elevating one end and letting gravity pull the water out. Store the brass components in a dry garage to prevent the internal springs from corroding. Leave the heavy-duty hose coiled loosely; modern polyurethane and rubber blends will survive freezing temperatures, but trapped water expanding inside the brass fittings will crack them.
By keeping your irrigation infrastructure on the surface, you maintain total control over your lawn's hydrology. You protect the vital soil biology that makes organic lawn care possible, eliminate the risk of chemical backflow, and create a flexible system that adapts to the seasonal needs of your turf without ever turning a shovel.

