
Lawn Care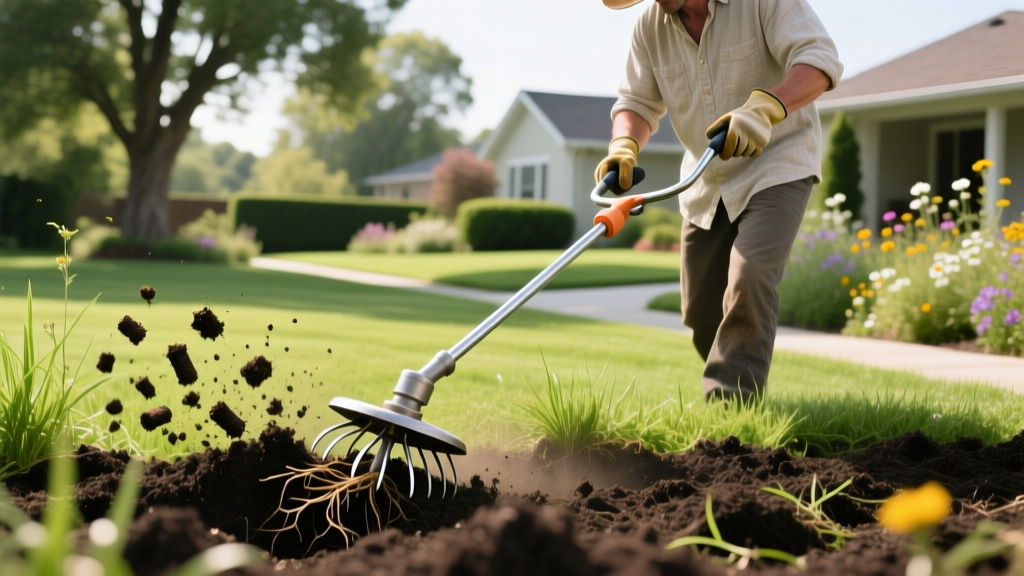
Build a DIY Aerator: Organic Soil Compaction Solutions
The Biology of Compacted Organic Soil
Transitioning to an organic, chemical-free lawn care regimen requires a fundamental shift in how you view soil mechanics. In conventional landscaping, synthetic surfactants and chemical wetting agents are often used to force water and synthetic fertilizers through compacted soil layers. When you eliminate these chemicals, you must rely entirely on the soil food web—aerobic bacteria, mycorrhizal fungi, and earthworms—to break down organic matter and deliver nutrients to grass roots.
Soil compaction is the enemy of this biological activity. According to the USDA Natural Resources Conservation Service, compaction collapses soil macropores, reducing oxygen levels below the 10% threshold required for aerobic microbial respiration. Without oxygen, beneficial organisms die off, and anaerobic pathogens thrive. For the organic lawn enthusiast, mechanical aeration is not an optional seasonal chore; it is the primary method for introducing oxygen into the soil profile and sustaining the biological engine of your yard.
Comparing DIY Aerator Methods for Organic Yards
Not all aeration methods are created equal, especially when your goal is to maximize the impact of organic amendments like compost and humic acids. Below is a breakdown of the most common DIY approaches and their efficacy in an organic system.
| Method | Compaction Relief | Organic Synergy | Est. Cost (2026) |
|---|---|---|---|
| Manual Core Extractor (DIY) | Excellent (removes physical plugs) | High (creates channels for compost tea and top-dressing) | $35 - $50 |
| Spike Sandals | Poor (increases lateral compaction) | Low (no physical space created for organic matter) | $15 - $25 |
| Tow-Behind Spike Drum | Moderate (fractures shallow soil) | Moderate (good for liquid organic fertilizers) | $80 - $120 |
| Liquid Aeration (Humic Acid) | Moderate (flocculates clay particles) | High (feeds soil biology while softening clay) | $30 - $45 / bottle |
⚠️ The Spike Aeration Myth: Avoid spike sandals or solid-tine pitchforks on heavy clay soils. Driving a solid spike into clay pushes soil outward and downward, actually increasing the density of the soil walls around the hole. For organic lawns situated on clay, hollow core extraction is mandatory to physically remove mass and create lasting voids for organic matter.
Blueprint: Building a Heavy-Duty Manual Core DIY Aerator
Commercial manual core aerators cost between $60 and $100, but they often feature thin-walled tubing that bends under heavy foot pressure. By building your own DIY aerator using Schedule 40 steel, you can create an indestructible tool tailored to your height and soil type for roughly $40.
Materials and Tools Required
- 1-inch OD (Outer Diameter) Steel Tubing: 18 inches long. Ensure it is hollow with a minimum 14-gauge wall thickness. (~$12 at industrial metal suppliers or hardware stores)
- 3/4-inch Galvanized Steel Pipe: One 36-inch length for the main shaft, and two 8-inch lengths for the T-handle. (~$14 total)
- 3/4-inch Galvanized Tee Fitting: To connect the T-handle. (~$4)
- Steel Reducing Coupling (1-inch to 3/4-inch): To weld or bolt the steel tube to the galvanized shaft. (~$5)
- Welder or 3/8-inch Drill and Grade-8 Bolts: For assembly.
- 1/2-inch Drill Bit: Crucial for the air-relief vent.
Step-by-Step Assembly
- Prepare the Core Tube: Cut the 1-inch steel tubing to exactly 18 inches. Sharpen the bottom edge using a metal file or angle grinder to create an inward-facing bevel. This bevel acts as a cutting edge to slice through roots and compacted soil.
- Drill the Air-Relief Vent: This is the most commonly missed step in DIY aerator builds. Drill a 1/2-inch hole through the side of the steel tube, exactly 2 inches from the top. Without this hole, soil suction will trap the core inside the tube, rendering the tool useless after one plunge. The vent breaks the vacuum, allowing the core to eject out the side when you push a screwdriver or wire down the shaft.
- Assemble the T-Handle: Thread the two 8-inch galvanized pipes into the left and right sides of the Tee fitting. Wrap the grips with high-density foam pipe insulation and secure with zip-ties to prevent hand blistering during heavy use.
- Join the Shaft and Tube: Insert the 36-inch galvanized shaft into the top of the reducing coupling, and weld it to the 1-inch steel core tube. If you do not have a welder, drill through both the coupling and the pipes, and secure them with Grade-8 steel bolts and locknuts.
The Organic Top-Dressing Synergy
Aeration in a vacuum is only half the battle. The true power of your DIY aerator is unlocked when paired with organic top-dressing. According to University of Wisconsin-Madison Extension, leaving the extracted soil cores on the lawn allows them to break down and redistribute soil microbes, but the open holes present a prime opportunity to introduce new organic matter directly to the root zone.
Choosing the Right Organic Amendment
Do not use raw, uncomposted manure or high-nitrogen synthetic fertilizers in the aeration holes. Instead, source screened organic compost with a 1/4-inch particle size. The 1/4-inch mesh ensures the compost falls directly into the aeration cores rather than smothering the existing grass blades.
Pro-Tip: The Compost Tea Flush
Immediately after sweeping your 1/4-inch compost into the aeration holes, apply a liquid compost tea or a diluted fish hydrolysate solution (mixed at 2 oz per gallon of water). The liquid carries the microbial life from the compost deep into the macro-pores created by your DIY aerator, jumpstarting the biological breakdown of thatch.
Immediately after sweeping your 1/4-inch compost into the aeration holes, apply a liquid compost tea or a diluted fish hydrolysate solution (mixed at 2 oz per gallon of water). The liquid carries the microbial life from the compost deep into the macro-pores created by your DIY aerator, jumpstarting the biological breakdown of thatch.
Troubleshooting Common DIY Aeration Failures
Even with a perfectly constructed tool, environmental variables can cause your aeration efforts to fail. Here is how to troubleshoot the most common edge cases.
The Tool Refuses to Penetrate the Soil
Cause: Soil moisture is below the optimal threshold. Compacted clay acts like concrete when dry.
Fix: Apply exactly 1 inch of water to the lawn 24 hours before aerating. Use a tuna can placed on the lawn to measure the output of your sprinkler. Do not aerate immediately after a heavy rain; if the soil is muddy, the core tube will clog with wet clay and the cores will not eject through the vent hole.
Cores Are Stuck Inside the Steel Tube
Cause: The air-relief vent is blocked, or the soil is too high in clay content, creating a vacuum seal.
Fix: Keep a stiff piece of 1/4-inch steel wire (like a cut wire hanger) tethered to your belt. After every third plunge, push the wire down the shaft to physically dislodge the clay plug. If this becomes a constant issue, enlarge the side vent hole to 5/8-inch.
Grass Turns Yellow After Aeration
Cause: Root shearing or nitrogen tie-up.
Fix: If you top-dressed with an uncomposted, carbon-heavy material like peat moss or raw wood chips, the soil microbes are consuming all available nitrogen to break down the carbon, starving your grass. Always use fully finished, nitrogen-stabilized organic compost for top-dressing aeration holes.
Frequently Asked Questions
Can I use liquid aeration instead of a DIY mechanical aerator?
Liquid aeration products containing humic acid and fulvic acid are excellent for maintaining soil structure and chelating organic nutrients. However, they do not physically remove soil mass. If your lawn suffers from severe physical compaction (e.g., heavy foot traffic areas or construction grading), liquid aeration cannot replace the physical void created by a manual core DIY aerator. Use liquid aeration as a maintenance tool between mechanical aeration seasons.
How often should I aerate an organic lawn?
For cool-season grasses (Kentucky Bluegrass, Fescue) in high-traffic areas, aerate once in early fall. For warm-season grasses (Bermuda, Zoysia), aerate in late spring just as the grass breaks dormancy. If your organic lawn is heavily mulched and maintained with deep, infrequent watering, earthworm activity may naturally reduce the need for mechanical aeration to once every two years.
Should I remove the soil plugs left by the DIY aerator?
No. Removing the plugs strips your lawn of valuable topsoil and the microbial life residing within it. Allow the plugs to dry for 48 hours, then drag a piece of chain-link fence or a stiff push broom over the lawn to shatter the cores. This redistributes the soil bacteria back over the thatch layer, accelerating natural thatch decomposition without the need for chemical dethatchers.

