
Lawn Care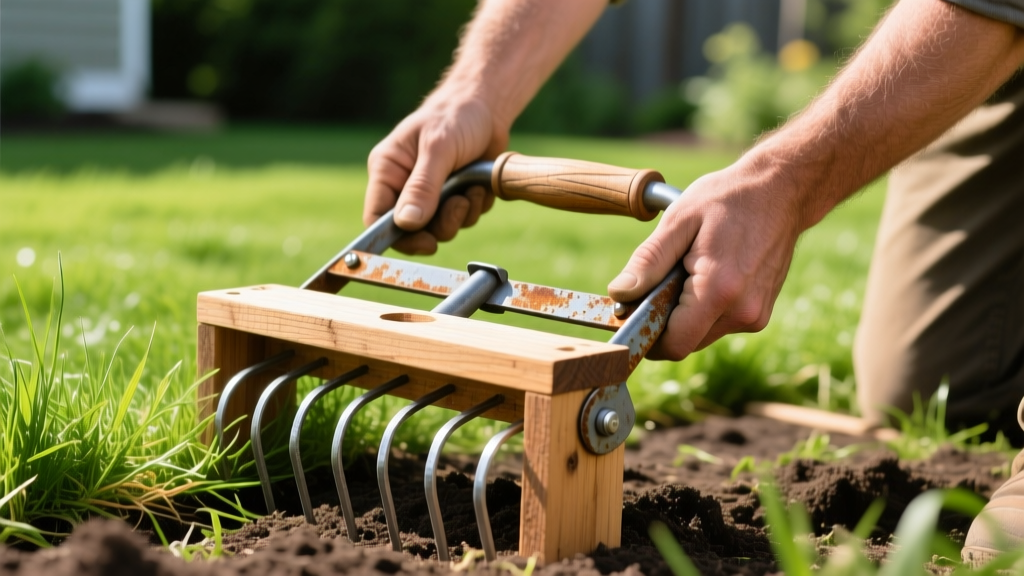
DIY Lawn Aerator: Build a Chemical-Free Soil Relief Tool
Soil compaction is the silent killer of organic lawns. While synthetic fertilizers can force blade growth through hardened dirt by chemically overriding natural nutrient cycles, organic lawn care relies entirely on the biological soil food web. Microbes, earthworms, and mycorrhizal fungi require oxygen to break down organic matter and feed your grass roots. When soil bulk density exceeds 1.5 g/cm³, that oxygen supply is choked off. According to the USDA Natural Resources Conservation Service, severe compaction restricts root penetration and reduces water infiltration by up to 70%. Building a heavy-duty DIY lawn aerator is the most cost-effective, chemical-free mechanical intervention you can deploy to restore soil respiration.
The Organic Connection: Why Aeration Replaces Chemicals
In a conventional lawn care program, compaction is often masked with high-nitrogen synthetic salts that burn their way into the soil profile. In an organic system, this approach is counterproductive; synthetic salts kill the very microbial life required to process organic compost and natural amendments. Core aeration physically removes plugs of soil, instantly creating macro-pores. These voids allow organic top-dressings, compost teas, and biochar to migrate deep into the root zone where they are most effective.
"Mechanical aeration is the cornerstone of chemical-free turf management. Without physical soil relief, organic amendments remain trapped on the surface, leading to thatch buildup and shallow root systems that are highly susceptible to drought and grubs." — University of Minnesota Extension Turfgrass Specialists
Core vs. Spike: Choosing Your DIY Aerator Mechanism
Before cutting any wood, you must choose the aeration method. For organic soil rehabilitation, core (plug) aeration is vastly superior to spike aeration. Spike aerators merely punch holes, which can actually exacerbate compaction by pushing soil laterally and creating a hardpan layer just below the spike depth.
| Feature | DIY Core Aerator (Recommended) | DIY Spike Aerator |
|---|---|---|
| Mechanism | Extracts 0.5" to 0.75" cylindrical soil plugs | Punches solid holes with metal spikes |
| Effect on Compaction | Relieves lateral pressure; creates true voids | Increases lateral compaction around the hole |
| Organic Integration | Allows compost and biochar to fill deep voids | Surface organics struggle to penetrate deep holes |
| Build Difficulty | Moderate (requires precise pipe mounting) | Easy (nails or spikes driven through wood) |
Materials and Tools for the Heavy-Duty DIY Core Aerator
Commercial tow-behind core aerators cost between $250 and $400 and are often constructed from thin-gauge stamped metal that bends when hitting buried rocks. This DIY design utilizes a weighted wooden platform and Schedule 40 galvanized steel pipes, yielding a tool that costs roughly $75 and outlasts budget commercial models.
Bill of Materials (Approximate Cost: $75)
- 1 sheet 3/4-inch exterior-grade plywood (Cut to 48" x 24") - $30
- Three 10-foot lengths of 3/4-inch Schedule 40 galvanized steel pipe (3/4" outer diameter, 1/2" inner diameter) - $18 per length ($54 total, but you will use about 1.5 lengths)
- Twenty 3-inch galvanized lag bolts with washers - $12
- Four heavy-duty steel corner brackets - $8
- One heavy-duty tow chain or nylon tow strap with carabiner - $15
- Weight source: Four standard concrete cinder blocks (often free from local demolition sites or ~$3 each).
Step-by-Step Build Guide: The 48-Inch Tow-Behind Core Aerator
This design uses a static drag method. Instead of mounting pipes to a rotating axle (which requires welding and complex bearings), the pipes are fixed vertically through the plywood base. The forward motion of your riding mower or ATV shears the soil, and the 1/2-inch inner diameter of the pipe naturally ejects the soil plug as it fills.
Step 1: Prepare the Plywood Base
Cut your 3/4-inch exterior plywood to a 48-inch by 24-inch rectangle. Sand the edges to prevent splintering. Drill a 1-inch hole in the exact center of the 48-inch front edge. This is where your tow chain will attach. Reinforce this hole with a heavy-duty steel eye bolt and lock nuts on both sides.
Step 2: Layout and Drill the Coring Grid
Map out a grid on the bottom of the plywood. You want the coring pipes spaced exactly 4 inches apart in a staggered (honeycomb) pattern to ensure uniform soil relief. Using a 1-inch spade bit, drill completely through the plywood at each grid mark. The 1-inch hole will accommodate the 3/4-inch outer diameter of the pipe, leaving room for adjustment.
Step 3: Cut and Bevel the Steel Pipes
Using a reciprocating saw with a bi-metal blade, cut the galvanized pipes into 6-inch segments. You will need approximately 24 to 28 segments depending on your grid layout. Critical Detail: Cut one end of each pipe at a sharp 45-degree angle. This creates a chisel point that slices through turf and clay with minimal resistance.
Step 4: Mount the Coring Spoons
Drive each 6-inch pipe segment up through the bottom of the plywood so that exactly 4.5 inches of the beveled pipe protrudes below the board, leaving 1.5 inches above the board. Secure each pipe to the top of the plywood using two galvanized pipe straps and 1-inch wood screws. Ensure the 45-degree bevel faces forward (toward the tow chain) to act as a slicing blade.
⚠️ Pro-Tip for Clay Soils: Wet clay will clog the 1/2-inch inner diameter of the pipes. To prevent this, drill a 1/4-inch "relief hole" on the side of each pipe, about 2 inches up from the bevel. This breaks the vacuum seal and allows the soil plug to eject cleanly as the aerator is dragged.
Step 5: Weight and Test
Core aerators require downward pressure (minimum 150 lbs) to penetrate hardened soil. Place four concrete cinder blocks evenly across the top of the plywood, securing them with ratchet straps to the steel corner brackets mounted on the edges. Attach your tow chain and test on a small, damp patch of lawn.
Integrating Aeration into an Organic Lawn Care Calendar
Operating your DIY lawn aerator is only half the process. To maximize the chemical-free benefits, you must immediately capitalize on the open soil voids. The EPA's guidelines on chemical-free lawn management emphasize that physical soil disruption must be paired with biological amendments to outcompete weeds naturally.
- Timing: Aerate cool-season grasses (Fescue, Kentucky Bluegrass) in early fall (late August to mid-September). Aerate warm-season grasses (Bermuda, Zoysia) in late spring (May to early June) when they are entering peak growth.
- Moisture Prep: Apply exactly 1 inch of water to the lawn 24 hours before aerating. The soil should be moist enough to yield a clean plug, but not so wet that it smears and creates a glaze on the hole walls.
- Compost Top-Dressing: Within 2 hours of aeration, spread screened organic compost at a rate of 1/2 cubic yard per 1,000 square feet. Use a stiff push broom to sweep the compost directly into the aeration holes.
- Compost Tea Application: 48 hours post-aeration, spray aerated compost tea (brewed for 24 hours with kelp meal and humic acid) to inoculate the fresh soil cores with beneficial bacteria.
Troubleshooting Common DIY Aerator Failures
Even a well-built DIY tool can encounter field issues. Use this diagnostic guide to correct performance failures on the fly.
Symptom: Pipes are bending backward during the pull.
Cause: Hitting buried construction debris, large river rocks, or extremely dry clay pan. Schedule 40 pipe is strong, but lateral shear force from a tractor will bend it if it snags.
Fix: Drop a 24-inch length of 1/2-inch steel rebar inside each pipe before mounting. This creates an internal spine that makes the coring spoons virtually indestructible against lateral bending.
Symptom: The aerator skims the surface and fails to penetrate deeper than 1 inch.
Cause: Insufficient downward mass or soil is hydrophobic (bone dry).
Fix: Add two additional cinder blocks or sandbags to the platform. If weight is already at 200+ lbs, stop and irrigate the lawn deeply. Aerating dry soil will merely scarify the thatch layer without relieving the subsoil compaction.
Symptom: Soil plugs are not ejecting; pipes are packed solid with dirt.
Cause: High clay content combined with excessive moisture creates a suction lock inside the smooth galvanized steel.
Fix: Implement the 1/4-inch relief holes mentioned in the build steps. Alternatively, coat the inside of the pipes with a light layer of food-grade mineral oil before starting, which reduces the friction coefficient of sticky clay.
FAQ: Organic Aeration Nuances
Can I leave the soil plugs on the lawn?
Yes. In an organic system, leaving the plugs on the surface is highly beneficial. Earthworms and microbial activity will break down the clay cores within 10 to 14 days, returning trapped minerals to the topsoil. Mowing over them with a mulching blade accelerates this process.
Should I apply organic pre-emergent after aerating?
No. Organic pre-emergents like corn gluten meal work by inhibiting root formation in germinating seeds. Because aeration creates ideal seedbeds for both weeds and your desired turfgrass, applying corn gluten meal immediately after aerating will prevent your overseeding efforts from succeeding. Wait at least 4 weeks after aeration and overseeding before applying organic weed preventatives.

