
Lawn Care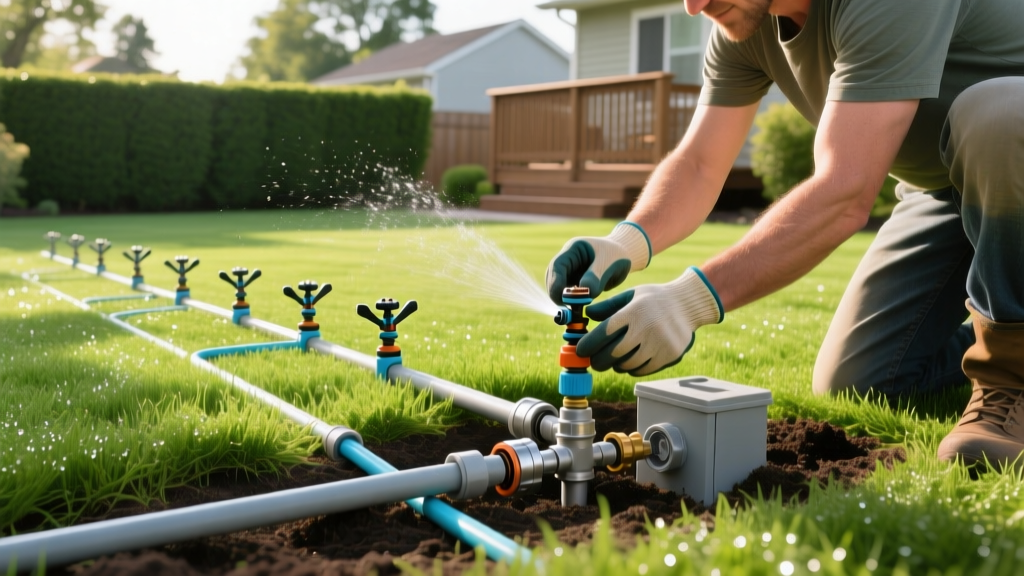
Lawn Sprinkler System Installation: DIY Layout, Costs & Steps
Pre-Installation: Zoning and Water Pressure Math
Successful lawn sprinkler system installation relies entirely on hydraulic math before a single trench is dug. Your municipal water supply or well pump dictates the maximum flow rate (Gallons Per Minute, or GPM) and static pressure (Pounds per Square Inch, or PSI) available to your system. According to the EPA WaterSense program, outdoor water use accounts for nearly 30% of total household consumption, making precise zoning critical for both turf health and utility conservation.
Calculating Your Available GPM and PSI
Attach a brass pressure gauge to your main outdoor hose bib to measure static PSI. Most residential systems operate between 45 and 65 PSI. Next, perform the bucket test to determine your maximum GPM: place a 5-gallon bucket under the hose bib, turn the spigot on fully, and time how many seconds it takes to fill. Divide 300 by the number of seconds to get your GPM. If it takes 30 seconds to fill a 5-gallon bucket, your available flow is 10 GPM.
Friction Loss Warning: Never design zones that consume 100% of your available GPM. Water moving through PVC pipe creates friction, which reduces pressure. For example, 1-inch Schedule 40 PVC flowing at 15 GPM loses roughly 3.15 PSI per 100 feet of pipe. Always cap your zone design at 80% of your measured GPM to account for friction loss and pressure drops when multiple household fixtures are in use.
2026 Material Costs & Component Selection
A professional irrigation contractor typically charges between $4,000 and $7,000 for a standard 5,000-square-foot yard. A DIY lawn sprinkler system installation reduces this cost to approximately $1,500 to $2,500, assuming you rent a vibratory pipe plow or trencher for the weekend. Below is a breakdown of premium, contractor-grade components recommended for residential installations.
| Component | Recommended Model/Type | 2026 Avg Cost | Purpose & Specifications |
|---|---|---|---|
| Smart Controller | Rachio 3 (8-Zone) | $229 | Weather-based scheduling with local evapotranspiration (ET) data integration. |
| Rotor Heads | Hunter PGP Ultra | $14/ea | Large open areas (25-40ft radius); applies water at ~0.4 inches/hour. |
| Spray Heads | Rain Bird 1800 w/ HE-VAN | $9/ea | Small/irregular zones (5-15ft); applies water at ~1.5 inches/hour. |
| Rotary Nozzles | Hunter MP Rotator | $8/ea | Low-flow areas and clay soils; reduces runoff by applying water at 0.4 in/hr. |
| Zone Valves | Hunter PGV 1-inch | $18/ea | Controls water flow to individual zones; features a manual bleed screw. |
| Mainline Pipe | 1' Schedule 40 PVC | $0.90/ft | High-pressure water delivery from the source to the valve manifolds. |
| Lateral Pipe | 3/4' Polyethylene (SDR-160) | $0.45/ft | Flexible, freeze-resistant pipe running from valves to sprinkler heads. |
Trenching and Pipe Layout Strategies
The physical layout of your sprinkler heads must follow the 'head-to-head' coverage rule. This means the spray from one sprinkler head must physically reach the adjacent head. If you space heads 30 feet apart using a rotor with a 25-foot throw, the overlapping area will receive half the water of the immediate radius, resulting in dry spots and fungal stress from uneven moisture.
The Golden Rule of Zoning: Matched Precipitation
Never mix rotor heads and standard spray heads on the same zone. Rotors apply water slowly (approx. 0.4 inches per hour), while standard spray heads apply water rapidly (approx. 1.5 inches per hour). If grouped together, the spray head zone will flood and runoff before the rotor zone receives adequate moisture. Group components strictly by their precipitation rates.
- Mainline Trenching: Dig the mainline trench (from the water source to the valve manifolds) to a depth of 12 to 18 inches. This protects the pressurized Schedule 40 PVC from lawn aerators and deep edging tools.
- Lateral Trenching: Lateral lines (from valves to heads) can be trenched at 8 to 12 inches. If you live in a climate with deep frost lines, polyethylene lateral pipe is preferred over PVC because it expands rather than shatters when residual water freezes.
- Gluing PVC: Use purple primer and medium-body clear PVC cement. Apply primer to both the pipe and the fitting, then apply glue to both. Push together and hold for 15 seconds. A dry-fit without primer will result in micro-leaks that erode soil beneath the pipe over time.
Wiring the Controller and Valves
Irrigation wiring is a frequent point of failure in DIY installs due to moisture intrusion. Use 14-gauge, multi-strand, UV-resistant irrigation wire (typically featuring 5 to 8 colored strands inside a single jacket). Run one common wire (usually white or black) to every valve on the manifold, and use a unique colored wire for the 'hot' lead on each individual valve solenoid.
Waterproofing Splices: Never use standard indoor wire nuts underground. Strip the wires, twist them tightly, and seal them using grease-filled wire nuts (such as Gardner Bender silicone-filled nuts) or 3M DBR/Y-6 direct burial resin kits. Standard wire nuts will corrode within two seasons, causing the smart controller to throw a 'valve fault' error.
Backflow Prevention and Legal Requirements
A backflow preventer is legally required in almost all municipalities to stop irrigation water (which contains fertilizers, pesticides, and animal waste) from siphoning back into the municipal drinking supply. The Irrigation Association mandates specific backflow devices based on local plumbing codes.
- Pressure Vacuum Breaker (PVB): The most common residential device. It must be installed at least 12 inches higher than the highest sprinkler head in the yard. It cannot be used if your system has valves located on hills higher than the device.
- Reduced Pressure Zone (RPZ): Required in areas with severe cross-connection hazards or where the PVB height requirement cannot be met. RPZs are more expensive ($150-$300) and require annual testing by a certified professional.
Common Installation Failure Modes & Fixes
Low-Head Drainage
Symptom: Water continuously leaks from the lowest sprinkler head in a zone for hours after the system shuts off, creating a swampy area and wasting hundreds of gallons.
Cause: Gravity pulls the residual water left in the lateral pipes out through the lowest elevation head.
Fix: Install sprinkler bodies with built-in check valves, such as the Hunter Pro-Spray PRS40 or Rain Bird 1800-SAM. These contain a spring-loaded seal that holds back up to 10 feet of elevation head pressure.
Water Hammer and Pipe Blowouts
Symptom: A loud 'bang' is heard inside the house when a zone shuts off, followed by a sudden loss of pressure and a geyser in the yard.
Cause: Fast-closing solenoid valves create a hydraulic shockwave (water hammer) that exceeds the PSI rating of the PVC fittings, causing them to fracture.
Fix: Ensure your system's static pressure does not exceed 80 PSI. If it does, install a pressure regulator at the point of connection. Additionally, use valves with flow-control stems to slightly restrict the closing speed, softening the hydraulic shock.
Frequently Asked Questions
Can I tap into my existing outdoor hose bib for the sprinkler system?
You can, but it is not recommended for systems larger than two zones. Hose bibs are typically fed by 1/2-inch or 3/4-inch copper pipes, which severely restrict your GPM. For a full-yard installation, tap directly into the main water line immediately after the water meter using a 1-inch or 1.5-inch brass saddle clamp or tee fitting.
Do I need a permit for a DIY lawn sprinkler system installation?
Yes, in most jurisdictions. You will typically need a plumbing permit for the backflow preventer installation and an electrical permit if you are wiring a new 24V transformer to a dedicated outlet. The backflow device must be inspected by the local water authority before the trench is backfilled.

