
Lawn Care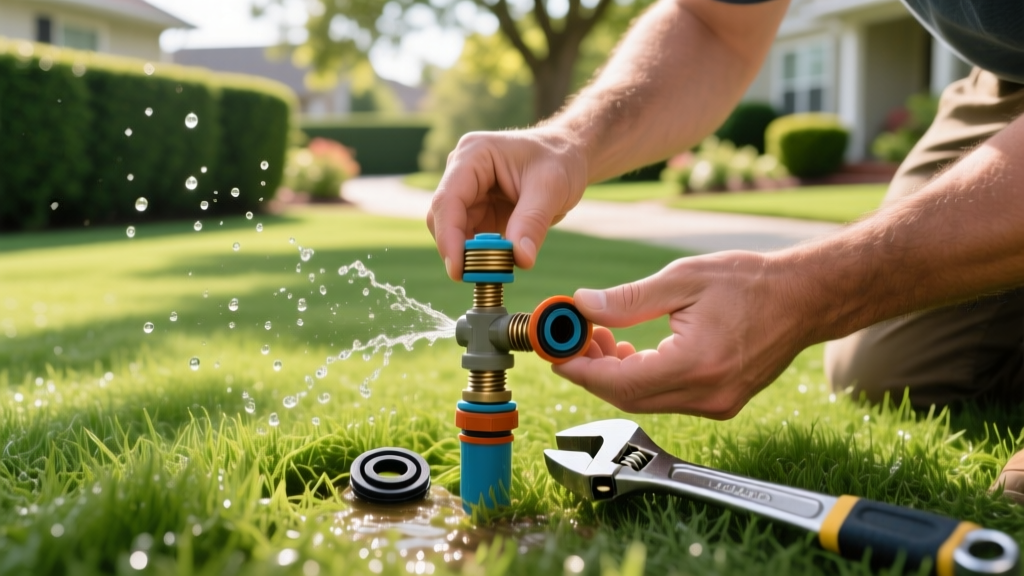
DIY Sprinkler Heads Repair: Fix Leaks, Geysers, and Low Pressure
The True Cost of Ignoring Broken Irrigation Components
A single broken sprinkler head geysering water into the air can waste up to 200 gallons of water per day. According to EPA WaterSense, outdoor water use accounts for nearly 30% of total household water consumption in the United States, and inefficient irrigation systems are a primary driver of waste. As of 2026, professional irrigation technicians typically charge between $85 and $140 per service call, plus a $25 to $45 markup on parts. By mastering DIY sprinkler heads repair, homeowners can resolve 90% of common zone failures for under $10 in materials, restoring uniform water distribution and protecting their turf from drought stress and fungal diseases caused by pooling water.
⚠️ Water Waste Warning: A single 1/32-inch diameter leak (about the thickness of a dime) at 60 PSI will waste over 6,000 gallons of water annually. Always address weeping heads and base leaks immediately to avoid municipal water tier-penalty surcharges.
Diagnostic Matrix: Match the Symptom to the Fix
Before buying replacement parts, you must accurately diagnose the failure mode. Sprinkler heads repair requires matching the exact visual symptom to the internal mechanical failure. Use this decision matrix to identify your required components.
| Visual Symptom | Probable Cause | Required Part | Est. DIY Cost |
|---|---|---|---|
| Water geysering straight up (no nozzle spray) | Blown or missing nozzle; stripped riser threads | Matched nozzle (e.g., Rain Bird MPR) or new riser | $3 - $6 |
| Water leaking at the base of the pop-up stem | Degraded wiper seal or cracked housing neck | Wiper seal kit (e.g., Rain Bird #395051SS) | $4 - $8 |
| Head won't pop up fully; weak spray pattern | Clogged filter screen or debris in supply line | Cleaning or replacement 1/2" cylindrical filter | $0 - $2 |
| Misting or fogging instead of droplet spray | Static water pressure exceeding 45 PSI | Pressure-regulated stem (e.g., Hunter PRS40) | $7 - $12 |
| Head is sunken below soil grade | Soil settling or mower damage to swing joint | Poly swing joint extension or funny pipe | $5 - $10 |
Essential Parts: Don't Buy the Wrong Model
The most common mistake in sprinkler heads repair is assuming universal compatibility between brands. While the external housing threads (typically 1/2-inch Female Pipe Thread, or FPT) are standardized, the internal components are highly proprietary.
Rain Bird vs. Hunter Internal Compatibility
If you are repairing a Rain Bird 1800 Series spray head, you must use Rain Bird specific wiper seals and springs. The Rain Bird 1804 (4-inch pop-up) utilizes a specific coiled spring and a rubber wiper seal that creates friction against the polycarbonate stem. Attempting to force a Hunter Pro-Spray seal into a Rain Bird body will result in immediate stem binding or severe weeping.
Conversely, Hunter Pro-Spray bodies feature a unique coiled spring mechanism and a distinct wiper seal design. If your Hunter head is misting due to high municipal water pressure (common in newer 2024+ suburban developments where static pressure often exceeds 70 PSI), you can upgrade the internal stem to a Hunter Pro-Spray PRS40. This pressure-regulated stem contains an internal diaphragm that automatically throttles flow, maintaining an optimal 40 PSI at the nozzle regardless of the zone's incoming pressure.
Step-by-Step: Fixing a Geyser or Base Leak
The following procedure covers the most frequent sprinkler heads repair scenario: replacing a degraded wiper seal and cleaning the internal filter to stop base leaks and restore pop-up height.
- Isolate the Zone: Do not shut off the main house water. Instead, locate your irrigation valve manifold and manually close the flow control knob on the specific zone valve, or turn off the zone via your smart controller (e.g., Rachio 4 or Hunter Pro-C2) and close the valve's bleed screw.
- Excavate the Perimeter: Using a hand trowel, dig a 3-inch radius around the sprinkler body. Remove soil down to the PVC tee or swing joint. Pro Tip: Place the excavated soil on a piece of cardboard to prevent it from washing into the turf and creating mud patches.
- Extract the Internals: Grip the top of the pop-up stem with channel-lock pliers (use a rag to prevent scratching the plastic) and twist the internal riser counter-clockwise. In most modern bodies, the entire internal assembly (spring, seal, filter, and riser) will unthread from the outer housing.
- Inspect and Clean the Filter: Pull the small cylindrical plastic screen from the bottom of the riser. Flush it with a hose to remove sand and scale. If the mesh is torn, replace it with a standard 1/2-inch irrigation filter.
- Replace the Wiper Seal: Pry the old rubber wiper seal off the top of the housing neck. Clean the seating groove with a damp cloth. Lubricate the new wiper seal (e.g., Rain Bird #395051SS) with a dab of silicone plumber's grease—never use petroleum jelly, which degrades EPDM rubber—and press it firmly into the groove.
- Reassemble and Test: Thread the internal riser back into the housing clockwise. Hand-tighten, then give it a quarter-turn with pliers. Turn the zone back on and observe. The stem should pop up smoothly without weeping at the base.
When to Abandon Repair and Replace the Entire Body
Not every issue can be solved with a $5 seal kit. Recognizing when a housing is structurally compromised saves time and prevents repeated flooding. You must excavate and replace the entire sprinkler body if you encounter any of the following failure modes:
- Stripped Internal Threads: If the riser spins endlessly without unthreading, the internal PVC threads of the housing are stripped. This is usually caused by cross-threading during a previous repair or overtightening with pipe wrenches.
- Longitudinal Hairline Cracks: Freeze-thaw cycles in northern climates can cause microscopic cracks in the ABS plastic housing. If you see water weeping through the side wall of the body while the zone is pressurized, the body must be cut out and replaced using a slip-fix PVC expansion coupling.
- Broken Swing Joint or Funny Pipe: If the head wobbles excessively or leaks from below the housing, the 1/2-inch polyethylene swing pipe (funny pipe) or the PVC swing joint elbow has fractured. This requires cutting the lateral line and installing a new barbed swing joint.
Advanced Troubleshooting: Sunken Heads and Grade Issues
Over time, soil settling, aeration, and topdressing can cause sprinkler heads to sink below the turf grade. A sunken head will spray directly into the grass blades immediately in front of it, creating a dry spot 10 feet away and a localized swamp near the head.
Rather than digging up the entire lateral line to raise the pipe, use a swing joint extension. These are telescoping PVC assemblies with two 90-degree elbows that allow you to adjust the vertical height of the sprinkler head by up to 6 inches without altering the underground PVC piping. Simply unscrew the sprinkler body from the existing swing joint, thread the extension into the elbow, and reattach the head. This ensures the nozzle clears the mature height of your bermuda or fescue turf, maintaining the head-to-head coverage uniformity required for efficient irrigation.
✓ Maintenance Framework: To minimize future sprinkler heads repair needs, perform a bi-annual "catch cup audit" in April and September. Place identical straight-sided tuna cans in a grid across your zones, run the system for 15 minutes, and measure the water depth. This identifies low-pressure heads (indicating upstream leaks) before they cause visible turf damage.
By keeping a small inventory of brand-specific wiper seals, standard MPR nozzles, and replacement filter screens in your garage, you can execute a complete sprinkler heads repair in under ten minutes per head. This proactive approach not only preserves your lawn's health but aligns with modern water conservation standards, ensuring your irrigation system operates at peak hydraulic efficiency year after year.

