
Lawn Care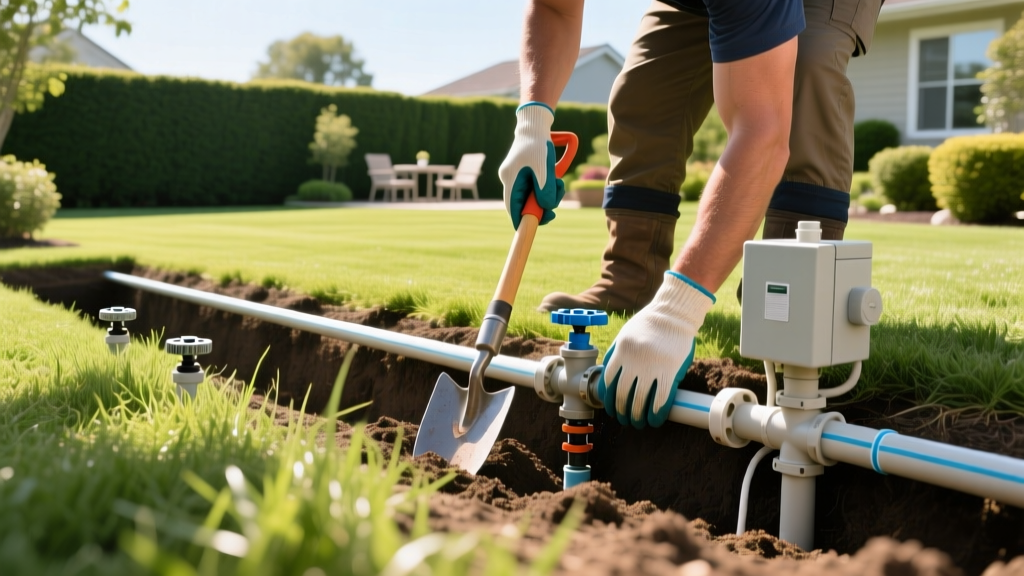
Underground Sprinkler System Installation: Layout, Costs, and Steps
Executing a flawless underground sprinkler system installation requires more than just digging trenches and dropping in pipes. It demands precise hydraulic calculations, strategic head placement for head-to-head coverage, and material selections tailored to your local soil and freeze-thaw cycles. While professional irrigation contractors typically charge between $3,500 and $6,000 for a standard 5,000-square-foot lawn, a meticulously planned DIY approach can reduce material and equipment rental costs to roughly $1,200 to $1,800.
⚠️ CRITICAL FIRST STEP: Before breaking ground, you must call 811 to have local utility lines marked. Hitting a buried gas or fiber-optic line can result in catastrophic financial liability and severe injury. Visit call811.com to initiate the free marking process at least 72 hours before your planned trenching date.
System Design and Hydraulic Calculations
The most common failure point in sprinkler system installation is designing zones that exceed the property's available water flow. You must determine your static water pressure (PSI) and maximum flow rate (Gallons Per Minute, or GPM).
The 5-Gallon Bucket Flow Test
Do not rely on municipal water reports. Test your actual hose bib or mainline connection:
- Ensure no other water sources in the house are running.
- Open the outdoor spigot fully and fill a standard 5-gallon bucket.
- Time the fill rate with a stopwatch. If it takes 15 seconds to fill, your formula is: (5 gallons / 15 seconds) x 60 = 20 GPM.
- Design your zones so that the total GPM of all sprinkler heads on a single zone never exceeds 80% of your tested GPM (in this case, 16 GPM max per zone) to account for pressure friction loss.
Head-to-Head Coverage Strategy
Sprinkler heads lose pressure and water volume at the outer edge of their throw radius. If a Hunter PGP Ultra rotor is rated for a 30-foot throw, you must space the heads 25 to 28 feet apart. The water from one head must physically strike the adjacent head's casing to eliminate dry spots and ensure uniform distribution.
Pipe Sizing and Flow Velocity Limits
Pushing too much water through a narrow pipe creates high velocity, leading to water hammer (which shatters PVC joints) and severe friction loss. The Irrigation Association recommends keeping water velocity below 5 feet per second (ft/sec) in lateral lines.
| PVC Pipe Size (Schedule 40) | Max Recommended GPM | Velocity at Max GPM | Best Application |
|---|---|---|---|
| 3/4 Inch | 10 GPM | 4.7 ft/sec | Small drip zones or single spray heads |
| 1 Inch | 18 GPM | 4.4 ft/sec | Standard lateral lines for spray heads |
| 1.25 Inch | 29 GPM | 4.6 ft/sec | Mainlines and high-flow rotor zones |
| 1.5 Inch | 42 GPM | 4.7 ft/sec | Primary mainline from the water source |
Material Selection: PVC vs. Polyethylene
Your soil composition and climate dictate your pipe material. Both have distinct advantages and failure modes in underground sprinkler system installation.
Schedule 40 PVC (Polyvinyl Chloride)
- Cost: ~$1.10 per foot for 1-inch pipe.
- Best For: Stable soils, warm climates, and rocky terrain where rigid pipe bridges small gaps.
- Assembly: Requires purple primer and medium-body PVC cement. Joints are permanent and rigid.
- Failure Mode: Shatters under freezing water expansion or heavy surface loads (like vehicle traffic) if buried less than 12 inches deep.
HDPE Polyethylene (Poly Pipe)
- Cost: ~$0.45 per foot for 1-inch pipe (SIDR 160).
- Best For: Northern climates with deep frost lines and expansive clay soils that shift seasonally.
- Assembly: Uses insert fittings secured with stainless-steel crimp rings. Never use barbed fittings with standard worm-gear hose clamps; they will corrode and leak within three years.
- Failure Mode: Kinks easily during installation if bent past its minimum bend radius (typically 10x the pipe diameter).
The Trenching and Assembly Workflow
Rent a walk-behind trencher (such as a Ditch Witch C16X or Toro RT1200) from a local equipment yard. Expect to pay $150 to $220 per day for the rental.
💡 PRO TIP: Always dig your mainline trench first and pressure-test it before backfilling. If a glued joint fails, you want to find out while the trench is still open, not after you have laid sod over it.
Step-by-Step Trenching Depths
- Mainline Depth: Must be buried 2 to 4 inches below your local frost line to prevent winter freezing. In USDA Zone 5, this means trenching at least 36 inches deep.
- Lateral Line Depth: Typically 8 to 10 inches deep. This protects the pipes from aeration equipment and standard lawn dethatching blades.
- Valve Manifold Depth: Bury valve boxes so the top of the box is flush with the final grade. Ensure 6 inches of crushed gravel is placed beneath the manifold to facilitate drainage and prevent the box from heaving during freeze-thaw cycles.
Controller Wiring and Smart Integration
Modern irrigation relies on smart controllers that adjust watering schedules based on local evapotranspiration (ET) data. The EPA's WaterSense program notes that smart irrigation controllers can save the average home nearly 7,600 gallons of water annually.
For a standard 8-zone system, the Rachio 3 Smart Sprinkler Controller (retailing around $229) or the Hunter Pro-C with Hydrawise integration are the industry benchmarks.
Wiring Specifications
- Wire Gauge: Use 14-gauge UF (Underground Feeder) wire for runs under 200 feet. Upgrade to 12-gauge for runs exceeding 200 feet to prevent voltage drop, which causes solenoid valves to chatter or fail to open.
- Splicing: Never use standard plastic wire nuts underground. Moisture will corrode the copper. Use silicone-filled waterproof wire connectors (often called 'Drycon' or 'Blazing' nuts) for all solenoid splices.
- Common Wire: Run a single continuous white 'common' wire to all valves, and individual color-coded 'hot' wires from the controller to each specific valve solenoid.
Winterization and Maintenance Realities
If you live in a climate where temperatures drop below 32°F, your underground sprinkler system installation must include a blowout port (typically a 1-inch brass ball valve) installed immediately after the backflow preventer.
"Never use a home air compressor to winterize a system. Standard shop compressors deliver high pressure but low volume (CFM). You need high volume (80-100 CFM) at low pressure to sweep water out of the pipes without melting the plastic gears inside the sprinkler heads. Always hire a professional with a tow-behind diesel compressor, capping the PSI at 50 for poly pipe and 80 for PVC."
Frequently Asked Questions
Do I need a backflow preventer?
Yes, it is a universal plumbing code requirement. If you are using inline valves buried in the ground, you must install a Pressure Vacuum Breaker (PVB) or a Reduced Pressure Zone (RPZ) assembly above ground, downstream of the main shutoff. Anti-siphon valves have the backflow mechanism built into the valve body, but they must be installed at least 12 inches higher than the highest sprinkler head in their zone.
Can I connect the sprinkler system directly to my garden hose bib?
Only for micro-irrigation or single-zone drip systems. A standard 3/4-inch hose bib cannot supply the continuous GPM required for a multi-zone rotor or spray head system. You must tap into the main water line (usually 1-inch or 1.25-inch copper or PEX) using a saddle clamp or a proper tee fitting, and install a dedicated ball valve for the irrigation system.
How do I fix low pressure on a specific zone?
Low pressure is rarely a mainline issue if other zones work perfectly. First, check the zone valve diaphragm; a torn diaphragm or debris trapped under the solenoid plunger will restrict flow. Second, inspect the sprinkler heads on that zone for cracked casings or missing nozzles, which act as massive leaks, stealing pressure from the rest of the heads on the lateral line.

