
Lawn Care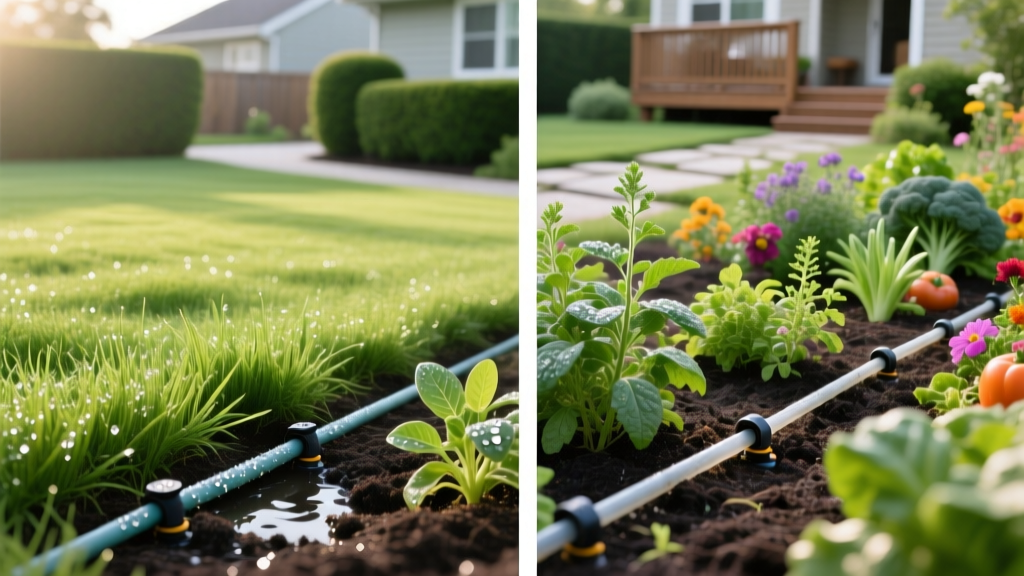
Drip Irrigation Pros and Cons: Lawns vs Garden Beds
The Golden Rule of Drip: Drip irrigation is the undisputed champion for ornamental beds, shrubs, and trees, but it is fundamentally the wrong tool for large, open turfgrass lawns unless you invest in specialized, high-cost subsurface systems.
The Core Dilemma: Turfgrass vs. Ornamental Beds
When evaluating drip irrigation pros and cons, the most critical factor is your landscape layout. Homeowners often attempt to apply a single irrigation philosophy across their entire property, leading to dead turf or waterlogged shrubs. Drip irrigation delivers water slowly and directly to the root zone at low pressure (typically 15 to 30 PSI). This precision makes it highly efficient for spaced plantings but entirely inadequate for the dense, uniform coverage required by turfgrass.
According to EPA WaterSense, drip systems can be up to 90% efficient compared to traditional sprinklers, which often lose water to wind drift and evaporation. However, this efficiency only translates to healthy plants if the delivery method matches the plant's growth habit. Below, we break down the exact mechanics, failure modes, and financial realities of implementing drip systems in 2026.
Drip Irrigation Pros and Cons for Garden Beds & Shrubs
The Advantages: Why Drip Dominates Beds
- Massive Water Conservation: By eliminating aerial spray, drip lines reduce evaporation losses by 30% to 50%. In regions with strict 2026 municipal water tiering, this keeps your utility bills in the lowest pricing bracket.
- Weed Suppression: Because water is only applied directly to the root ball of your desired plants, the surrounding dry soil prevents weed seeds from germinating.
- Disease Prevention: Fungal pathogens like powdery mildew and black spot thrive on wet foliage. Drip keeps the leaves completely dry, drastically reducing the need for chemical fungicides.
- Fertilizer Efficiency: Liquid fertilizers can be injected directly into the drip lines (fertigation), delivering nutrients exactly where the feeder roots are located without burning the foliage.
The Drawbacks: Real-World Failure Modes
Despite the benefits, drip systems require meticulous maintenance. The Texas A&M AgriLife Extension notes that emitter clogging remains the number one cause of system failure.
- Emitter Clogging: Mineral deposits (calcium and magnesium) and organic algae will clog standard emitters. You must install a 120-mesh to 150-mesh screen filter at the head assembly and flush the lines bi-annually by opening the end caps.
- Rodent and Pest Damage: Gophers, voles, and even squirrels frequently chew through polyethylene drip lines looking for water during dry spells. In high-rodent areas, you must use thicker-walled tubing (minimum 0.040 inch wall thickness) or bury the lines under 2 inches of crushed gravel.
- UV Degradation: If left exposed to direct sunlight, standard black poly tubing becomes brittle and cracks within 3 to 5 years. Always cover drip lines with 2 to 3 inches of organic mulch to protect them from UV rays and physical damage.
Why Surface Drip Fails on Open Lawns
Attempting to run standard surface drip tubing across an open lawn is a guaranteed path to frustration. Turfgrass requires uniform, overlapping head-to-head coverage to maintain a dense canopy. Surface drip lines laid out in a grid will create alternating strips of green and brown grass as the soil's lateral capillary action fails to spread the water evenly between the emitters.
Furthermore, surface lines present severe tripping hazards, interfere with core aeration, and will inevitably be shredded by lawnmower blades. For standard above-ground lawn watering, high-efficiency rotary nozzles (like the Rain Bird HE-VAN or Toro Precision) remain the superior, cost-effective choice.
The Exception: Subsurface Drip Irrigation (SDI) for Lawns
There is one scenario where drip irrigation works beautifully for turfgrass: Subsurface Drip Irrigation (SDI). SDI involves burying specialized, root-intrusion-resistant drip lines 4 to 6 inches below the soil surface.
Required Technology for Turf SDI
You cannot use standard garden drip lines for lawns. Grass roots are aggressive and will seek out the moisture at the emitter, eventually penetrating the orifice and clogging the system. You must use products specifically engineered with physical or chemical root barriers, such as Netafim Techline CV or Rain Bird XFS-DRI. These products feature copper-lined emitters or physical check valves that prevent roots from entering the drip emitters.
SDI Cost and Installation Realities
SDI is highly efficient and invisible, allowing you to walk, mow, and aerate your lawn without damaging the system. However, the installation costs are steep. Trenching or using a vibratory plow to bury the lines 4 inches deep at 12-inch spacing requires heavy labor.
| System Type | Material Cost (per sq. ft.) | Installed Cost (per sq. ft.) | Water Efficiency | Primary Maintenance |
|---|---|---|---|---|
| Surface Drip (Garden Beds) | $0.15 - $0.25 | $0.40 - $0.75 | 85% - 90% | Filter cleaning, line flushing, mulch replacement |
| Subsurface Drip (Lawns) | $0.45 - $0.70 | $1.50 - $2.50 | 90% - 95% | Annual line flushing, air vacuum valve checks |
| Traditional Pop-up Sprinklers | $0.20 - $0.40 | $0.80 - $1.30 | 65% - 75% | Head leveling, nozzle clearing, winterization |
Expert Decision Framework: Which System to Choose
Use this logic tree to determine the correct irrigation approach for different zones in your yard:
- Zone A: Dense, open turfgrass (Front/Back Lawns).
Decision: Use high-efficiency rotary nozzles on traditional pop-up risers. If budget allows ($2.00+ per sq. ft.) and you want maximum water savings, install Subsurface Drip Irrigation (SDI) using Netafim Techline CV. - Zone B: Mixed ornamental beds, shrubs, and groundcover.
Decision: Use surface drip irrigation with 1/2-inch poly tubing and 2.0 GPH (gallons per hour) inline emitters spaced 12 to 18 inches apart. Cover with mulch. - Zone C: Individual trees and large isolated shrubs.
Decision: Use a dedicated drip manifold with adjustable bubblers (e.g., Rain Bird Xeri-Bug) or loop 1/4-inch micro-tubing with multiple 1.0 GPH emitters around the drip line of the canopy. - Zone D: Narrow strips (less than 4 feet wide) between sidewalk and house.
Decision: Surface drip. Sprinklers in narrow strips waste up to 40% of water on concrete hardscapes. Drip keeps the water strictly in the soil.
Critical Components for a Fail-Safe Drip Setup
If you are installing a drip system, skipping any of the following head assembly components will result in system failure within the first season:
The Mandatory Head Assembly Stack
- Backflow Preventer: Required by code to keep fertilizer and stagnant drip-line water from siphoning back into your home's drinking water.
- Automatic Zone Valve: Controls the flow of water to the specific drip zone via your smart controller.
- Pressure Regulator: Non-negotiable. Drip systems operate at 25 to 30 PSI. Standard home water pressure (50 to 80 PSI) will blow the fittings apart and rupture the tubing. Use a brass or high-grade plastic pressure reducer rated for your specific zone's GPM.
- Screen Filter (120-mesh minimum): Catches sediment, rust flakes, and organic debris before they enter the micro-orifices of the emitters.
Final Word on Smart Controllers
To maximize the efficiency of your drip system, pair it with a smart irrigation controller (such as the Rachio 3 or Hydrawise Pro) connected to a wireless soil moisture sensor. Because drip lines apply water slowly, standard time-based schedules often lead to deep percolation where water sinks past the root zone. Soil moisture sensors ensure the system only runs when the soil tension drops below the optimal threshold for your specific plant material, cementing drip irrigation as the most water-wise landscaping strategy available.

