Lawn Care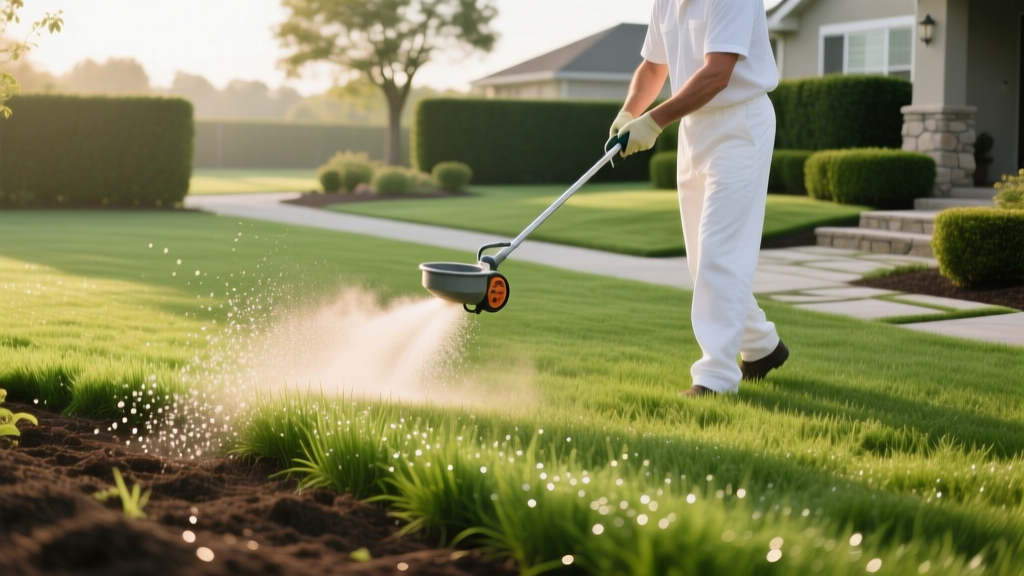
How to Apply Sulphur for Lawns: A Step-by-Step Soil pH Guide
The Science of Soil pH and Sulphur Oxidation
Most turfgrasses thrive in a soil pH range of 6.0 to 7.0. When soil pH climbs above 7.2 (alkaline), essential micronutrients like iron, manganese, and zinc become chemically locked, resulting in interveinal chlorosis (yellowing leaves with green veins) and stunted root growth. Applying sulphur for lawns is the most cost-effective, long-term method to correct high soil pH.
Elemental sulphur does not lower pH directly. Instead, it relies on naturally occurring soil bacteria, primarily Thiobacillus, to oxidize the sulphur into sulphuric acid. This biological process means sulphur is not an overnight fix; it requires specific soil temperatures (above 55°F), adequate moisture, and time—typically 3 to 6 months to fully react. Understanding this microbial lag time is critical for planning your lawn maintenance schedule.
Warning: The 5-Pound Threshold
Never apply more than 5 pounds of elemental sulphur per 1,000 square feet in a single application. Exceeding this limit can cause severe phytotoxicity (leaf burn), accumulate toxic levels of soluble salts, and damage the soil microbiome. If your soil test indicates you need a 2.0 pH drop, you must split the application across multiple seasons.
Never apply more than 5 pounds of elemental sulphur per 1,000 square feet in a single application. Exceeding this limit can cause severe phytotoxicity (leaf burn), accumulate toxic levels of soluble salts, and damage the soil microbiome. If your soil test indicates you need a 2.0 pH drop, you must split the application across multiple seasons.
Step 1: Diagnose with a Laboratory Soil Test
Do not guess your soil pH using cheap hardware store litmus strips or liquid dye kits; they lack the buffer capacity metrics required to calculate sulphur application rates. You must send a core sample to a professional laboratory.
- Sample Collection: Use a soil probe or spade to extract 10 to 15 cores at a depth of 3 to 4 inches across your lawn.
- Mixing: Combine the cores in a clean plastic bucket (never use galvanized metal, which can skew zinc readings).
- Lab Selection: Mail the sample to a reputable lab like Logan Labs or your local university extension office. Expect to pay between $20 and $35 for a comprehensive test that includes pH, buffer pH, and Cation Exchange Capacity (CEC).
According to UMass Extension, the buffer pH metric is non-negotiable for calculating amendments. A soil with a pH of 7.5 and a high clay content (high buffer capacity) requires vastly more sulphur than a sandy soil with the exact same pH.
Step 2: Select the Right Sulphur Product
Not all sulphur products function identically. Choosing the wrong type can lead to aluminium toxicity or wasted money. Below is a decision matrix for the three most common lawn sulphur products available in 2026.
| Product Type | Speed of Action | Cost (per 1,000 sq ft) | Best Use Case & Risks |
|---|---|---|---|
| Elemental Sulphur (e.g., Espoma Organic Soil Acidifier) | Slow (3-6 months) | $4.00 - $6.00 | Best for long-term maintenance and safe for all grasses. Requires microbial activity. |
| Aluminium Sulphate | Instant (Days) | $12.00 - $18.00 | Use only for small garden beds. Avoid on lawns: High risk of aluminium toxicity to grass roots. |
| Liquid Sulphur (Suspensions) | Moderate (Weeks) | $8.00 - $12.00 | Good for foliar feeding and quick green-up, but poor for deep soil pH modification. |
For turfgrass, prilled elemental sulphur (90% to 99% purity) is the undisputed standard. Products like Espoma Organic Soil Acidifier or Bonide Sulfur Plant Food typically retail for $14 to $18 for a 4-pound bag in 2026, providing excellent coverage and safety.
Step 3: Calculate Your Exact Application Rate
Once your lab results arrive, use the soil texture and current pH to determine your application rate. The University of Wisconsin Extension provides standard agronomic baselines for elemental sulphur application. Use the chart below to find your target rate per 1,000 square feet to achieve a 1.0 point pH drop.
| Soil Texture | Sulphur Required (lbs / 1,000 sq ft) for 1.0 pH Drop | Visual Identification |
|---|---|---|
| Sandy Loam | 1.5 lbs | Gritty, falls apart easily when squeezed dry. |
| Loam / Silt Loam | 3.0 lbs | Smooth, holds a loose ball when squeezed moist. |
| Clay / Heavy Clay | 4.5 to 5.0 lbs | Sticky, forms a tight ribbon when squeezed. |
Calculation Example
If you have a 5,000 sq ft lawn with heavy clay soil, and your soil test shows a pH of 8.0 (target is 7.0, requiring a 1.0 drop):
5,000 sq ft / 1,000 = 5 units.
5 units × 4.5 lbs (clay rate) = 22.5 lbs of elemental sulphur total.
Step 4: Calibration and Application Protocol
Applying granular sulphur requires precise spreader calibration to prevent localized over-application, which can scorch the turf.
- Timing: Apply in early spring or early fall. Soil temperatures must be consistently above 55°F to activate the Thiobacillus bacteria. Avoid applications during summer heatwaves exceeding 85°F.
- Mowing: Mow the lawn to its standard height and remove clippings to ensure the granules reach the soil surface.
- Spreader Settings: For a standard rotary spreader (like a Scotts EdgeGuard) using prilled 90% elemental sulphur, set the dial to 3.5. For a drop spreader, use a setting of 5.0. Always verify by measuring out the exact weight needed for a 10x10 test area.
- The Spread Pattern: Apply in a crisscross pattern (half the rate North-South, half East-West) to eliminate striping and ensure uniform coverage.
Pro Tip: Aeration Synergy
Core aerate your lawn immediately before applying sulphur. The aeration holes act as direct conduits, bypassing the thatch layer and placing the sulphur granules directly into the root zone where microbial activity is highest. This can reduce the oxidation timeline by up to 30%.
Core aerate your lawn immediately before applying sulphur. The aeration holes act as direct conduits, bypassing the thatch layer and placing the sulphur granules directly into the root zone where microbial activity is highest. This can reduce the oxidation timeline by up to 30%.
Step 5: Watering and Post-Application Care
Elemental sulphur left sitting on wet grass blades will cause severe chemical burns. The post-application watering step is non-negotiable.
- Immediate Wash-Off: Run your irrigation system for 5 to 10 minutes immediately after spreading to wash all granules off the foliage and into the soil.
- Sustained Moisture: The oxidation process requires water. Maintain consistent soil moisture (about 1 inch of water per week from rain or irrigation) for the next 60 days. If the soil dries out completely, the bacterial oxidation process halts entirely.
- Fertilizer Interactions: Do not apply lime, wood ash, or high-calcium fertilizers concurrently. Conversely, applying ammonium-based nitrogen fertilizers (like ammonium sulfate) simultaneously will have a synergistic acidifying effect, accelerating the pH drop.
Troubleshooting Common Sulphur Failures
The pH Hasn't Changed After 6 Months
If a follow-up soil test shows no movement, evaluate the following failure modes:
- Free-Lime Presence: Your soil may contain free calcium carbonate (limestone fragments). Free-lime acts as a massive buffer, neutralizing the sulphuric acid as fast as the bacteria produce it. If your lab test notes 'Free-Lime Present', elemental sulphur will not work. You must switch to acidifying fertilizers or accept the native pH and choose alkaline-tolerant grass species like Tall Fescue.
- Thatch Barrier: A thatch layer thicker than 0.5 inches will trap the sulphur granules above the soil line, preventing bacterial contact. Dethatch before reapplying.
- Temperature Deficit: Applications made in late November in northern climates will sit dormant until the soil warms in April. The 3-to-6-month clock only starts once soil temps cross the 55°F threshold.
By adhering to strict soil testing, respecting the 5-pound application ceiling, and leveraging core aeration, you can safely and permanently correct alkaline soil, unlocking the nutrient density required for a dense, dark green lawn.