
Lawn Care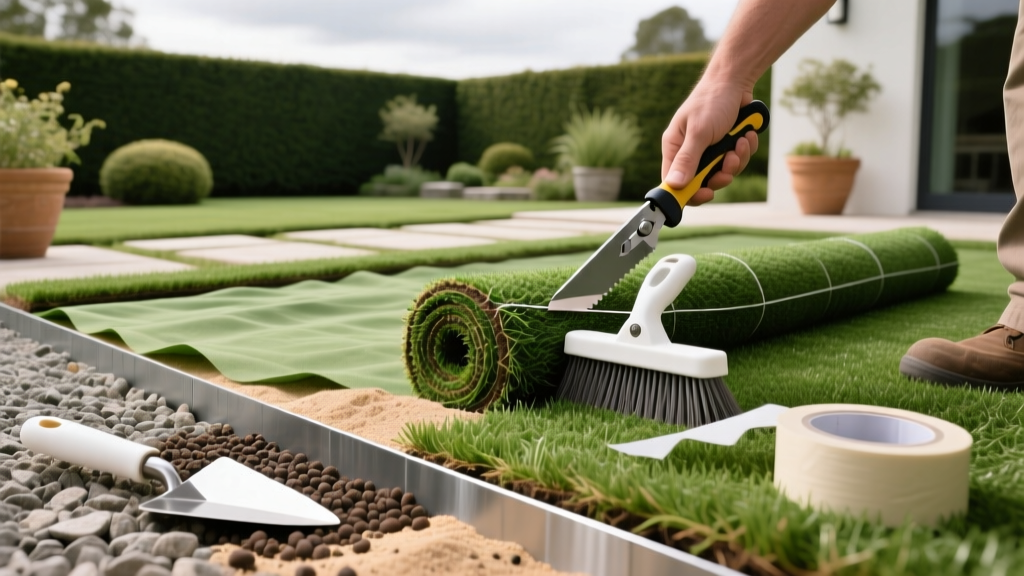
Expert Fake Grass Installation Guide: Base Prep to Infill
Installing synthetic turf is fundamentally a civil engineering project disguised as a landscaping task. While natural grass establishment relies on root zone biology and soil microbiomes, fake grass installation depends entirely on structural integrity, hydrology, and precision seaming. A premium $5-per-square-foot turf will fail in two years if laid over an improperly compacted sub-base, while a mid-tier turf can last two decades when supported by a correctly engineered foundation.
This guide bypasses superficial advice and details the exact material specifications, compaction metrics, and seaming protocols required for a permanent synthetic lawn establishment.
The Anatomy of a Proper Fake Grass Base
The most common failure mode in synthetic turf is sub-surface settling, which creates depressions (often called 'birdbaths') that pool water and stretch the turf backing. To prevent this, the base must mimic the load-bearing characteristics of a residential driveway.
The 4-Layer Base Standard:
- Subgrade: Native soil, scarified and graded at a 1% to 2% slope for drainage.
- Geotextile Barrier: 3oz to 4oz non-woven fabric (prevents base material from migrating into clay subsoils).
- Aggregate Base: 3 to 4 inches of Class II Road Base (3/4-inch minus crushed rock).
- Leveling Course: 0.5 to 1 inch of Decomposed Granite (DG) or limestone screenings.
According to the Synthetic Turf Council (STC), the aggregate base must achieve a 95% Modified Proctor density. This requires mechanical compaction, not just hand-tamping. For DIY installations under 500 square feet, a hand tamper may suffice if the base is laid in 2-inch lifts, but any area larger than this mandates renting a vibratory plate compactor (minimum 5,000 lbs of compaction force).
Material Sourcing and Cost Breakdown
Budgeting for fake grass installation requires looking beyond the turf itself. The base and infill materials often account for 40% of the total project cost. Below is a precise material breakdown for a standard 1,000-square-foot residential installation.
| Material | Specification | Qty per 1,000 sq ft | Est. Cost |
|---|---|---|---|
| Class II Road Base | 3/4-inch minus aggregate | 12-14 tons | $350 - $500 |
| Decomposed Granite | 1/4-inch minus screenings | 3-4 tons | $150 - $250 |
| Geotextile Fabric | 3oz non-woven polypropylene | 1,200 sq ft roll | $80 - $120 |
| Seaming Tape & Glue | 12-inch tape + polyurethane glue | 4-6 tubes / 2 rolls | $150 - $200 |
| Infill | 12/20 mesh silica or acrylic | 1,500 - 2,000 lbs | $250 - $600 |
Step-by-Step Excavation and Base Compaction
Proper establishment begins with removing the existing organic material. Grass roots and topsoil retain moisture and decompose, leading to catastrophic base failure.
- Excavate to 4.5 Inches: Remove all existing turf and topsoil. If you encounter heavy, expansive clay, excavate an additional 2 inches and backfill with road base to prevent frost heave or clay swelling from pushing the turf upward.
- Install Perimeter Bender Board: Secure composite or galvanized steel bender board along all hardscape edges using 12-inch steel stakes driven every 2 feet. This creates a rigid frame to stretch the turf against.
- Lay the Geotextile Barrier: Roll out the non-woven fabric. Overlap seams by 12 inches. Do not use cheap woven plastic weed barrier; it restricts water permeability and causes pooling.
- Spread and Compact the Road Base: Apply Class II road base in 2-inch 'lifts' (layers). Lightly mist each lift with water before compacting. Moisture Test: Squeeze a handful of the damp base material. It should hold its shape without water dripping through your fingers. Run the plate compactor over each lift in overlapping passes until the surface is rigid.
- Apply the Leveling Course: Spread the DG or limestone screenings. Use a long aluminum leveling rake and a water-filled lawn roller to achieve a perfectly smooth, 1% graded surface.
Seaming Techniques: Glue vs. Tape vs. Sewing
Synthetic turf rolls are typically 12 or 15 feet wide. Joining these rolls invisibly is the most technically demanding part of fake grass installation. The pile (the grass blades) has a natural 'grain' or 'mohawk' direction. All rolls must be laid with the grain pointing toward the primary viewing area (usually the house or patio).
The Modern Seaming Standard: Tape and Polyurethane Glue
Historically, installers used nails or sewing machines to join seams. Today, the industry standard is a 12-inch wide polyurethane-coated seaming tape paired with a two-part or single-part outdoor polyurethane turf glue (such as SuperSeam or SGW Turf Glue).
Critical Seaming Warning: Never apply glue directly to the base material. Always fold back both edges of the turf, lay the seaming tape flat on the base, apply the glue to the tape in a zigzag pattern, and carefully fold the turf edges back down. Ensure the tuft rows interlock perfectly before pressing down.
Cure Times: Polyurethane glues require specific temperature and humidity parameters to cure. Ideal application is between 60°F and 85°F. If the temperature drops below 50°F, the glue will not cross-link properly, leading to seam separation under thermal expansion.
Infill Selection: The 'Root Zone' of Synthetic Turf
In natural grass planting guides, we focus on soil amendments for root establishment. In fake grass installation, infill serves as the structural ballast, UV protector, and thermal regulator. Without infill, synthetic fibers will mat down within months, and the backing will degrade from direct UV exposure.
According to water conservation guidelines outlined by the Southern Nevada Water Authority, proper artificial turf installation with permeable infill is critical for maintaining yard drainage and reducing urban heat island effects compared to solid hardscaping.
Comparing Infill Materials
- 12/20 Mesh Silica Sand: The most economical choice ($8-$12 per 50lb bag). It provides excellent ballast but retains heat and can compact over time, reducing drainage. Best for low-traffic landscape areas.
- Envirofill (Acrylic-Coated Sand): A premium, antimicrobial infill ($25-$35 per 50lb bag). The rounded granules resist compaction, maintain drainage, and contain Microban to inhibit bacterial growth. Mandatory for pet turf installations.
- Crumb Rubber: Made from recycled tires. Excellent shock absorption for playgrounds, but it absorbs massive amounts of heat (up to 160°F in direct sun) and can track into the house. Generally avoided in modern residential landscaping.
- Zeolite: A natural volcanic mineral used as a top-dressing (1 lb per sq ft) specifically to neutralize ammonia in pet urine. It does not provide sufficient ballast on its own and must be used over a primary sand infill.
Common Installation Failure Modes and Fixes
Even with meticulous base prep, environmental factors can challenge your installation. Here is how to troubleshoot the most common post-installation anomalies.
| Symptom | Root Cause | Remediation Protocol |
|---|---|---|
| Water pooling in center | Sub-base settling or insufficient 1% slope | Cut an X in the turf, remove wet base, re-compact with DG, and re-seam with tape. |
| Visible seams | Pile direction mismatch or glue starvation | Pull back seam, re-apply glue, ensure tuft rows interlock, and weigh down with sandbags. |
| Fibers matting flat | Insufficient infill or wrong mesh size | Power broom the area to stand fibers up, then drop-spread an additional 1 lb/sq ft of infill. |
| Edges lifting | Thermal expansion without perimeter nails | Install 5-inch galvanized sod staples every 3 inches along the entire perimeter. |
Post-Installation Establishment: Settling the Turf
Just as natural grass requires a rolling and watering period to establish soil contact, synthetic turf requires a mechanical 'establishment' phase immediately after installation.
Once the seams have fully cured (usually 24 hours), you must integrate the infill and stand the fibers upright. Use a gas-powered power broom with stiff nylon bristles (not wire, which will shred the backing). Run the broom in multiple directions to work the silica sand or Envirofill deep into the thatch layer, ensuring it rests at the base of the fibers rather than sitting on top.
Finally, lightly mist the entire lawn with a garden hose. This washes dust off the blades, settles the infill into the backing's drainage holes, and helps the turf acclimate to the ambient temperature, completing the fake grass installation process and leaving you with a permanent, high-performance landscape surface.

