
Lawn Care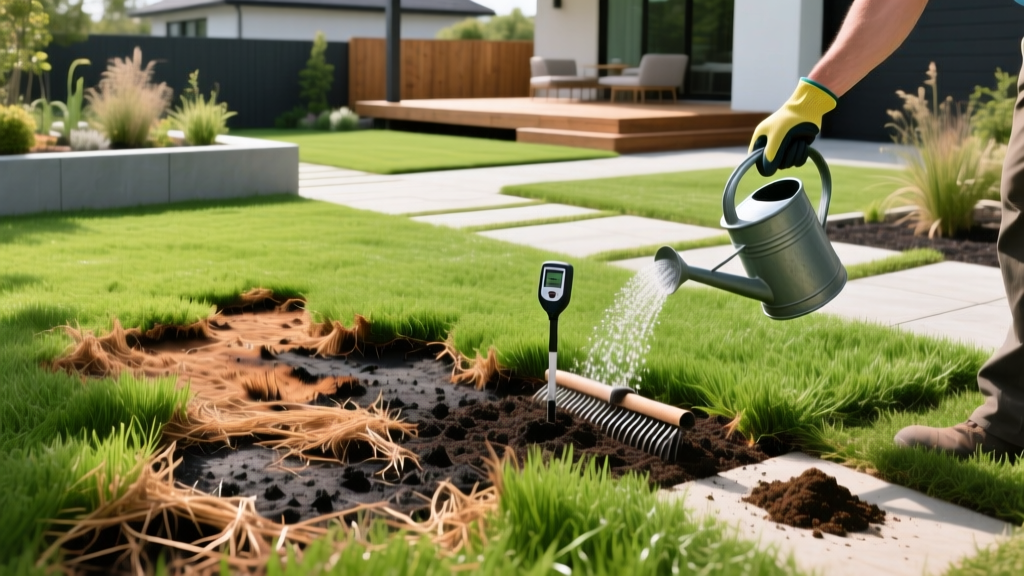
How to Fix a Burning Lawn: Step-by-Step Recovery Guide
The Science Behind a Burning Lawn
When turfgrass professionals and homeowners refer to a "burning lawn," they are describing a severe physiological crisis, not a thermal event. In agronomy, lawn burn is primarily caused by osmotic stress and chemical desiccation. When the concentration of soluble salts in the soil—whether from synthetic nitrogen fertilizers, dog urine, or de-icing runoff—exceeds the salinity inside the grass root cells, water is violently pulled out of the plant. This reverse-osmosis effect leaves the turf desiccated, resulting in the characteristic yellowing and necrotic brown patches associated with a burning lawn.
Recovering your turf requires more than just turning on the sprinklers. It demands a precise, step-by-step maintenance protocol to flush the soil profile, displace toxic ions, and rebuild the root zone. According to turfgrass research from the University of Minnesota Extension, improper fertilizer application timing and rates are the leading culprits of chemical turf burn, particularly when quick-release nitrogen sources are applied during peak summer heat.
Diagnosing the Root Cause of Your Burning Lawn
Before initiating recovery procedures, you must accurately diagnose the source of the burn. Treating drought scorch as fertilizer burn will lead to overwatering and secondary fungal diseases like Pythium blight. Use the diagnostic matrix below to identify your specific issue.
| Cause | Visual Symptoms | Soil Test Indicator | Time to Appearance |
|---|---|---|---|
| Fertilizer Burn | Linear streaks matching spreader paths; leaf tips turn yellow then brown. | Electrical Conductivity (EC) > 2.0 dS/m | 24 to 48 hours |
| Urine Burn | Distinct brown dead center surrounded by a lush, dark green halo. | High Sodium/Salt; localized pH spike | 12 to 24 hours |
| Drought Scorch | Uniform dull, bluish-green tint; footprints remain on grass for minutes. | Volumetric Water Content (VWC) < 15% | 7 to 14 days |
Phase 1: Emergency Flushing and Soil Detoxification
If you have confirmed fertilizer or urine burn, your immediate priority is to dilute the soil salt concentration. This process, known as leaching, pushes the excess salts below the active root zone (typically the top 6 inches of soil).
Step-by-Step Flushing Protocol
- Measure Application Rates: Place three straight-sided catch cans (tuna cans work perfectly) in the affected zone. You need to apply exactly 1 inch of water per day.
- Execute Deep Watering: Run your irrigation system or use an oscillating sprinkler until the cans collect 1 inch of water. Do not exceed 1 inch in a single day, as waterlogged soil will suffocate roots and invite anaerobic bacteria.
- Repeat for 4 to 7 Days: Continue this daily 1-inch application for a minimum of four days. For severe synthetic fertilizer spills (e.g., dropping a full bag of 46-0-0 Urea), extend flushing to seven days.
- Monitor Soil Moisture: Use a soil moisture meter (such as the XLUX T10) to ensure the soil is moist but not saturated between flushing sessions.
⚠️ Warning: The Mowing Rule
Never mow a burning lawn during the flushing phase. The turf is under extreme physiological stress. Mowing removes the remaining photosynthetic leaf tissue the plant needs to generate energy for root recovery. Wait until new green shoots emerge at the crown before resuming mowing, and never remove more than 1/3 of the blade height.
Phase 2: Neutralizing Salts and Restoring pH
Flushing removes soluble salts, but it does not address the sodium accumulation left behind by dog urine or certain cheap fertilizer blends. High sodium destroys soil structure, causing clay particles to bind together and eliminate pore space. To fix this, you must introduce calcium to displace the sodium via cation exchange.
Gypsum Application Procedures
Pelletized gypsum (calcium sulfate dihydrate) is the industry standard for sodium remediation. As of 2026, a 50-lb bag of high-quality turf-grade gypsum (such as Espoma Organic Garden Gypsum) typically costs between $18 and $24.
- Application Rate: Apply 50 lbs of gypsum per 1,000 square feet for severe urine or salt burn. For mild burn, 25 lbs per 1,000 square feet is sufficient.
- Method: Use a broadcast spreader (like the Scotts Elite Spreader) calibrated to the setting indicated on the gypsum packaging.
- Watering In: Immediately water the gypsum into the soil with 1/2 inch of water to activate the calcium ions.
According to soil management guidelines from Texas A&M AgriLife Extension, calcium effectively displaces sodium on the soil's cation exchange sites, allowing the sodium to be safely leached away without destroying the soil's aggregate structure.
Phase 3: Overseeding and Turf Replacement Protocols
If the crown of the grass plant (the white base at the soil line) is completely brown and brittle, the plant is dead. Flushing and gypsum will not resurrect necrotic tissue. You must physically remove the dead material and introduce new seed.
Reseeding Step-by-Step
- Wait 14 Days Post-Flush: Ensure all residual fertilizer salts have dissipated. Planting seed into toxic soil will result in immediate seedling death.
- Dethatch and Rake: Use a metal thatching rake to aggressively remove the dead brown grass down to the bare soil. Seed-to-soil contact is non-negotiable for germination.
- Select the Right Seed: Avoid cheap big-box store seeds coated in excessive clay. Invest in premium, zero-weed-seed blends. For cool-season lawns, Jonathan Green Black Beauty Ultra or Scotts Turf Builder Grass Seed Sun & Shade Mix are top performers. Expect to pay $60 to $90 for a 20-lb bag in 2026.
- Slice Seed or Top Dress: For areas larger than 100 square feet, rent a slice seeder ($60-$80 per day) to cut grooves into the soil and drop seed simultaneously. For smaller spots, spread seed by hand at a rate of 5 to 8 lbs per 1,000 square feet, then cover with a 1/4-inch layer of peat moss or compost.
- Apply Starter Fertilizer: Use a phosphorus-rich starter fertilizer (e.g., 18-24-12) to promote rapid root development, but only if a recent soil test confirms your soil is deficient in phosphorus.
Preventative Fertilization Matrix
The most effective way to manage a burning lawn is to prevent the osmotic shock from occurring in the first place. Transitioning to slow-release nitrogen sources and adhering to strict seasonal timing will eliminate fertilizer burn.
| Season | Recommended Fertilizer Type | Example Product (NPK) | Application Rate (lbs N / 1,000 sq ft) |
|---|---|---|---|
| Early Spring | Slow-Release Polymer Coated | Lesco Poly Plus (24-0-11) | 0.8 to 1.0 |
| Peak Summer | Organic / Biological (No synthetic N) | Milorganite (6-4-0) or SeaHume | 0.5 (or skip entirely) |
| Early Fall | Quick-Release (Methylene Urea) | Scotts Turf Builder WinterGuard (32-0-10) | 1.0 to 1.2 |
By implementing these precise diagnostic, flushing, and reseeding protocols, you can reverse the damage of a burning lawn and restore a dense, resilient turf canopy. Always base your long-term fertility program on a comprehensive soil test from a reputable lab like Logan Labs or Ward Laboratories to ensure your soil's cation exchange capacity and baseline salinity are properly balanced.

