
Lawn Care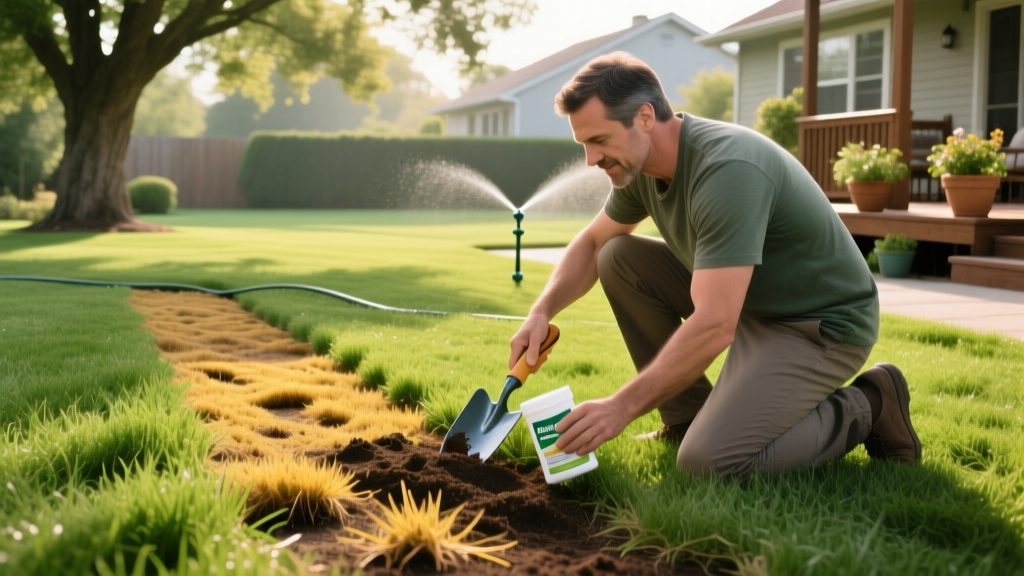
How to Fix Dog Pee Stains on Grass: Step-by-Step Recovery
The Science of Canine Urea Burns
Necrotic, yellow-ringed patches of dead grass are the inevitable result of canine urea deposition. Before attempting lawn repair, it is critical to debunk the most pervasive myth in turfgrass management: dog urine does not kill grass because it is too acidic. According to veterinary and agronomic consensus, canine urine typically has a pH between 6.0 and 6.5, which is slightly acidic to neutral and well within the tolerable range for most turfgrasses.
The Real Culprit: Nitrogen Overload
The actual cause of the burn is urea, a nitrogen-rich compound. A single dog urination event can deposit the equivalent of 200 pounds of synthetic nitrogen fertilizer per acre. This massive, localized salt spike draws moisture out of the grass blades and roots via osmosis, resulting in rapid tissue desiccation and death. The dark green 'halo' often seen around the dead center is simply the outer zone where the diluted nitrogen acts as a mild fertilizer.
The actual cause of the burn is urea, a nitrogen-rich compound. A single dog urination event can deposit the equivalent of 200 pounds of synthetic nitrogen fertilizer per acre. This massive, localized salt spike draws moisture out of the grass blades and roots via osmosis, resulting in rapid tissue desiccation and death. The dark green 'halo' often seen around the dead center is simply the outer zone where the diluted nitrogen acts as a mild fertilizer.
Understanding this chemical reality dictates how to fix dog pee stains on grass effectively. Attempting to alter soil pH with lime or baking soda will fail and may introduce harmful sodium levels to your soil profile. The following step-by-step protocol addresses the actual nitrogen-salt imbalance.
Phase 1: Immediate Triage (0 to 12 Hours)
The window for preventing permanent tissue death is narrow. If you catch your dog in the act or notice a fresh wet spot, immediate dilution is the only proven preventative measure.
- Calculate the Dilution Volume: You need to apply enough water to push the urea salts below the primary root zone (typically 4 to 6 inches deep). For a standard 12-inch diameter urination spot, apply exactly 1.5 to 2.0 gallons of water.
- Apply Gently: Use a watering can with a rose attachment or a hose with a gentle shower nozzle. High-pressure sprays will cause runoff, failing to push the salts downward and potentially spreading the urea to adjacent healthy grass.
- Surfactant Addition (Optional): If your soil is heavily compacted or hydrophobic, add two drops of mild, non-antibacterial dish soap to your watering can. This breaks the water's surface tension, allowing rapid infiltration into the soil matrix.
Phase 2: Soil Remediation and Salt Flushing
If the spot has already turned yellow or brown, the grass tissue is dead, and the soil is heavily saturated with residual nitrogen salts. Before reseeding, you must remediate the soil environment; otherwise, new seedlings will suffer the exact same osmotic burn.
Heavy Flushing Protocol
Apply 3 to 4 gallons of water to the affected area daily for three consecutive days. This aggressive leaching process forces the accumulated urea salts deep into the subsoil, away from the shallow root zones of newly germinated seeds.
Choosing a Soil Amendment
Once flushed, you can apply enzymatic or carbon-based treatments to accelerate the breakdown of residual organic compounds. Below is a comparison of the most effective remediation products available on the market.
| Product Category | Active Mechanism | Avg. Cost (2026) | Efficacy |
|---|---|---|---|
| Microbial Enzymes (e.g., Dogonit) | Introduces urease-producing bacteria to rapidly metabolize urea into ammonia and CO2. | $35 - $45 / Quart | High |
| Liquid Humic Acid (e.g., PetiGreen) | Carbon molecules bind to excess nitrogen salts, buffering the soil and stimulating microbial life. | $28 - $35 / Quart | Medium-High |
| Calcium Sulfate (Pelletized Gypsum) | Calcium displaces sodium and improves soil flocculation, aiding in deep water drainage. | $18 - $25 / 40lb Bag | Medium |
| Baking Soda (Sodium Bicarbonate) | Attempts to neutralize pH (which is unnecessary) while introducing toxic sodium to roots. | $5 / Box | Harmful (Avoid) |
Phase 3: Reseeding the Burn Patch
Once the soil has been flushed and treated, you can proceed with physical lawn repair. The University of Minnesota Extension recommends precise seed-to-soil contact for successful bare spot renovation.
Step-by-Step Seeding Procedure
- Debride the Area: Use a steel thatch rake to aggressively scratch the soil surface within the dead patch. Remove all dead, yellowed grass blades and loosen the top 1/4 inch of soil.
- Select the Right Cultivar: Not all grasses handle nitrogen spikes equally. Tall fescue (e.g., 'Titan Ultra' or 'RTF') and perennial ryegrass exhibit the highest natural tolerance to dog urine. Avoid fine fescues, which are highly susceptible to salt burn.
- Sow at High Density: Apply seed at a rate of 10 to 12 seeds per square inch. Over-seeding the patch compensates for the slightly elevated residual salts that may still inhibit some germination.
- Topdress and Tamp: Cover the seed with a 1/8-inch layer of screened peat moss or fine compost. This retains moisture and protects the seed from birds. Walk over the patch or use a hand tamper to ensure firm seed-to-soil contact.
- Moisture Management: Water the patch lightly 2 to 3 times daily for the first 14 days. The goal is to keep the top 1/4 inch of soil consistently damp, not saturated, until the seedlings reach 2 inches in height.
Preventative Lawn Maintenance Protocols
Repairing spots is labor-intensive. Implementing proactive management strategies will drastically reduce the number of burn patches you need to fix each season. The American Kennel Club notes that dietary and behavioral adjustments are the most effective long-term solutions for turf preservation.
Dietary Hydration Adjustments
The concentration of urea in urine is directly tied to the dog's hydration levels. Adding water to your dog's dry kibble or switching to a wet-food diet increases their overall fluid intake, naturally diluting the nitrogen concentration in their urine. Avoid over-the-counter 'lawn-saving' dietary supplements that contain DL-Methionine; these alter urine pH and can contribute to dangerous urinary tract stones in canines without actually preventing nitrogen burns.
Establishing a Designated Potty Zone
Training your dog to use a specific, non-turf area is the ultimate fix. Construct a 4x4 foot or 4x8 foot designated zone in a discreet corner of your yard. Fill it with materials that drain rapidly and do not show staining:
- Washed pea gravel (3/8-inch size)
- Cedar or cypress mulch (avoid cocoa bean mulch, which is highly toxic to dogs)
- Artificial turf with a permeable crushed granite sub-base
Warning on Tomato Juice: A persistent internet myth suggests feeding dogs tomato juice to prevent lawn burns. This is entirely false. Tomato juice is high in sodium and does not alter the nitrogen content of the urine. Ingesting high-sodium liquids can lead to excessive thirst, increased urination volume, and potential cardiovascular strain in older dogs.
Troubleshooting Common Repair Failures
If your reseeded patches are failing to germinate or are dying shortly after sprouting, diagnose the issue using this framework:
- Seed Germinates Then Immediately Yellows: The soil was not flushed adequately. Residual urea salts are burning the delicate new root tips. Halt fertilization, apply 3 gallons of water daily for a week, and reseed.
- Seed Fails to Germinate Entirely: The topdressing was applied too thick (over 1/4 inch), blocking sunlight, or the soil surface was allowed to dry out during the critical 14-day germination window.
- Weeds Outcompete the Grass: Bare, nitrogen-rich soil is a prime germination bed for crabgrass and spurge. Apply a pre-emergent herbicide specifically labeled as safe for new seedlings (such as Tenax / mesotrione) immediately after seeding to protect the vulnerable turf.
By addressing the root chemical cause of the damage and following precise agronomic repair steps, you can maintain a dense, resilient lawn that coexists successfully with your pets.

