
Lawn Care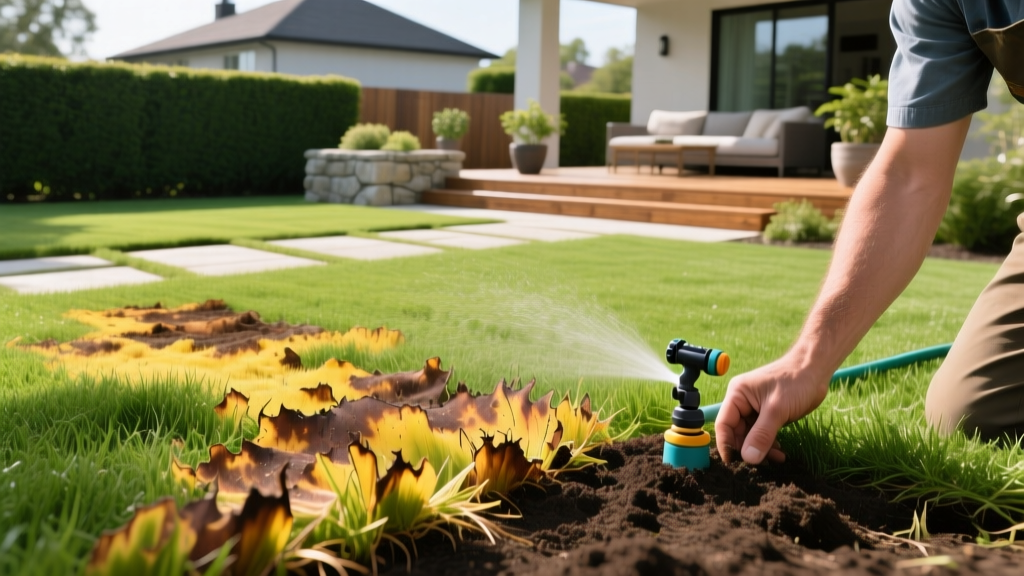
How to Fix a Fertilizer Burn Lawn: Step-by-Step Guide
The Science Behind Fertilizer Burn: Osmotic Stress
When homeowners accidentally burn lawn grass, the damage is rarely caused by heat or chemical toxicity in the traditional sense. Instead, it is driven by osmotic stress. Synthetic fertilizers—particularly quick-release nitrogen sources like urea (46-0-0) or ammonium sulfate (21-0-0)—dissolve into highly concentrated soluble salts in the soil. When the salt concentration in the soil exceeds the concentration inside the grassroots, water is violently drawn out of the plant tissue to balance the osmotic pressure. The result is rapid dehydration, manifesting as yellowing, browning, and crispy leaf tips, often in distinct streaks that mirror your spreader's wheel tracks.
Recovering a burned lawn requires a precise, multi-step protocol focused on soil chemistry and root hydration, not just throwing more water and seed at the problem. Below is the exact maintenance procedure used by turfgrass professionals to reverse salt injury and restore canopy density.
Diagnostic Matrix: Is It Fertilizer Burn, Fungus, or Drought?
Before initiating the leaching process, confirm the diagnosis. Misidentifying brown patch fungus or chinch bug damage as fertilizer burn will lead to improper watering that exacerbates fungal pathogens. Use this diagnostic matrix to verify the root cause.
| Condition | Visual Symptoms | Timeline & Triggers | Soil & Root Clues |
|---|---|---|---|
| Fertilizer Burn | Yellow/brown streaks, tip dieback, uniform browning in overlap zones. | Appears 1 to 4 days after application; worsens in high heat. | White salt crusts on soil surface; soil smells acidic or metallic. |
| Brown Patch Fungus | Circular patches (1-5 ft wide), dark smoke rings on margins, lesions on blades. | Develops during 70°F+ nights with high humidity and prolonged leaf wetness. | Soil moisture is high; roots remain white and firm; thatch is damp. |
| Drought Stress | Overall dulling, bluish-gray hue, persistent footprints (lack of turgor pressure). | Gradual onset over 7-14 days of zero precipitation and high evapotranspiration. | Soil is hydrophobic or cracked; roots are dry but not chemically burned. |
| Dog Urine Spots | Distinct 6-12 inch brown dead centers surrounded by a dark green 'halo' ring. | Randomly distributed; correlates with pet traffic patterns. | Localized nitrogen spike; soil pH is highly alkaline in the center. |
Step-by-Step Recovery Protocol for Salt Injury
Step 1: Aggressive Soil Leaching (Days 1-3)
The immediate priority is to dilute and flush the excess soluble salts below the root zone (typically 6 to 8 inches deep). Standard irrigation is insufficient; you must calculate the exact volume required for leaching.
- The Math: One inch of water equals 0.62 gallons per square foot. To effectively leach salts from the top 6 inches of loam soil, you need to apply approximately 1.5 to 2 inches of water.
- The Execution: For a 1,000-square-foot burned zone, you must apply roughly 930 to 1,240 gallons of water. Do not apply this all at once, or you will cause severe surface runoff and nutrient pollution into local waterways.
- The Schedule: Run your irrigation system for 30-45 minutes, three times a day (morning, early afternoon, late evening), allowing the water to percolate between cycles. Continue this aggressive leaching for 72 hours.
Step 2: Cation Exchange and Salt Displacement (Day 4)
Water alone cannot always displace sodium and tightly bound ammonium ions from the soil's cation exchange sites. To force these salts out of the soil matrix, apply Pelletized Gypsum (Calcium Sulfate).
According to UMass Amherst turfgrass specialists, calcium ions in gypsum will trade places with sodium and excess ammonium on the soil clay particles, allowing the harmful salts to be flushed away by subsequent watering. Apply gypsum at a rate of 40 lbs per 1,000 square feet using a broadcast spreader. Water it in lightly (0.25 inches) to activate the dissolution process.
Step 3: Crown Vitality Assessment and Core Aeration (Day 7)
After the soil has been flushed and buffered, assess the damage. Perform the "tug test" on the brown grass. If the grass resists pulling, the crown and roots are still alive, and the plant will push new tillers from the basal meristem once the salt stress is gone. If the grass pulls up effortlessly with shallow, blackened roots, the crown is dead.
For dead zones larger than a dinner plate, mechanical intervention is required:
- Rent a Core Aerator: Pull 3-inch deep plugs on 3-inch centers across the damaged area. This relieves soil compaction caused by heavy leaching and creates direct channels for new seed-to-soil contact.
- Top-Dress: Apply a 1/4-inch layer of screened compost or peat moss over the aerated area to retain moisture for germination.
Step 4: Strategic Overseeding (Day 8)
When reseeding a burn lawn, do not use standard starter fertilizers. The soil already has an artificial surplus of nitrogen and phosphorus from the initial burn event. Adding more will shock the delicate new seedlings.
- Seed Selection: Choose a premium, uncoated seed blend matched to your existing turf. Coated seeds often contain starter fertilizers and fungicides that can further alter the recovering soil chemistry.
- Application Rates: Apply Kentucky Bluegrass at 2 lbs per 1,000 sq ft, or Tall Fescue at 6 to 8 lbs per 1,000 sq ft.
- Germination Watering: Shift from deep leaching to frequent, shallow watering. Keep the top 1 inch of soil consistently moist (watering 3-4 times daily for 5 minutes) until seedlings reach 2 inches in height.
⚠️ CRITICAL MAINTENANCE WARNING
Never mow a recovering burn lawn below 3 inches. Reduced leaf surface area limits the plant's ability to photosynthesize and generate the carbohydrates needed to rebuild damaged root systems. Furthermore, do not apply any post-emergent herbicides (like 2,4-D or Quinclorac) for at least 4 weeks post-recovery, as the turf's vascular system is too compromised to metabolize the chemicals safely.
Prevention Framework: Spreader Calibration and Product Selection
As noted by the University of Minnesota Extension, the most common cause of fertilizer burn is overlapping spreader passes and the use of high-salt-index synthetic nitrogen in peak summer heat. Implement these preventative protocols:
1. Calibrate Your Spreader
Spreader dials are notoriously inaccurate across different granule sizes. To calibrate your Scotts EdgeGuard or Lesco rotary spreader:
- Weigh out exactly 2 pounds of your chosen fertilizer.
- Mark a 1,000-square-foot test area on your driveway (e.g., 20 ft x 50 ft).
- Set the dial to the manufacturer's recommended setting and walk the area at a consistent 3 MPH pace.
- Weigh the remaining fertilizer. If you have more than 0.2 lbs left, increase the dial by 0.5. If you ran out before finishing the area, decrease the dial by 0.5.
2. Switch to Low-Salt-Index, Slow-Release Nitrogen
If you maintain your lawn during July or August, abandon quick-release urea. Transition to methylene urea (MU), isobutylidene diurea (IBDU), or organic options like Milorganite (5-2-0). These products rely on microbial activity and soil temperature to release nitrogen slowly, keeping the soil's osmotic pressure stable and virtually eliminating the risk of burning, even if you accidentally overlap a pass.
💰 Cost Analysis: Recovery vs. Prevention (per 5,000 sq ft)
Understanding the financial impact of fertilizer burn highlights the value of proper calibration and product selection.
- Cost to Fix a Severe Burn: $185 - $240 (Includes $85 core aerator rental, $45 for 200 lbs of gypsum, $60 for premium uncoated seed and peat moss, plus 15 hours of manual labor and excess water utility costs).
- Cost of Prevention: $35 - $50 (Upgrading to a high-quality slow-release methylene urea fertilizer and spending 20 minutes calibrating your spreader on the driveway before application).
Frequently Asked Questions
Will grass grow back after fertilizer burn?
Yes, if the crown (the white, fleshy base of the grass plant at the soil line) is still alive. The leaching and gypsum protocol outlined above will reduce soil salinity, allowing the dormant crown to push new tillers within 10 to 14 days. If the crown is brittle and brown all the way through, the tissue is necrotic and must be overseeded.
Can I use sugar to fix a burned lawn?
While applying sugar (at a rate of 1 lb per 1,000 sq ft) is a popular internet myth claiming to stimulate microbial breakdown of excess nitrogen, it is largely ineffective for acute osmotic burn. Sugar feeds soil bacteria, but it does not displace the soluble salts causing the immediate dehydration. Stick to aggressive water leaching and calcium sulfate (gypsum) for chemical displacement.
How long does it take for a burn lawn to recover?
Mild tip-burn (where only the top 1/3 of the blade is brown) will recover in 7 to 10 days as you mow off the damaged tissue and the plant resumes normal growth. Severe burns that cause complete canopy browning but leave the crown alive will take 3 to 4 weeks of consistent watering and flushing to show visible green regrowth.

