
Lawn Care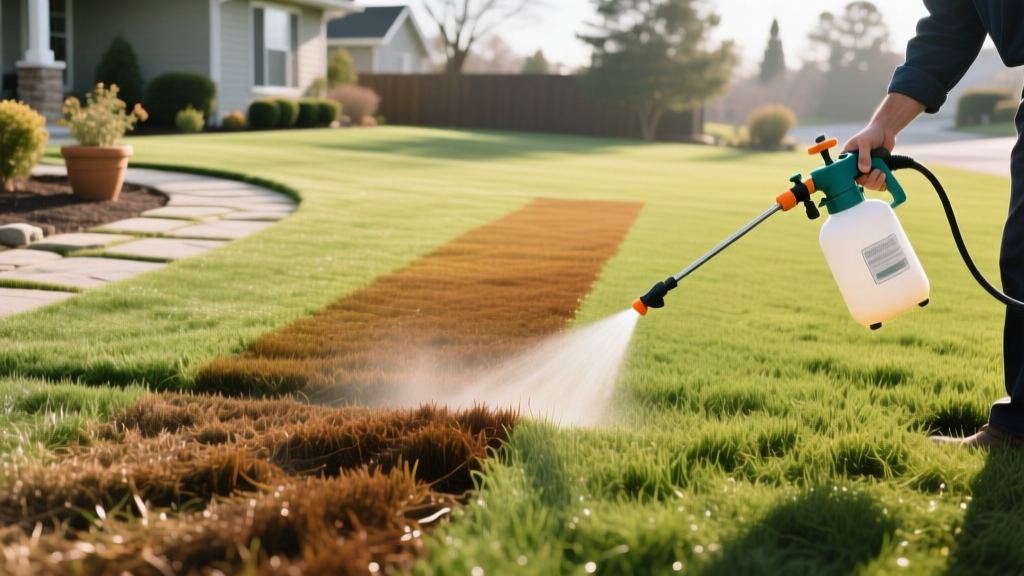
Step-by-Step Guide to Applying Grass Dye for Dormant Winter Lawns
The Economics and Ecology: Turf Colorant vs. Winter Overseeding
For homeowners managing warm-season grasses like Bermuda, Zoysia, or St. Augustine, winter dormancy brings an unavoidable aesthetic challenge: a lawn that turns straw-brown for three to five months. Historically, the solution was overseeding with annual ryegrass. However, applying a professional-grade grass dye (technically known as a turf colorant or pigment) has become the superior agronomic choice. According to turfgrass researchers at the University of Arizona Turfgrass Research program, painting dormant turf eliminates the massive water requirements, soil compaction, and spring transition damage associated with winter overseeding.
Before mixing your first batch, it is critical to understand the operational differences between these two maintenance procedures. The following matrix breaks down the real-world costs and labor inputs for a standard 5,000-square-foot residential lawn.
| Metric | Winter Overseeding (Ryegrass) | Grass Dye Application (Colorant) |
|---|---|---|
| Material Cost | $120 - $180 (Seed, starter fertilizer) | $90 - $160 (1 Gallon premium concentrate) |
| Water Usage | 1,500+ gallons (germination phase) | 0 gallons (requires completely dry turf) |
| Labor Time | 8-12 hours (scalping, seeding, watering) | 2-3 hours (mowing, blowing, spraying) |
| Spring Transition | High stress (ryegrass competes with base turf) | Zero stress (pigment naturally degrades) |
| Longevity | 4-5 months | 2-4 months (depends on UV and foot traffic) |
Selecting the Right Pigment: Color Theory for Dormant Turf
The term 'grass dye' is often used interchangeably with turf paint, but chemically, you are looking for a water-based polymeric pigment. Cheap, consumer-grade dyes often rely on heavy blue or green food-coloring bases. When applied to dormant Bermuda grass—which naturally fades to a yellowish-straw hue—blue pigments mix with the yellow background to create an unnatural, muddy teal or 'Smurf blue' appearance.
Expert Color Theory Rule: Always select a turf colorant formulated with yellow and brown oxide undertones. Premium products like Geoponics Endurant Premium or Green Lawnger use specialized iron oxides that neutralize the yellow in dormant grass, resulting in a deep, natural emerald green. Expect to pay between $140 and $170 per gallon for commercial-grade concentrates in 2026, which is sufficient to cover 5,000 to 7,000 square feet depending on your dilution ratio.
Guidelines from Texas A&M AgriLife Extension emphasize that pigment particle size dictates longevity. Look for products that specify 'nano-particle' or 'micro-fine' formulations, as these penetrate the leaf cuticle rather than simply sitting on the surface where they will rub off on shoes and pet paws.
Pre-Application Protocol (72 Hours Out)
Proper preparation dictates 80% of your final result. Grass dye will not adhere properly to wet, overgrown, or debris-covered leaf blades.
- Day 1: The Scalp and Edge. Mow your dormant lawn slightly lower than your summer height. For Bermuda, drop the deck to 1.5 inches; for Zoysia, aim for 2 inches. This removes the frayed, split tips of the dormant blades where pigment tends to pool and look unnatural. Edge your hardscapes to create a crisp boundary line.
- Day 2: Debris Eradication. Use a commercial-grade backpack blower to remove every leaf, twig, and acorn. Any organic matter left on the turf will absorb the dye, leaving obvious brown spots when the debris eventually blows away.
- Day 3: Moisture Fasting. Do not irrigate. The turf must be bone-dry. If morning dew is heavy, wait until 11:00 AM to begin your application. Applying pigment to damp grass causes the water droplets to dilute the dye on contact, leading to severe streaking.
Step-by-Step Grass Dye Application Procedure
To achieve a uniform, professional finish, you must use the correct spray equipment. The Golf Course Superintendents Association of America (GCSAA) notes that rotary nozzles are unacceptable for turf painting; you must use a flat fan nozzle to ensure an even, overlapping spray pattern.
- Calibrate the Sprayer: Fill a 4-gallon backpack sprayer with clean water. Install a TeeJet 8002 VS or 8003 VS flat fan nozzle. Pump the sprayer to exactly 40 to 50 PSI. Higher pressure creates fine mist that drifts onto your house siding; lower pressure produces heavy droplets that cause blotching.
- Mix the Solution: For heavily dormant, straw-colored grass, use a 1:10 dilution ratio (1 part dye to 10 parts water). For lightly dormant or transitional grass, a 1:15 ratio is sufficient. Pour the water in first, then add the grass dye concentrate, and agitate the tank vigorously for 60 seconds.
- Establish a Walking Pace: Maintain a steady walking speed of exactly 3 miles per hour. Use a metronome app on your phone if necessary—consistency in pace is what prevents dark overlapping bands.
- Execute the Overlap Pattern: Spray in straight lines, using your wheel tracks or a guide rope as a reference. Overlap each pass by exactly 50%. The flat fan nozzle is designed to lay down a heavy center and a light edge; the 50% overlap ensures the light edges blend into a uniform solid color.
- Cut in the Edges: Switch to a handheld 1-gallon pump sprayer with a cone nozzle to carefully paint the perimeter edges along driveways and flower beds, preventing overspray onto concrete.
Troubleshooting Common Pigment Failures
Even experienced landscapers encounter application anomalies. Here is how to diagnose and fix the three most common grass dye failures:
1. The 'Tiger Stripe' Effect (Severe Streaking)
Cause: Inconsistent walking speed or failure to overlap by a full 50%. It can also occur if the sprayer pressure drops below 30 PSI as the tank empties.
Fix: Wait 24 hours for the initial coat to cure. Mix a half-strength batch (1:20 ratio) and spray perpendicular to your original passes to fill in the light streaks without darkening the heavy bands.
2. Concrete and Hardscape Staining
Cause: Wind drift or failure to cut in edges manually.
Fix: Act within 15 minutes. Polymeric pigments bind rapidly to porous surfaces. Scrub the concrete immediately with a stiff-bristle brush and a solution of warm water and trisodium phosphate (TSP). Once the dye cures for 24 hours, it becomes UV-stable and nearly impossible to remove without a pressure washer and bleach solution.
3. Premature Fading and Rub-Off
Cause: Applying the dye when the ambient temperature was below 50°F (10°C), which prevents the polymer binders from cross-linking and curing to the leaf cuticle.
Fix: Always check the 48-hour weather forecast. The temperature must remain above 50°F during application and for 12 hours post-application to allow proper chemical curing.
Curing, Rainfastness, and Longevity
Once the application is complete, the grass dye requires a minimum of 4 to 6 hours of direct sunlight and dry conditions to become 'rainfast.' During this curing window, keep all foot traffic, pets, and irrigation off the lawn. If a dog runs across the lawn two hours after spraying, you will see distinct paw prints where the uncured pigment has transferred to their fur.
When properly applied to fully dormant turf, a high-quality polymeric grass dye will maintain its vibrant green color for 60 to 120 days. The pigment does not wash away with rain; rather, it slowly degrades through UV photodegradation and mechanical wear from foot traffic. As your warm-season grass naturally breaks dormancy and begins pushing new, naturally green leaf blades in the spring, the remaining pigment will seamlessly blend with the new growth, requiring no aggressive dethatching or transition management.

