Lawn Care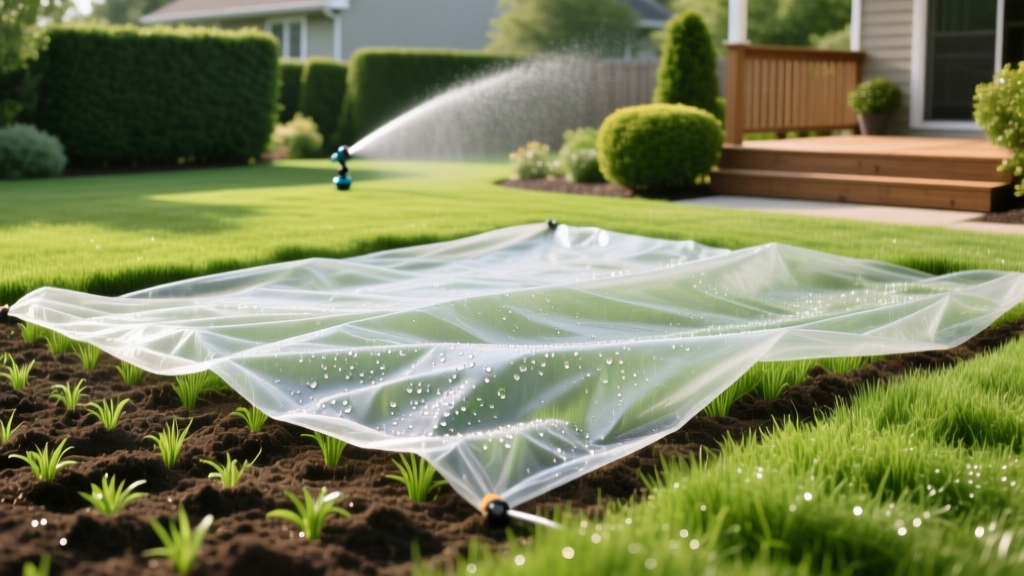
How to Use a Grass Tarp for Turf Protection and Seed Germination
The Dual Purpose of a Grass Tarp in Lawn Maintenance
In professional lawn renovation and routine maintenance, a grass tarp serves two distinct, highly specialized functions: protecting established turf from material staging damage, and accelerating seed germination through microclimate manipulation. Misidentifying these use cases—or using the wrong tarp material for the job—is the leading cause of turf death and seed failure during DIY and contractor-led landscaping projects.
According to the UC Davis Turfgrass Program, soil compaction and canopy smothering are the primary threats to existing lawns during hardscaping renovations. Conversely, when establishing new turf, moisture retention and temperature regulation dictate germination success. This guide details the exact step-by-step procedures for deploying both heavy-duty protection tarps and breathable germination tarps, including material specifications, anchoring physics, and 2026 cost benchmarks.
⚠️ Critical Warning: Heavy Equipment Staging
Never use a standard grass tarp to drive heavy machinery (skid steers, mini-excavators) over a lawn. A 16 oz PVC tarp prevents friction burns and fluid leaks, but it does not distribute point-loads. Driving a 3,000 lb track loader over a tarp will still compress the soil profile to 200+ PSI, destroying soil macropores and killing the root zone. Always pair a protective tarp with composite track mats for heavy equipment.
Procedure 1: Deploying a Grass Tarp for Material Staging
When dumping topsoil, stacking pavers, or staging gravel near an established lawn, a heavy-duty grass tarp prevents canopy smothering, chemical burns from masonry dust, and localized soil compaction from static loads.
Step 1: Calculate Load and Select Material
For static material staging (e.g., pallets of retaining wall blocks or piles of mulch), you must use a 16 oz to 22 oz PVC-coated polyester tarp. Cheap 6-mil polyethylene tarps from big-box stores will tear under the abrasive edges of pavers and degrade under UV exposure within 14 days. A 16 oz PVC tarp costs between $1.20 and $1.80 per square foot in 2026, but it offers a 5-year lifespan and high puncture resistance.
Step 2: Prep the Turf Canopy
Before deployment, mow the target lawn area to exactly 2.5 inches. If the grass is too tall, the weight of the tarp and staged materials will bend the blades, creasing the vascular tissue and causing localized necrosis. If mowed too short, the tarp will rest directly on the soil crown, trapping excess heat. Apply a liquid kelp or seaweed extract (at 3 oz per 1,000 sq ft) 24 hours prior to tarping to boost the turf's natural stress tolerance.
Step 3: Anchor with 11-Gauge Sod Staples
Standard U-stakes (typically 14-gauge) will pull out under wind shear when a large tarp acts as a sail. Use 18-inch, 11-gauge steel sod staples. Drive a staple every 4 feet along the perimeter, and place additional staples in a grid pattern across the center of the tarp if the staged materials will be shifted or dragged. Ensure the tarp is pulled taut; wrinkles will pool water and create anaerobic pockets on the grass below.
Procedure 2: Using a Germination Grass Tarp for Overseeding
A germination tarp (often called a seed blanket or turf growth cover) is fundamentally different from a protection tarp. It must be breathable, lightweight, and UV-stabilized. The goal is to trap soil moisture and raise the ambient temperature by 5°F to 10°F, creating an ideal greenhouse effect for cool-season grasses like Tall Fescue and Kentucky Bluegrass. Penn State Extension notes that maintaining consistent seed-to-soil moisture is the single most critical factor in preventing seed dormancy and washout.
Material Selection: Why Mesh Over Solid Poly?
Never use a solid poly tarp for seed germination. Solid plastics block gas exchange, suffocating the soil microbiome and creating a high-humidity environment that breeds Pythium blight and other destructive fungal pathogens. Instead, use a 3 oz to 4 oz breathable polypropylene mesh tarp (often sold as 30% shade cloth or specialized germination fleece). This material allows 70% light penetration and 100% water permeability while blocking wind desiccation.
Comparative Analysis: Germination Tarp vs. Traditional Mulches
| Establishment Method | Cost (per 1,000 sq ft) | Labor Time | Moisture Retention | Weed Seed Risk |
|---|---|---|---|---|
| Breathable Germination Tarp | $150 - $180 | 45 mins | 95% | 0% |
| Certified Weed-Free Straw | $40 - $60 | 90 mins | 60% | 15% (if uncertified) |
| Hydromulch (Wood/Paper) | $250 - $350 | 30 mins | 80% | 2% |
Step-by-Step Germination Deployment
- Grade and Seed: Prepare the soil bed, sow your seed at the manufacturer's recommended rate (e.g., 8 lbs per 1,000 sq ft for Tall Fescue), and apply a starter fertilizer high in phosphorus (like a 10-18-10 NPK).
- Initial Watering: Water the bare soil deeply to a 4-inch depth before laying the tarp. This prevents the dry mesh from wicking moisture away from the seed bed upon initial contact.
- Drape and Overlap: Roll out the 3 oz polypropylene germination tarp. If covering a large area, overlap adjacent tarps by at least 12 inches to prevent wind from getting underneath and peeling the cover back.
- Perimeter Anchoring: Secure the edges with 6-inch landscape staple pins every 3 feet. Do not anchor the center of the tarp; allow it to float slightly above the soil so the emerging grass blades do not become entangled in the mesh weave.
- Water Through the Mesh: Irrigate directly through the tarp. The polypropylene mesh will disperse the water droplets, preventing soil erosion and seed displacement while maintaining the required surface moisture.
Common Failure Modes and Troubleshooting
Even with correct materials, improper execution leads to turf damage. Monitor for these specific failure modes:
- Etiolation (Spindly Growth): If a germination tarp is left on too long after the seed sprouts, the grass will stretch rapidly to find light, resulting in weak, pale blades. Fix: Remove the tarp the moment 80% of the seedlings reach the one-leaf stage (typically 7-10 days for cool-season grasses).
- Wind Shear Tear-Outs: Tarps deployed on sloped lawns often rip at the staple points during high winds. Fix: Reinforce staple holes by placing a 2-inch square of heavy duct tape or a specialized tarp grommet patch over the area before driving the staple through both the patch and the tarp.
- Thermal Burn on Protection Tarps: Dark green or black PVC tarps left in direct summer sun can reach surface temperatures of 140°F, baking the grass underneath. Fix: For summer staging, use white or reflective silver-coated tarps, and remove the tarp within 48 hours of material clearing to allow the turf canopy to resume photosynthesis.
2026 Sourcing and Cost Guide
Sourcing the correct grass tarp requires looking beyond standard hardware stores. For heavy-duty 16 oz PVC protection tarps, commercial landscaping suppliers and specialized online retailers (such as Tarps Now or MyTee Products) offer custom-cut sizes that eliminate the need for overlapping. Expect to pay $1.40 per square foot for a custom 20x30 ft PVC tarp with reinforced brass grommets.
For 3 oz breathable germination tarps, agricultural supply stores and hydroponic retailers carry the widest selection of UV-stabilized polypropylene meshes. Standard 15x50 ft rolls typically cost between $110 and $140. When storing these tarps for future seasons, clean them with a mild bleach solution (1 part bleach to 10 parts water) to kill fungal spores, and store them in a climate-controlled environment to prevent UV degradation and rodent damage. Properly maintained, a high-quality germination tarp will last for 4 to 6 overseeding seasons, making it a highly cost-effective alternative to single-use straw mulch.
By matching the exact material weight and weave to your specific lawn maintenance procedure, you eliminate the variables that cause turf loss and seed failure, ensuring a predictable, professional-grade result.