
Lawn Care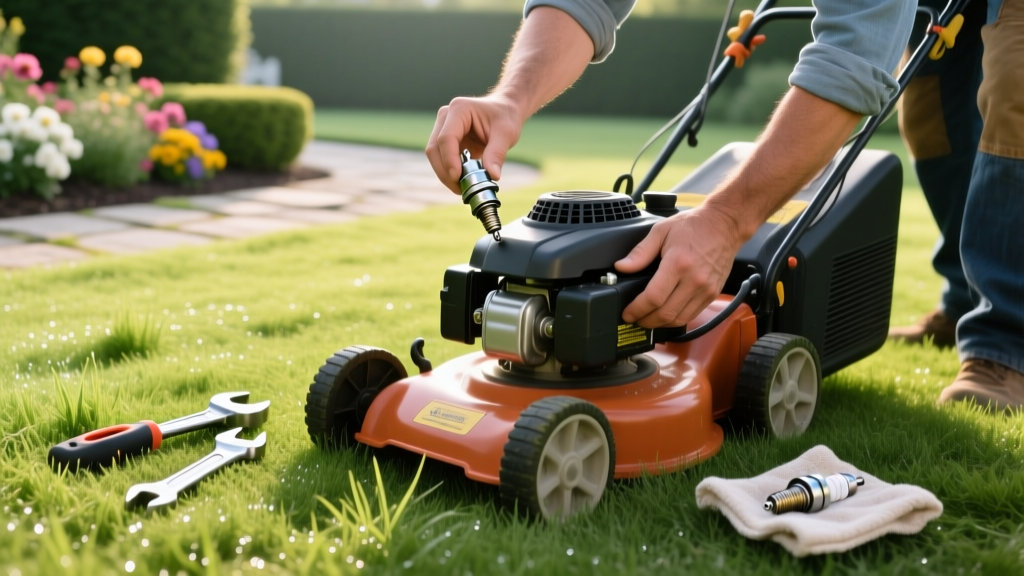
How to Change the Spark Plug in a Lawn Mower: Expert DIY Guide
The Hidden Culprit Behind Hard Starts
When a walk-behind or riding lawn mower refuses to start, sputters under load, or burns through fuel inefficiently, the ignition system is the first place to look. According to small engine repair technicians, nearly 80% of starting failures in carbureted and EFI mowers trace back to either degraded fuel or a failing spark plug. Learning how to change the spark plug in a lawn mower is a foundational maintenance skill that costs less than $15 in parts and takes under twenty minutes, yet it restores peak combustion efficiency and prevents carbon buildup in the cylinder head.
Modern small engines operate under extreme thermal stress. A typical walk-behind mower engine runs at 3,000 to 3,600 RPM, generating combustion chamber temperatures that can exceed 1,200°F. Over a standard 50-hour mowing season, the center electrode of a standard copper-core plug erodes, widening the gap and forcing the magneto or ignition coil to work harder. This results in a weak, inconsistent spark that fails to fully ignite the air-fuel mixture.
Diagnostic Check: Replace vs. Clean
Before purchasing a replacement, pull the existing plug and inspect the firing tip. If the electrode is coated in dry, black soot, the engine is running rich (too much fuel), and cleaning the plug with a wire brush and compressed air might suffice temporarily. However, if the porcelain insulator is cracked, the electrode is melted, or the gap measures wider than 0.040 inches, immediate replacement is mandatory. A wet, oily plug indicates worn piston rings or a blown head gasket, requiring deeper engine teardowns beyond a simple plug swap.
Required Tools and Exact Part Numbers
Using the correct tools prevents catastrophic damage to the cylinder head threads, which are typically cast aluminum and highly susceptible to stripping. Gather the following equipment before beginning:
- Spark Plug Socket: Most walk-behind mowers require a 5/8-inch (16mm) spark plug socket with a built-in rubber isolator. Larger riding mowers and some commercial zero-turns may require a 13/16-inch (21mm) socket.
- Feeler Gauge: A standard blade-type gauge to measure the electrode gap precisely.
- Wire Brush and Compressed Air: For cleaning debris away from the spark plug well before extraction.
- Dielectric Grease: A small tube of silicone-based grease to protect the boot from moisture and heat.
- Replacement Spark Plug: Always match the exact OEM specification. Common industry standards include the NGK BPR5ES (standard for Honda GCV160/GCV190 engines) and the Champion RJ19LM (the default for most flathead Briggs & Stratton 500cc to 725cc engines). Expect to pay between $4.00 and $9.00 per plug at local hardware stores.
Step-by-Step Spark Plug Replacement
- Disable the Ignition System (Safety Critical): Never work on the ignition system with the spark plug wire attached. The flywheel magneto can generate a lethal shock or cause the engine to kick back if the blade is bumped. Disconnect the black rubber spark plug boot by gripping the base of the boot—never pull by the wire itself, as this will snap the internal carbon core. Tuck the wire away from the plug well.
- Purge the Spark Plug Well: Use compressed air or a handheld blower to clear grass clippings, dirt, and chaff from the base of the spark plug. If debris falls into the cylinder head when the plug is removed, it will cause severe scoring on the cylinder walls during the next compression stroke.
- Extract the Old Plug: Seat the 5/8-inch spark plug socket firmly over the porcelain insulator. Attach a 3/8-inch drive ratchet. Turn counterclockwise with steady pressure. If the plug is seized due to carbon locking, apply a few drops of penetrating oil (like PB Blaster) to the base threads and wait 15 minutes. Do not use excessive force, or the plug stem will snap off inside the head.
- Gap the New Plug: Even if the packaging claims the plug is 'pre-gapped,' always verify. Insert the 0.030-inch blade of your feeler gauge between the center and ground electrodes. It should slide through with a slight drag. If the gap is too wide, gently tap the ground electrode against a wooden block to close it. If too narrow, use the gap tool's bending notch to pry it open.
- Thread and Torque the New Plug: Apply a microscopic drop of anti-seize compound to the upper threads only (keep it away from the firing tip to prevent pre-ignition). Thread the new plug in entirely by hand to avoid cross-threading the soft aluminum head. Once hand-tight, use the ratchet to torque it down. For gasket-seat plugs, tighten an additional 1/2 to 2/3 turn after the gasket contacts the head. For taper-seat plugs, tighten 1/16 turn past hand-tight. Target torque is generally 15 to 20 ft-lbs.
- Reconnect the Boot: Apply a thin film of dielectric grease inside the rubber boot to prevent moisture intrusion and make future removal easier. Push the boot onto the terminal until you feel and hear a distinct click.
OEM Spark Plug Gap and Torque Matrix
Referencing the correct specifications for your specific engine block is vital. The table below outlines the factory defaults for the most common residential and commercial mower engines in 2026.
| Engine Brand | Common Model Series | Standard Plug Model | Gap Spec | Thread Size |
|---|---|---|---|---|
| Briggs & Stratton | Quantum / Intek (OHV) | Champion RC12YC | 0.030 in | 14mm x 1.25 |
| Honda | GCV160 / GCV190 | NGK BPR5ES | 0.028 - 0.031 in | 14mm x 1.25 |
| Kawasaki | FR / FS Series (ZTR) | NGK BKR5E-11 | 0.039 - 0.043 in | 14mm x 1.25 |
| Kohler | Courage / Command | Champion RC12YC | 0.030 in | 14mm x 1.25 |
For comprehensive maintenance schedules and official part cross-references, always consult the Briggs & Stratton Support portal or your specific engine manufacturer's documentation.
Troubleshooting Common Installation Failures
Even with careful execution, post-installation issues can arise. Use this decision matrix to diagnose problems immediately after changing the plug.
- Symptom: Engine cranks but backfires through the carburetor.
Cause: Spark plug gap is too wide, causing the spark to blow out under high compression, or the ignition timing is disrupted by a damaged flywheel key.
Fix: Re-check the gap with a feeler gauge. If correct, inspect the flywheel keyway for shearing. - Symptom: Mower starts but idles roughly and emits black smoke.
Cause: The spark plug heat range is too cold for the engine, leading to rapid carbon fouling, or the choke is stuck closed.
Fix: Verify you installed the correct heat range plug (e.g., a '5' in NGK nomenclature is standard; a '6' or '7' runs colder and will foul in low-RPM mowing applications). - Symptom: Visible arcing or snapping sounds near the plug wire while running.
Cause: Carbon tracking inside the rubber boot or a cracked porcelain insulator causing voltage to leak to the engine block.
Fix: Replace the spark plug wire/boot assembly immediately. Running with an arcing wire will eventually destroy the ignition coil.
Extending Plug Life: Fuel and Storage Protocols
The lifespan of a lawn mower spark plug is directly tied to the quality of the fuel being burned. Standard E10 pump gas (10% ethanol) attracts moisture from the atmosphere, leading to phase separation and corrosive byproducts that coat the spark plug electrodes in a white, crusty residue. This dielectric barrier forces the ignition coil to output higher voltage, eventually burning out the coil windings.
To maximize the interval between spark plug changes, transition to ethanol-free recreational fuel (REC-90) or treat standard pump gas with a marine-grade fuel stabilizer like STA-BIL 360 Marine. This prevents the varnish and gum deposits that physically bridge the spark plug gap during winter storage.
Furthermore, always run the engine for five minutes after adding treated fuel to ensure the stabilized mixture reaches the carburetor bowl and the combustion chamber. For end-of-season winterization, fogging the cylinder through the spark plug hole with a dedicated fogging oil coats the piston rings and the spark plug threads, preventing galvanic corrosion between the steel plug shell and the aluminum cylinder head. By integrating these fuel management practices, a high-quality iridium or platinum-tipped spark plug can easily exceed 300 hours of runtime before requiring adjustment or replacement.
For further reading on optimizing small engine longevity and evaluating modern battery-electric alternatives that eliminate spark plug maintenance entirely, refer to the latest testing data from Consumer Reports Lawn Mower Guides.

