Lawn Care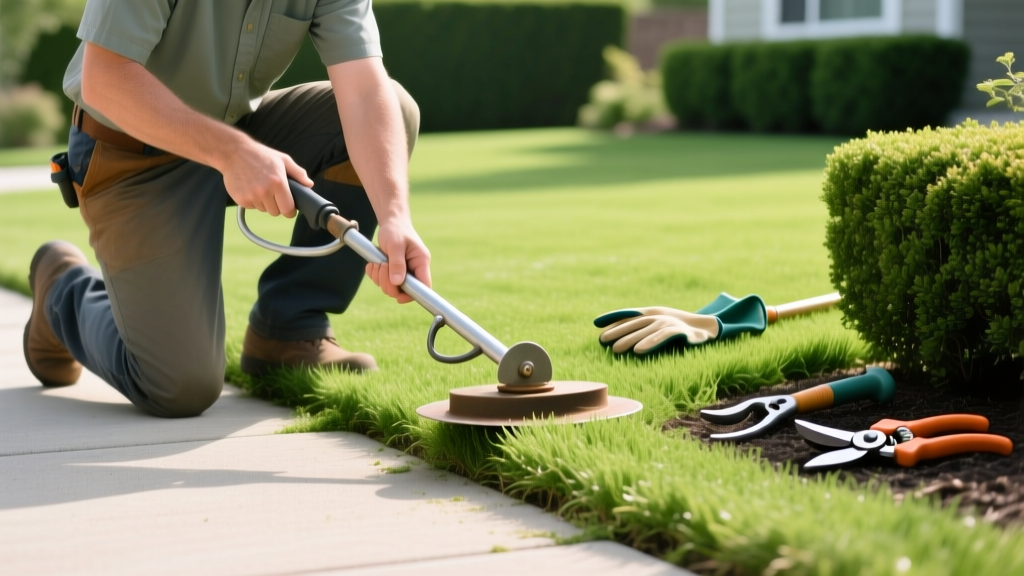
How to Do Edging: A Step-by-Step Lawn Maintenance Guide
The Anatomy of a Perfect Lawn Edge
Understanding how to do edging correctly requires distinguishing it from trimming. Trimming removes horizontal grass overgrowth; edging creates a vertical, physical barrier between your turf and adjacent surfaces like driveways, sidewalks, and mulch beds. A properly executed edge severs invasive rhizomes, prevents mulch migration, and establishes the sharp architectural lines that define professional landscaping.
According to University of Minnesota Extension, consistent edging not only improves aesthetic curb appeal but also reduces the time spent manually pulling weeds from hardscape cracks. This step-by-step procedure details the exact tools, depths, and angles required to establish and maintain a permanent landscape boundary.
Tool Selection Matrix: Matching Equipment to Terrain
Selecting the wrong tool is the primary cause of ragged edges and wasted labor. The matrix below breaks down the optimal equipment based on your lawn size, soil composition, and border types.
| Tool Type | Top Model (2026) | Est. Cost | Best Application |
|---|---|---|---|
| Manual Trenching Spade | Fiskars 39" Steel Trencher | $35 | Precision curves, tight corners, and softscape beds. |
| Dedicated Electric Edger | WORX WG896 12-Amp | $100 | Long, straight hardscape borders (driveways/sidewalks). |
| Cordless String Trimmer | EGO Power+ ST1521S (Edging Mode) | $199 | Overgrown edges, versatile properties, mixed borders. |
| Gas-Powered Walk-Behind | McLane 101-5.5GT-K | $450+ | Commercial properties, acreage, compacted clay soils. |
Phase 1: Layout and Marking
Never freehand an edge. The human eye struggles to maintain a consistent radius over distances longer than 10 feet.
Mapping Curves and Straights
- For Curves: Lay a flexible garden hose along the desired boundary. Stand back and evaluate the curve from multiple angles. Avoid "wobbles" or compound S-curves; opt for long, sweeping, continuous arcs that are easy to mow.
- For Straight Lines: Drive two wooden stakes at the endpoints of the border and pull a mason's string tight between them. Rub the string with chalk and snap it against the turf to leave a highly visible, perfectly straight guide line.
Pro Tip: When edging around tree rings, use a compass made from a stake and a string to ensure a mathematically perfect circle. This prevents the "kidney bean" shapes that commonly develop after years of sloppy manual trimming.
Phase 2: Execution and Trenching Depths
The physical cut dictates the longevity of your edge. Depth and angle must be adjusted based on the adjacent surface and the grass species present.
Targeting the Rhizome Zone
Warm-season grasses like Bermudagrass and Zoysiagrass spread aggressively via underground rhizomes. According to Scotts Lawn Care Guidelines, a shallow 2-inch cut will only sever surface stolons, allowing rhizomes to bypass the trench and invade your mulch beds within weeks. You must cut a minimum of 4 to 6 inches deep to create an effective subterranean barrier.
The 90-Degree vs. 45-Degree Rule
- Hardscapes (90-Degree Cut): When edging against concrete driveways, pavers, or sidewalks, cut straight down at a 90-degree angle. This creates a flat, vertical soil wall that prevents dirt and mulch from spilling onto the concrete when it rains.
- Softscapes (45-Degree V-Trench): When edging against garden beds or mulch rings, angle your blade at 45 degrees toward the lawn. This creates a "V-trench" that allows you to pack mulch tightly into the gap, forming a physical dam that stops grass while keeping the mulch securely in the bed.
WARNING: Underground Utilities and Irrigation
Shallow irrigation lines and sprinkler heads are often installed just 2 to 4 inches below the soil surface near driveway edges. Always manually probe the soil with a spade near sprinkler heads before running a motorized steel edger. For major trenching projects, always contact 811 (Call Before You Dig) at least 48 hours in advance to have public utility lines marked for free.
Shallow irrigation lines and sprinkler heads are often installed just 2 to 4 inches below the soil surface near driveway edges. Always manually probe the soil with a spade near sprinkler heads before running a motorized steel edger. For major trenching projects, always contact 811 (Call Before You Dig) at least 48 hours in advance to have public utility lines marked for free.
Phase 3: Soil Extraction and Cleanup
Cutting the edge is only half the process. The severed strip of soil and grass must be removed to finalize the trench.
- Undercut the Strip: If using a manual spade, insert the blade horizontally at the bottom of your 6-inch vertical cut to slice the soil strip away from the main lawn root zone.
- Extract and Shake: Lift the soil strips out of the trench. Shake them vigorously over the lawn to reclaim valuable topsoil and expose the grass roots for composting.
- Blow and Sweep: Use a commercial-grade backpack blower (like the Stihl BR 800) to clear loose dirt from the trench and blow any debris off adjacent hardscapes. Leaving soil on concrete will result in mud stains and potential weed germination in driveway cracks.
Phase 4: Mulch Integration and Preservation
An edge without mulch is a temporary edge. Once the V-trench is cleared, apply a 2-to-3-inch layer of double-shredded hardwood mulch into the garden bed, packing it firmly into the 45-degree angled trench. Do not allow mulch to pile up against the base of trees or the siding of your home, as this retains moisture and invites wood-destroying organisms.
Troubleshooting Common Edge Failures
| Symptom | Root Cause | Corrective Action |
|---|---|---|
| Grass invading mulch beds within 3 weeks | Trench too shallow; rhizomes bypassing the cut. | Re-trench to a minimum depth of 6 inches using a manual spade. |
| Soil washing onto driveway after rain | Edge cut at an angle rather than a strict 90 degrees. | Re-cut the hardscape border vertically; ensure the soil wall is flat. |
| Ragged, torn grass blades along the edge | Dull edger blade or spinning string trimmer line. | Replace the trimmer line or sharpen/replace the steel edger blade. |
Seasonal Maintenance Schedule
How often you need to perform this procedure depends entirely on your turfgrass species and local climate.
- Aggressive Warm-Season Grasses (Bermuda, Zoysia, Kikuyu): Require edging every 3 to 4 weeks during peak summer growth. Their rapid rhizome expansion demands constant vigilance.
- Cool-Season Grasses (Tall Fescue, Kentucky Bluegrass, Ryegrass): Typically require edging only twice a year—once during the spring green-up and once in early fall. These grasses spread primarily via tillers or slower underground rhizomes, making them easier to contain.
By adhering to these precise depths, angles, and maintenance intervals, you transition your lawn from a simple patch of grass to a meticulously engineered landscape. Proper edging reduces long-term weed control costs, protects hardscape investments, and establishes a permanent boundary that defines your property.