
Lawn Care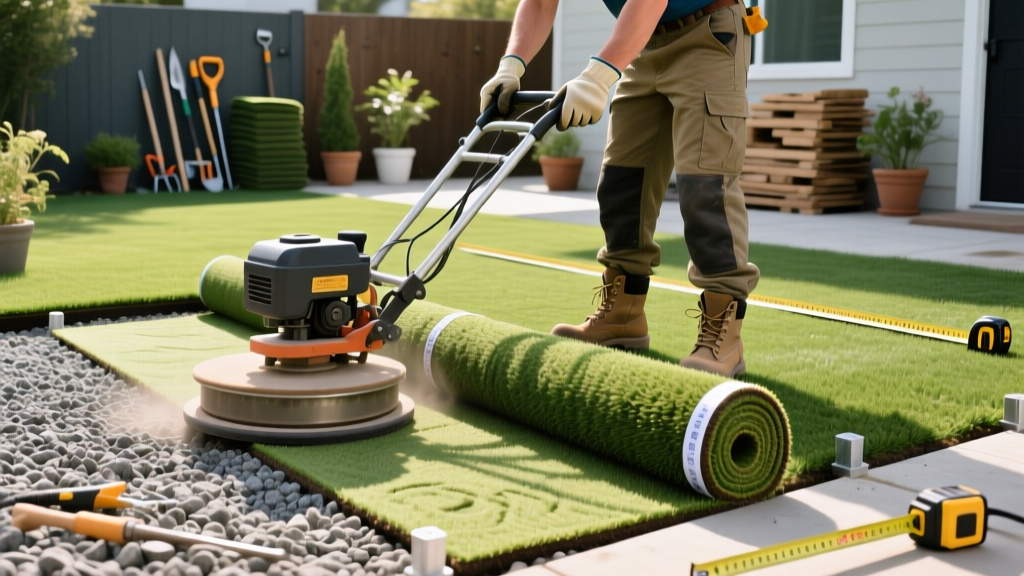
How to Install Synthetic Lawn: Pro Base Prep and Seaming Guide
Installing artificial turf is fundamentally a civil engineering project in miniature. While the synthetic grass itself gets all the visual credit, the longevity, drainage, and aesthetic perfection of the lawn are entirely dictated by what lies beneath it. Learning how to install synthetic lawn correctly means mastering soil excavation, aggregate compaction, and polyurethane seaming long before the first blade of fake grass is unrolled.
A poorly installed synthetic lawn will exhibit pooling water, wrinkled surfaces, and separated seams within the first two years. Conversely, a professionally graded and seamed installation will remain pristine for 15 to 20 years. This guide bypasses superficial advice and details the exact materials, measurements, and techniques required for a commercial-grade residential installation.
Material Selection and 2026 Cost Baselines
Before breaking ground, you must select the appropriate turf and base materials. Turf pricing in 2026 generally ranges from $3.50 to $8.50 per square foot, depending on face weight, pile height, and backing technology. For residential lawns, a polyethylene (PE) blend with a face weight between 60oz and 75oz and a pile height of 1.5 inches offers the most natural look and durable foot traffic resistance.
| Material Component | Specification | Estimated Cost (Per Sq Ft) |
|---|---|---|
| Mid-Grade Residential Turf | 65oz Face Weight, 1.5" Pile, Dual-Color | $4.50 - $6.00 |
| Class II Road Base | 3/4-inch minus crushed aggregate | $0.60 - $0.90 |
| Decomposed Granite (DG) | 1/4-inch minus limestone or granite | $0.50 - $0.80 |
| Turf Infill | 16-30 Mesh Silica Sand or Envirofill | $0.40 - $1.20 |
| Seaming Supplies | 6" Seam Tape, Polyurethane Adhesive | $0.25 - $0.45 |
Phase 1: Excavation and Base Engineering
The most common failure point in DIY artificial grass installation is inadequate base preparation. The goal is to create a sub-surface that is structurally rigid, completely permeable, and precisely graded.
Step 1: Excavation and Geotextile Layering
- Excavate to 4.5 Inches: Remove all existing sod, roots, and topsoil to a depth of 4.5 inches below your final desired grade. Use a sod cutter for large areas to ensure uniform depth.
- Install a Geotextile Weed Barrier: Lay a 4oz non-woven geotextile fabric directly over the native soil. Overlap seams by 6 inches. This prevents native clay or silt from migrating up into your aggregate base over time, which would otherwise clog the turf's drainage holes.
Step 2: Aggregate Base and Compaction
According to the Synthetic Turf Council, a stable base is mandatory for warranty validation on most premium turfs.
- Lay Class II Road Base: Spread 3 inches of Class II Road Base (a mix of crushed rock and fines). This layer provides structural integrity and deep drainage.
- Moisture and Compact: Lightly mist the aggregate with water and run a vibratory plate compactor (minimum 80 lbs of compaction force) over the entire area in overlapping passes. You are aiming for 95% Proctor density. Hand tampers are insufficient for this stage.
- Apply the Cap Layer: Spread 1 inch of Decomposed Granite (DG) or limestone screenings over the compacted road base. This creates a smooth, fine finish that prevents sharp rocks from puncturing the turf backing.
- Final Grading: Compact the DG layer. Ensure a minimum 1% to 2% slope away from structures to facilitate surface runoff. The final base should sit exactly 0.75 inches below your concrete hardscapes or bender boards.
Phase 2: Turf Layout, Seaming, and Securing
Seaming is where amateur installations become visibly obvious. Synthetic grass has a directional nap (the blades lean slightly in one direction). If two adjacent rolls are seamed together with opposing nap directions, the seam will reflect light differently and look like a glaring zipper across the yard.
The Seaming Protocol
- Acclimate the Turf: Unroll the turf and let it sit in the sun for 2 to 4 hours. This allows the backing to expand and relax, eliminating wrinkles.
- Trim the Edges: Factory edges are rarely perfectly straight. Use a sharp utility knife to trim 2 to 3 inches off the edge of both pieces you intend to seam. Cut from the backing side, tracing between the stitch rows to avoid slicing the grass fibers.
- Align the Nap: Ensure the grass blades on both pieces are pointing in the exact same direction. Push the two edges together until they kiss, but do not overlap them.
- Apply Tape and Adhesive: Fold back both edges. Lay a 6-inch wide polyurethane seam tape down the center. Apply a 1/4-inch thick bead of polyurethane turf adhesive (such as Super Seam or Turf Bond) in a zigzag pattern across the tape. Carefully fold the edges back down onto the glue.
- Weight the Seam: Immediately place 50 lb bags of sand or specialized seam rollers along the entire length of the seam. Leave the weights in place for a minimum of 12 hours while the polyurethane cures. Do not seam if rain is forecasted within 24 hours, as moisture will compromise the chemical cure of the glue.
Perimeter Securing
Once seamed, secure the perimeter using 5-inch or 6-inch galvanized spiral turf nails. Drive nails every 4 to 6 inches along all edges. In the interior field of the lawn, place a nail every 18 to 24 inches in a staggered grid pattern to prevent the turf from shifting or bubbling during temperature fluctuations.
Critical Warning: Tree Root Intrusion
If installing synthetic lawn over the root zone of mature trees, roots will eventually grow upward, seeking the oxygen trapped beneath the geotextile fabric. This will create severe, unrepairable ridges in your turf. To mitigate this, install a rigid root barrier (such as DeepRoot UB 24-2) vertically into the soil at least 24 inches deep around the perimeter of the tree's drip line before laying your base.
Phase 3: Infill Application and Power Brooming
Infill is not optional. It serves three vital purposes: it weighs the turf down to prevent thermal expansion wrinkles, it supports the grass blades so they stand upright, and it protects the primary backing from UV degradation. As noted in industry installation standards, skipping infill will void most manufacturer warranties.
Choosing Your Infill
| Infill Type | Best Use Case | Application Rate |
|---|---|---|
| 16-30 Mesh Silica Sand | Standard residential lawns, low traffic | 1.5 - 2.0 lbs / sq ft |
| Envirofill (Acrylic Coated) | Pet areas, high traffic (contains Microban antimicrobial) | 1.5 - 2.5 lbs / sq ft |
| Crumb Rubber | Sports fields, play areas (avoid for pets due to heat retention) | 2.0 - 3.0 lbs / sq ft |
The Brooming Process
Distribute the infill evenly using a drop spreader or a specialized turf broadcast spreader. Apply it in two passes: spread half the required weight, then use a motorized power broom with stiff nylon bristles to drive the sand deep into the thatch layer. Repeat with the second half. The power broom is essential; a standard push broom will not generate the kinetic energy required to push the sand past the primary backing and into the root zone of the turf.
Long-Term Maintenance and Water Savings
One of the primary drivers for artificial turf adoption is water conservation. According to EPA WaterSense, outdoor water use can account for up to 60% of a household's total water consumption in arid climates. Replacing a 1,000-square-foot natural grass lawn with synthetic turf saves approximately 55,000 gallons of water annually.
While synthetic lawns eliminate mowing and fertilizing, they do require basic maintenance to maintain their permeability and aesthetic. Rinse the turf with a hose monthly to remove dust and pollen. If you have pets, use an enzymatic turf cleaner on urine spots to break down uric acid crystals. Finally, re-brush high-traffic areas with a stiff nylon rake twice a year to prevent the infill from compacting and the fibers from matting down.
Frequently Asked Questions
Can I install synthetic lawn directly over existing concrete?
Yes, but drainage and cushioning become concerns. You must drill 1/2-inch drainage holes into the concrete every 12 inches if water pools on the surface. Use a specialized foam shock pad (typically 5mm to 10mm thick) glued directly to the concrete before laying the turf to provide impact absorption and hide the hard surface beneath.
How does extreme heat affect artificial grass?
Standard synthetic turf can reach surface temperatures of 140°F to 160°F in direct summer sunlight. To mitigate this, select a turf with specialized heat-reflective pigments in the yarn, and use a lighter-colored infill like Envirofill rather than dark crumb rubber, which absorbs and radiates heat. Misting the lawn with water will temporarily drop the surface temperature by 20°F to 30°F.

