
Lawn Care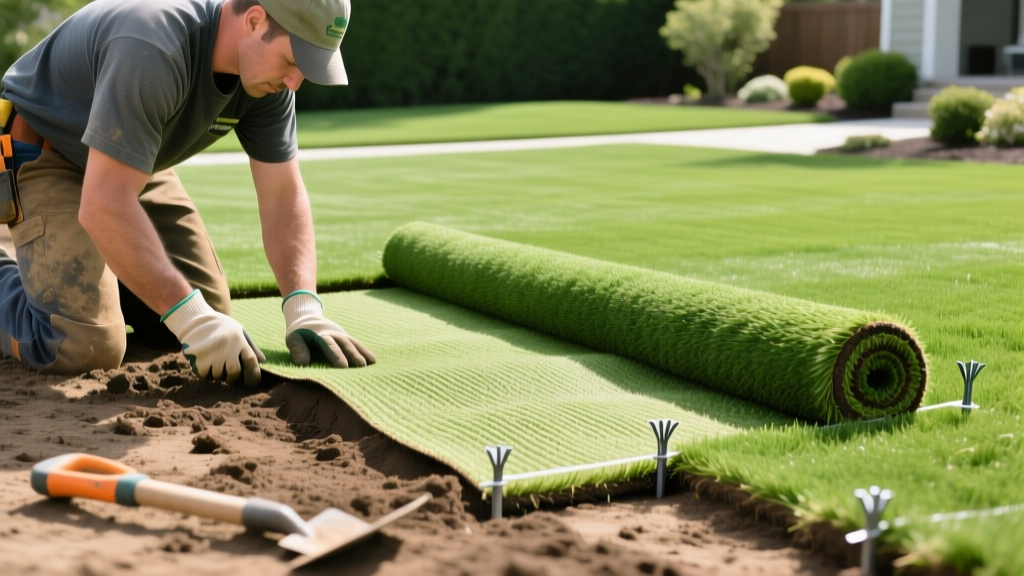
How to Lay Artificial Grass on Dirt: Pro Base Prep & Install Guide
The Reality of Synthetic Turf Installation
Most DIY synthetic turf installations fail within three to five years. The culprit is rarely the grass itself; it is almost always improper sub-base engineering. When learning how to lay artificial grass on native soil, treating the dirt foundation with the same structural rigor as a concrete pour is non-negotiable. A professional-grade installation currently costs between $12 and $22 per square foot, but a meticulous DIY approach can reduce material costs to $8–$14 per square foot. This guide bypasses superficial advice and details the exact structural specifications, material grades, and compaction metrics required for a permanent, drainage-optimized synthetic lawn.
Material & Tool Checklist for a 500 Sq. Ft. Lawn
Before breaking ground, secure the correct materials. Using substandard base rock or inferior adhesives is the primary cause of premature seam failure and drainage pooling.
- Base Material: 3 to 4 tons of Class II Road Base or 3/8-inch minus decomposed granite (DG).
- Weed Barrier: 4 oz per square yard non-woven geotextile fabric (do not use standard woven landscape fabric, which impedes drainage).
- Turf: 500 sq. ft. of polyethylene/polypropylene blend artificial grass with a minimum face weight of 50 oz and a fully permeable polyurethane or latex backing.
- Fasteners: 5-inch or 6-inch galvanized landscape spikes (approx. 150 nails for perimeter and field).
- Seaming: 12-inch wide synthetic turf seam tape and a two-part urethane adhesive (e.g., Superseam Pro) or high-grade single-part adhesive.
- Infill: 750 to 1,000 lbs of antimicrobial silica sand or Zeolite (1.5 to 2.0 lbs per sq. ft.).
- Equipment: Vibratory plate compactor (minimum 3,000 PSI compaction force), power broom, carpet stretcher (kicker), and a drop spreader.
Phase 1: Excavation and Sub-Base Engineering
The longevity of your lawn depends entirely on this phase. Native topsoil contains organic matter that decomposes and shifts over time, causing the turf above it to sink and ripple.
Excavation Depth and Soil Removal
Excavate the entire area to a depth of 3 to 4 inches below your desired finish grade. If you are installing adjacent to existing concrete or pavers, measure down from the hardscape edge to ensure the final turf level sits exactly 1/4 inch below the hardscape to prevent tripping hazards and allow for water runoff.
Establishing the Drainage Slope
Synthetic turf drains vertically through the backing, but the sub-base must still move water laterally to prevent subsurface pooling. Establish a 1% to 2% grade (a drop of 1/8 inch to 1/4 inch per foot) away from structures. According to This Old House landscaping experts, using a laser level or a string line with a line level is mandatory to verify this slope across the entire excavation site.
Base Deployment and Compaction
Spread your Class II road base or decomposed granite in 2-inch layers (lifts). Lightly mist each lift with water to achieve optimal moisture content for compaction. Run a vibratory plate compactor over each lift in overlapping, perpendicular passes until the surface is rock-hard. The final compacted base should be completely smooth; any irregularities in the base will telegraph through the turf and become visible under direct sunlight.
Pro Tip: If your native soil is heavy clay, lay a 2-inch layer of large drainage rock (3/4-inch clean gravel) at the very bottom of the excavation before adding the Class II base. This creates a French-drain-like reservoir that prevents the clay from wicking moisture back up into your base layer.
Phase 2: Weed Barrier and Shock Pad Deployment
Once the base is fully compacted and graded, roll out the 4 oz non-woven geotextile weed barrier. Overlap the seams of the fabric by at least 6 inches and secure it temporarily with landscape staples. Do not use standard woven plastic weed cloth; it creates a slip plane between the base and the turf, and its low permeability will cause water to pool on the surface during heavy rainfall.
If the lawn will be used for high-impact play or sports, install a 1/2-inch or 3/4-inch foam shock pad over the weed barrier at this stage. This adds critical G-max impact attenuation, making the surface safer for children and pets.
Phase 3: Turf Placement, Seaming, and Fastening
Roll out the artificial grass and allow it to acclimate in direct sunlight for at least 2 to 3 hours. This relaxes the backing and eliminates manufacturing wrinkles. Always ensure the grass grain (the direction the blades naturally lean) points toward the primary viewing area, typically facing the house or main patio.
Cutting and Trimming
Always cut artificial grass from the backside using a sharp utility knife with a fresh hook blade. Cutting from the top risks slicing off the grass fibers. Leave a 2-inch overhang on all perimeter edges for final trimming after the turf is secured.
The Seaming Process
Seaming is where most DIYers compromise the installation. When joining two rolls, trim 2 inches off the factory edges of both pieces to remove the stitching holes and ensure a tight, fiber-to-fiber fit.
Center the 12-inch seam tape shiny-side down beneath the joint. Apply a two-part urethane adhesive to the tape using a 1/8-inch notched trowel. Carefully fold the turf edges down onto the adhesive, ensuring no grass fibers are trapped in the glue. Walk the seam or place heavy weights (like bags of infill) along the joint. As noted by the Synthetic Turf Council (STC), allowing the adhesive to cure fully for 24 hours before applying tension or infill is critical to prevent seam separation.
Perimeter and Field Fastening
Stretch the turf tightly using a carpet kicker to eliminate any latent wrinkles. Secure the perimeter with 5-inch galvanized landscape spikes driven every 4 to 6 inches. For the interior field, drive a nail every 12 to 18 inches in a staggered grid pattern. Hammer the nails flush, but do not drive them so deep that they dimple the turf backing.
Phase 4: Infill Selection and Power Brushing
Infill is not optional; it weighs down the turf, protects the backing from UV degradation, and keeps the grass blades standing upright. The type of infill you choose dictates the lawn's thermal properties and pet-friendliness.
| Infill Type | Application Rate | Pros | Cons |
|---|---|---|---|
| Standard Silica Sand | 1.5 - 2.0 lbs/sq ft | Cost-effective, excellent ballast, natural look. | Retains heat, does not neutralize pet odors. |
| Zeolite | 1.5 - 2.0 lbs/sq ft | Absorbs ammonia (ideal for dogs), stays cooler than sand. | More expensive, requires dry application. |
| Envirofill (Acrylic) | 1.5 - 2.5 lbs/sq ft | Antimicrobial, highly durable, excellent drainage. | Premium pricing, slightly less natural feel. |
Use a drop spreader to apply the infill evenly across the lawn in two perpendicular passes (e.g., North-South, then East-West). Immediately follow up with a motorized power broom, brushing against the grain to drive the infill deep into the thatch layer and stand the blades upright. For optimal results, repeat the power brushing process after the first heavy rainfall.
Critical Failure Modes to Avoid
Warning: Seam Shrinkage
Synthetic turf expands and contracts with temperature fluctuations. If you install the turf on a cold morning and do not leave a slight 1/8-inch gap at the seams, the turf will expand in the afternoon sun, causing the seams to buckle and ridge. Conversely, if installed on a hot day without proper stretching, the turf will shrink in the winter, tearing the seams apart. Always install and seam turf at moderate temperatures (between 55°F and 75°F) when possible.
Synthetic turf expands and contracts with temperature fluctuations. If you install the turf on a cold morning and do not leave a slight 1/8-inch gap at the seams, the turf will expand in the afternoon sun, causing the seams to buckle and ridge. Conversely, if installed on a hot day without proper stretching, the turf will shrink in the winter, tearing the seams apart. Always install and seam turf at moderate temperatures (between 55°F and 75°F) when possible.
Troubleshooting: Drainage Pooling
If water pools on the surface after installation, the issue is either a depressed area in the compacted base or the use of a non-permeable weed barrier. To fix a localized depression without replacing the lawn, you must cut an 'X' in the turf, peel it back, add a thin layer of decomposed granite to level the base, re-compact, and re-seam the turf. For comprehensive drainage science, refer to Bob Vila's installation guidelines regarding sub-base permeability.
If water pools on the surface after installation, the issue is either a depressed area in the compacted base or the use of a non-permeable weed barrier. To fix a localized depression without replacing the lawn, you must cut an 'X' in the turf, peel it back, add a thin layer of decomposed granite to level the base, re-compact, and re-seam the turf. For comprehensive drainage science, refer to Bob Vila's installation guidelines regarding sub-base permeability.
Mastering how to lay artificial grass requires patience and adherence to civil engineering principles rather than basic gardening techniques. By prioritizing base compaction, precise slope grading, and meticulous seaming protocols, your synthetic lawn will remain structurally sound, visually pristine, and fully functional for 15 to 20 years.

