
Lawn Care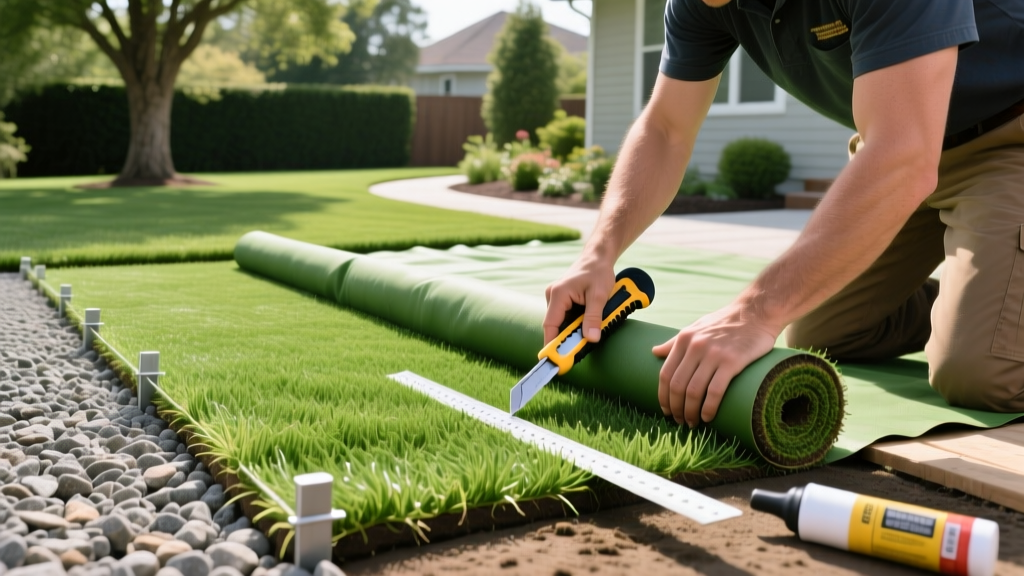
How Do I Lay Fake Grass? The Ultimate Base Prep and Install Guide
The Hidden Cost of Skipping Sub-Base Preparation
If you are researching how do I lay fake grass, the most critical part of the installation happens before the turf ever touches the ground. A common misconception among DIY homeowners is that artificial turf can simply be rolled out over existing soil or sand. This approach guarantees drainage failure, uneven settling, and premature seam separation within 12 to 18 months. According to the University of California Agriculture and Natural Resources, proper base engineering is what allows synthetic landscapes to mimic the permeability and resilience of natural soil while conserving thousands of gallons of water annually.
Professional installation costs typically range from $8 to $14 per square foot, with materials accounting for roughly 40% of that price. By executing the sub-base preparation and turf seaming yourself, you can reduce costs to $4 to $6 per square foot. This guide provides the exact measurements, material grades, and compaction densities required to build a commercial-grade synthetic lawn in a residential setting.
Material Calculator: What You Actually Need for 500 Square Feet
Ordering the correct volume of base material and infill prevents project delays. The table below outlines the precise material requirements for a standard 500-square-foot rectangular yard.
| Material | Specification / Grade | Quantity for 500 sq ft | Estimated Cost (2026) |
|---|---|---|---|
| Excavation Removal | N/A (Disposal fees) | ~6.5 cubic yards | $250 - $400 |
| Weed Barrier | 3 oz woven geotextile | 550 sq ft (overlap) | $85 - $110 |
| Sub-Base Aggregate | 3/8" crushed minus granite | 4.5 tons (3" depth) | $350 - $500 |
| Artificial Turf | Polyethylene, 1.75" pile | 550 sq ft (waste factor) | $1,650 - $2,750 |
| Seaming Supplies | 12" double-sided tape + glue | 4 rolls tape, 2 tubes glue | $180 - $220 |
| Infill | Antimicrobial silica sand | 1,000 lbs (2 lbs/sq ft) | $300 - $450 |
Phase 1: Excavation and Perimeter Preparation
The first physical step is removing the existing topsoil and organic matter. You must excavate to a depth of 3.5 to 4 inches below your desired finish grade. If you are installing turf flush with an existing concrete patio, excavate exactly 4 inches down from the top of the concrete edge to allow for 3 inches of base and 1 inch of turf thickness.
⚠️ Tree Root and Utility Warning
Before excavating, call your local utility marking service (e.g., 811 in the US) to identify buried irrigation or electrical lines. When working near established trees, do not sever roots larger than 2 inches in diameter. Instead, hand-dig around them and build the sub-base up over the root flare to prevent tree stress and future base heaving.
Once excavated, lay down a 3 oz woven geotextile weed barrier. Do not use cheap non-woven landscaping fabric; it degrades under UV exposure and tears during the compaction phase. Overlap the fabric edges by 6 inches and secure it to the soil using 6-inch landscape staples every 3 feet.
Phase 2: Engineering the Crushed Granite Sub-Base
The sub-base is the structural foundation of your synthetic lawn. The industry standard recommended by the Synthetic Grass Warehouse is 3/8-inch crushed minus granite or Class II road base. The "minus" designation means the aggregate contains fine dust and smaller particles that lock together when compacted, creating a concrete-like surface that still permits water permeability.
Spread the aggregate to a depth of 3 inches. Moisture is critical for proper compaction. Lightly mist the aggregate with a garden hose until it reaches a 10% to 15% moisture content—it should hold together when squeezed in your fist without dripping water. Run a vibratory plate compactor (minimum 80 lbs) over the entire area in a grid pattern, making at least three passes. The goal is to achieve 80% to 90% modified Proctor density. Use a 6-foot leveling rake to smooth out any high spots or depressions, ensuring a maximum grade variance of 1/4 inch over any 10-foot span.
Phase 3: Turf Acclimation, Cutting, and Precision Seaming
Artificial turf is manufactured in large rolls and stored in tight cylinders, causing the backing to curl and the fibers to compress. Unroll the turf and let it acclimate in direct sunlight for 12 to 24 hours. This allows the polyurethane or latex backing to expand and flatten, preventing future wrinkling.
When cutting the turf, always use a sharp utility knife with a fresh hooked blade. Cut from the backside of the turf, tracing the second or third stitch row to avoid trimming the primary fibers. Leave a 2-inch overhang along all hardscape edges for final trimming after seaming.
The Seaming Process
Seams are the most common failure point in DIY installations. To join two sections of turf:
- Fold back both edges of the turf to expose the sub-base.
- Lay a 12-inch wide double-sided seaming tape down the center of the joint.
- Apply a continuous bead of polyurethane artificial grass adhesive to the center of the tape.
- Carefully drop the first edge of the turf onto the tape, ensuring the fibers are not trapped underneath.
- Drop the second edge, matching the stitch gauge perfectly. The tuft rows must align seamlessly.
- Walk the seam or use a heavy carpet roller to press the backing firmly into the adhesive.
Pro Tip: Never attempt to seam turf in temperatures below 50°F or above 95°F. Polyurethane adhesives become brittle in the cold and cure too rapidly in extreme heat, leading to weak bonds and visible seam lines.
Phase 4: Perimeter Securing, Infill Distribution, and Grooming
Once all seams are cured (typically 12 to 24 hours), trim the perimeter edges flush with the hardscape. Secure the outer edges using 5-inch or 6-inch galvanized landscaping nails spaced every 4 to 6 inches. Never nail the seams themselves; the adhesive must be allowed to flex independently of the rigid nail points.
Infill serves three vital purposes: it weighs the turf down to prevent shifting, it holds the grass blades upright, and it protects the primary backing from UV degradation. For residential lawns, use an antimicrobial rounded silica sand (such as Envirofill or standard 16/30 mesh silica). Avoid using angular masonry sand, which will grind against the turf backing and cause premature wear.
Apply 1.5 to 2 pounds of infill per square foot using a drop spreader. Apply the infill in two separate passes—first 1 lb/sq ft, brush it in, then apply the remaining amount. Finally, use a gas-powered power broom or a stiff synthetic push broom to brush the fibers against the grain. This stands the blades upright and drives the infill deep into the thatch layer at the base of the turf.
Troubleshooting Common Installation Failures
| Symptom | Root Cause | Corrective Action |
|---|---|---|
| Puddling water after rain | Insufficient sub-base compaction or lack of 1% slope. | Cut out the affected turf, add and compact fresh 3/8" minus aggregate to restore the grade, and re-seam the patch. |
| Visible seam lines | Tuft rows misaligned during gluing or adhesive applied too thick. | Cut out the seam with a carpet knife, remove the old tape, and re-seam using a fresh 12" tape and thinner adhesive bead. |
| Turf wrinkles or bubbling | Turf was not acclimated in the sun or installed while too cold. | Wait for a hot, sunny day, pull the turf taut from the edges, add additional perimeter nails, and power brush heavily. |
Mastering how to lay fake grass requires patience and a willingness to invest heavily in the unseen layers of the project. By prioritizing a properly compacted crushed granite base and executing meticulous seam alignment, your synthetic lawn will remain flat, highly permeable, and visually indistinguishable from natural grass for 15 to 20 years.

