
Lawn Care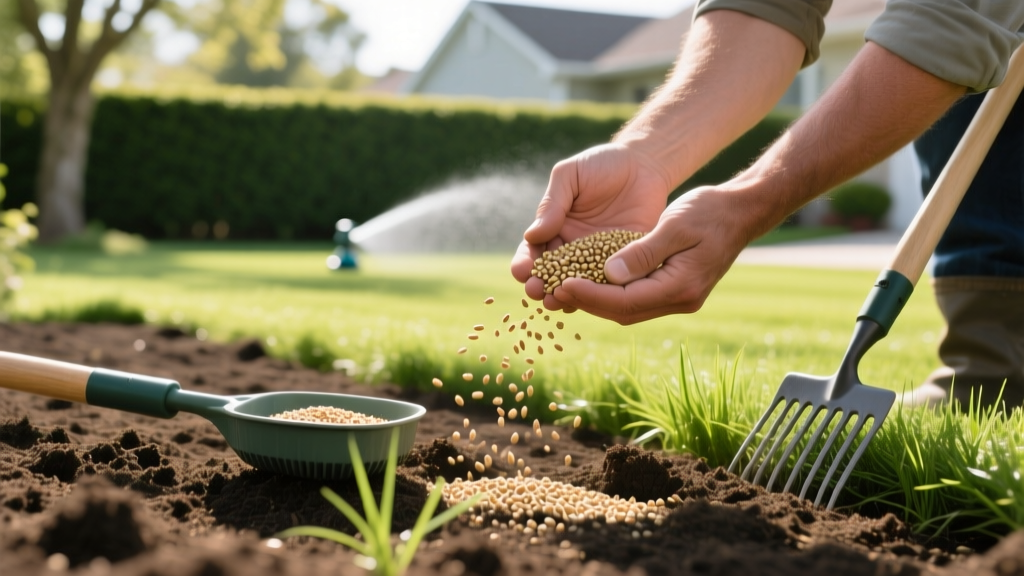
How to Plant Lawn Seed: A Step-by-Step Establishment Guide
The Seed Selection Matrix: Choosing NTEP-Rated Cultivars
Knowing how to plant lawn seed begins long before you open a bag; it starts with selecting genetics suited to your microclimate and soil profile. Commercial seed blends often contain cheap filler grasses like annual ryegrass or unimproved Kentucky Bluegrass (KBG) that thin out within two seasons. For a permanent, drought-tolerant lawn, source single-cultivar seeds rated highly by the National Turfgrass Evaluation Program (NTEP).
| Grass Type | Climate Zone | Recommended NTEP Cultivar | Seeding Rate (per 1,000 sq ft) | Germination Window |
|---|---|---|---|---|
| Tall Fescue | Transition / Cool | Titan Ultra, Raptor 3 | 6.0 - 8.0 lbs | 7 - 12 Days |
| Kentucky Bluegrass | Cool / Northern | Midnight, Mazama, Blue Note | 2.0 - 3.0 lbs | 14 - 28 Days |
| Perennial Ryegrass | Cool / Northern | Pangea GLR, Apple 3GL | 5.0 - 7.0 lbs | 5 - 7 Days |
| Bermudagrass | Warm / Southern | Yukon, Princess 77 | 1.0 - 2.0 lbs (hulled) | 10 - 14 Days |
Cost Expectation (2026): Premium, NTEP-rated seed costs between $8.00 and $14.00 per pound. While a 50lb bag of big-box-store Tall Fescue might cost $120, a 50lb bag of certified Titan Ultra will cost closer to $350. The investment pays off in reduced water bills and fungicide applications over the next decade.
Soil Preparation: The 4-Inch Rule and Grading
Seed-to-soil contact is the single most critical variable in establishment. Grass seed will not germinate effectively if it sits on top of hardpan clay or existing thatch. According to Penn State Extension, the seedbed must be cultivated to a depth of at least 4 inches to allow for proper root penetration and water drainage.
⚠️ Warning: The Starter Fertilizer Trap
Many homeowners apply standard 30-0-10 spring fertilizers before seeding. This is a critical error. High nitrogen levels will burn tender seedlings, and zero phosphorus starves the developing root system. You must use a dedicated Starter Fertilizer with a high phosphorus content (e.g., 18-24-12 or 10-18-10) to stimulate rapid root growth. Apply at a rate of 1.0 lb of actual nitrogen per 1,000 sq ft.
Step-by-Step Soil Prep Workflow
- Test the Soil: Send a sample to a lab like Logan Labs or your local university extension. Aim for a pH between 6.0 and 7.0. If pH is below 6.0, apply pelletized calcitic lime at 50 lbs per 1,000 sq ft and incorporate it into the soil.
- Till and Rake: Use a rear-tine tiller to break up the top 4 inches of soil. Remove all rocks larger than a golf ball and any existing weed roots.
- Establish the Grade: Use a string line and a landscaping rake to grade the yard. The soil should drop 1/4 inch for every horizontal foot away from your home's foundation to prevent water intrusion.
- Roll the Seedbed: Rent a water-filled lawn roller (approx. 300 lbs). Roll the bare soil to firm it up. If your footprints sink deeper than 1/2 inch when walking on it, the soil is too loose and will result in an uneven, bumpy lawn after settling.
Seeding Rates and Application Techniques
Understanding how to plant lawn seed requires precise calibration of your equipment. Over-seeding leads to intense competition for sunlight and nutrients, resulting in thin, spindly grass that is highly susceptible to damping-off fungus. Under-seeding leaves bare patches vulnerable to crabgrass invasion.
Broadcast vs. Drop Spreader Calibration
For areas larger than 2,500 square feet, a rotary broadcast spreader (like the Scotts EdgeGuard Max) provides the most even coverage. However, you must calibrate it to avoid running out of seed halfway through the yard.
- The 50 Sq Ft Test: Weigh out exactly 1/20th of the recommended rate for 1,000 sq ft. (e.g., if the bag says 6 lbs per 1,000 sq ft, weigh out 0.3 lbs or 4.8 ounces of seed).
- Mark a Test Area: Use landscaping flags to mark a 10 ft x 5 ft area (50 sq ft) of your bare soil.
- Adjust the Dial: Walk the test area at your normal, consistent pace. Adjust the spreader dial up or down until you run out of seed exactly as you reach the end of the 50 sq ft zone.
After spreading the seed, lightly drag a leaf rake or a piece of chain-link fence over the soil. The goal is to cover the seed with exactly 1/8 to 1/4 inch of soil. Seed buried deeper than 1/2 inch will exhaust its endosperm energy reserves before reaching the surface.
The 21-Day Germination Watering Protocol
Once the seed is in the ground, moisture management dictates success. Grass seed cannot survive drying out during the imbibition phase (the initial water uptake). According to University of Minnesota Extension, the top 1/2 inch of soil must remain consistently moist, but never saturated, until the seedlings reach mowing height.
💡 Pro Tip: Hydromulch vs. Straw
Avoid using traditional straw, which often introduces thousands of agricultural weed seeds into your new lawn. Instead, use a sterile cellulose hydromulch (like Penn Mulch) or a specialized grass seed accelerator. These products retain up to 10 times their weight in water, keeping the seedbed moist during the heat of the day and protecting the seed from wind and bird predation.
Watering Schedule Breakdown
- Days 1–10 (Germination Phase): Water 3 to 4 times a day for 5 to 10 minutes per zone. Use oscillating sprinklers to provide a gentle mist that will not wash the seed away. Water early morning, mid-day, and late afternoon. Never water after 5:00 PM, as prolonged nighttime moisture invites Pythium blight.
- Days 11–21 (Seedling Establishment): As roots begin to anchor, reduce frequency to once a day, but increase the duration to 20–30 minutes. This encourages roots to chase the moisture deeper into the soil profile.
- Days 22+ (Deep Root Training): Transition to standard deep-and-infrequent watering. Apply 1 to 1.5 inches of water per week, split across two morning watering sessions.
Troubleshooting Common Establishment Failures
Even with meticulous preparation, environmental variables can disrupt establishment. Here is how to diagnose and correct the most common issues encountered when planting lawn seed.
Symptom: Seed germinates but turns yellow and collapses at the soil line within 48 hours.
Diagnosis: Damping-off disease (Pythium or Rhizoctonia), caused by overwatering and poor air circulation.
Corrective Action: Immediately reduce watering frequency. Allow the topsoil surface to dry slightly between sessions. Apply a preventative systemic fungicide containing Azoxystrobin (e.g., Scotts DiseaseEx) at the curative rate.
Symptom: Patchy germination with bare spots concentrated in the center of the yard.
Diagnosis: Spreader overlap failure or wind drift during application.
Corrective Action: Wait until the surrounding grass has been mowed twice. Lightly rake the bare spots to break the soil crust, re-apply seed at 50% of the normal rate, and resume the 10-day watering protocol for those specific zones.
The First Mow: The 3-Inch Rule
Do not mow the new lawn until the majority of the turf has reached 3.5 to 4 inches in height. When you do mow, ensure your mower blades are freshly sharpened. Dull blades will rip tender seedlings out by the roots rather than cutting them. Set the mower deck to 3 inches and never remove more than 1/3 of the leaf blade in a single pass. Leave the clippings on the lawn to return vital nitrogen and organic matter to the developing soil ecosystem.

