
Lawn Care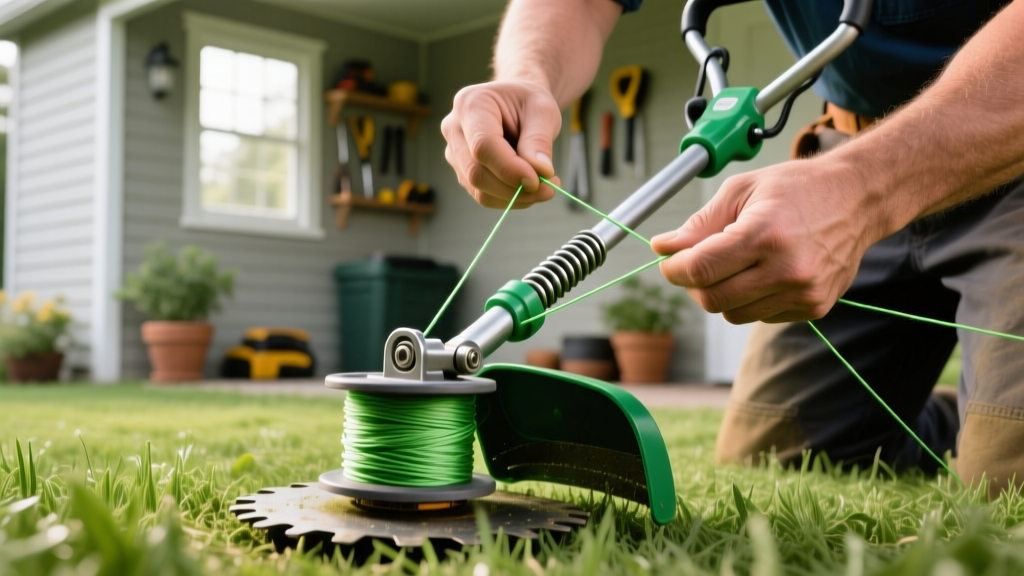
How to Restring a Lawn Trimmer: Bump Feed and Fixed Line Guide
The Hidden Cost of Incorrect Trimmer Line
A jammed or melted trimmer spool turns a 20-minute edging job into an hour-long frustration session. Most homeowners attribute line snapping or spool jamming to a defective trimmer head, but the reality is usually rooted in two specific errors: using the wrong line diameter for the motor’s torque output, or winding the spool in the wrong direction. When you understand the material science of trimmer line and the mechanical differences between bump-feed, speed-feed, and fixed-line heads, you can eliminate spool failures entirely.
This guide details exactly how to restring a lawn trimmer across all major head types, including the precise line diameters required to prevent motor burnout on electric models and line welding on commercial gas units.
Trimmer Line Material and Diameter Matrix
Before restringing, you must select the correct line. Trimmer lines are primarily manufactured from three materials, each with distinct melting points and tensile strengths. Standard nylon melts at roughly 428°F (220°C), making it highly susceptible to "line welding" (melting into a solid block inside the spool) when used on high-RPM gas trimmers. Copolymer and aluminum-reinforced lines withstand higher friction heat and resist snapping when striking chain-link fences or concrete curbs.
| Diameter Range | Trimmer Type | Target Vegetation | Risk of Motor Burnout |
|---|---|---|---|
| 0.065" – 0.080" | Light-duty electric (18V-40V) | Standard turfgrass, light weeds | Low (Designed spec) |
| 0.080" – 0.095" | Residential gas & heavy electric | Thick grass, dandelions, clover | High on light electric |
| 0.095" – 0.105" | Commercial gas (25cc - 40cc) | Heavy brush, thick stalks | N/A (Requires gas torque) |
| 0.105" – 0.155" | Brush cutters & fixed-line heads | Woody stems, brambles, saplings | N/A (Fixed line heads only) |
⚠ Critical Warning for Electric Trimmers: Never install 0.095" line on a 20V or 40V battery-powered string trimmer. The increased aerodynamic drag and mass will force the motor to draw excess amperage, rapidly degrading the battery cells and potentially melting the internal wiring harness. Stick strictly to the manufacturer’s maximum diameter specification printed on the trimmer guard.
Step-by-Step: How to Restring a Bump-Feed Trimmer
The bump-feed head (common on STIHL AutoCut and Husqvarna T25 models) relies on a spring-loaded spool that releases line when tapped on the ground. Improper winding direction is the number one cause of spool jamming in these units.
1. Lock and Remove the Spool
Align the two arrows on the outer rim of the spool with the eyelets on the trimmer housing. This locks the spool in place. Unscrew the center retaining knob (usually reverse-threaded, so turn clockwise to loosen) and carefully remove the spool and the internal compression spring. Do not lose the spring.
2. Clear and Anchor the Line
Remove all fragmented, melted, or UV-degraded line from the spool. Locate the small anchor hole in the center divider of the spool. Cut a 15-foot length of your chosen trimmer line. Fold it exactly in half to find the center, and insert the folded loop into the anchor hole, pulling it through until it catches on the opposite side.
3. Wind in the Correct Direction
Look for the directional arrow printed on the top or bottom of the spool. Wind the line tightly and evenly in the direction indicated by the arrow. Winding backward will cause the line to immediately retract and jam the moment you start the engine. Keep the tension high; loose winding creates friction heat that leads to line welding.
4. Seat the Line and Reassemble
Once you have about 6 inches of line remaining on each side, snap the line into the temporary holding notches on the spool’s outer rim. Thread both ends through the metal or reinforced plastic eyelets on the trimmer housing. Pull the line out of the holding notches, reinsert the spring, and thread the retaining knob back onto the shaft (turn counter-clockwise to tighten).
Speed-Feed (Quick-Load) Heads: No Disassembly Required
Speed-feed heads, popularized by ECHO and now standard on many commercial fleets, eliminate the need to open the spool. If your trimmer head features an alignment arrow on the side and a central push-button, follow this streamlined process:
- Align: Rotate the spool by hand until the arrows on the spool align with the eyelets on the outer housing.
- Feed: Cut a 20-foot length of line. Push one end through an eyelet and keep feeding it through the head until an equal length protrudes from the opposite eyelet.
- Lock: Grab both ends of the line and pull them outward simultaneously until you hear a distinct clicking sound. This engages the internal ratcheting mechanism that locks the line in place.
- Trim: Use wire cutters to trim the line to your desired operational length (usually 4 to 5 inches per side).
Restringing Fixed-Line (Commercial) Heads
For heavy brush clearing, professionals use fixed-line heads (like the Oregon Gator SpeedLoad or STIHL DuroCut). These do not use a spool. Instead, they accept individual, pre-cut strands of heavy-duty line (0.105" to 0.155").
To restring a fixed-line head, simply depress the locking tab on the side of the head, pull out the worn strand, and insert a new pre-cut piece into the socket until it clicks. This process takes less than five seconds per strand and prevents the catastrophic spool failures associated with thick line on high-torque brush cutters.
Troubleshooting Common Restringing Failures
Issue: Line Welding (Spool melts into a solid block)
Cause: Using standard nylon line on a high-RPM gas trimmer, or winding the spool too loosely.
Fix: Switch to a copolymer or titanium-coated line (e.g., Husqvarna Titanium Force) which has a higher melting threshold. Ensure you pull the line with heavy tension while winding.
Cause: Using standard nylon line on a high-RPM gas trimmer, or winding the spool too loosely.
Fix: Switch to a copolymer or titanium-coated line (e.g., Husqvarna Titanium Force) which has a higher melting threshold. Ensure you pull the line with heavy tension while winding.
Issue: Line Snapping Immediately Upon Contact
Cause: UV degradation. Nylon trimmer line loses its moisture content and becomes brittle when stored in direct sunlight or unconditioned garages for over 12 months.
Fix: Submerge your old, brittle spools in a bucket of clean water for 24 to 48 hours. The nylon will reabsorb moisture, restoring its flexibility and tensile strength. For long-term storage, keep sealed spools in a cool, dark, climate-controlled environment.
Cause: UV degradation. Nylon trimmer line loses its moisture content and becomes brittle when stored in direct sunlight or unconditioned garages for over 12 months.
Fix: Submerge your old, brittle spools in a bucket of clean water for 24 to 48 hours. The nylon will reabsorb moisture, restoring its flexibility and tensile strength. For long-term storage, keep sealed spools in a cool, dark, climate-controlled environment.
Safety and Operational Best Practices
According to the Consumer Product Safety Commission (CPSC), string trimmers are responsible for thousands of emergency room visits annually, primarily due to flying debris and improper guarding. Always ensure the plastic debris guard is securely bolted to the trimmer shaft before testing a newly restringed head. The guard not only protects your shins from projectiles but also houses the metal cutting blade that trims the line to the correct operational length when you tap the bump-feed head.
Furthermore, the University of Minnesota Extension recommends maintaining a parallel trimmer angle to the ground to prevent "scalping" the turf. When edging along driveways, keep the line tip at least half an inch away from concrete surfaces; striking concrete at 7,000 RPM will instantly shear the line and unbalance the spool, causing severe vibration that can damage the trimmer’s centrifugal clutch.
Final Torque Check
After restringing, start the trimmer and let it idle for 10 seconds. Listen for any rhythmic clicking or excessive vibration. If the spool wobbles, the compression spring is likely misaligned or the retaining knob is cross-threaded. Shut off the engine immediately, realign the spring over the center post, and re-tighten the knob to prevent the spool from ejecting at high speeds.

