
Lawn Care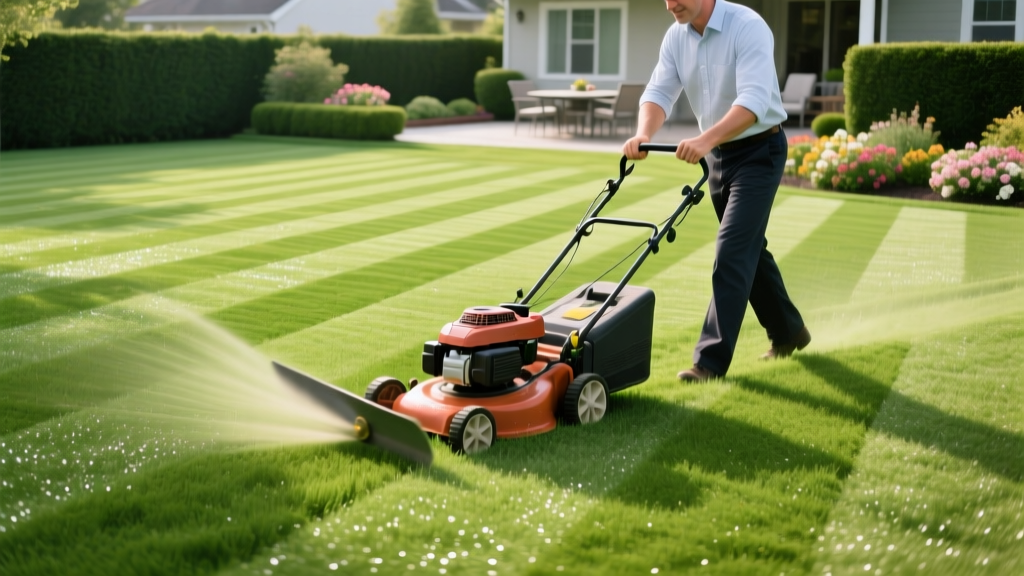
How to Stripe Grass: Step-by-Step Mowing Patterns & Tips
The Science Behind the Stripes
Lawn striping is not an optical illusion created by varying grass heights; it is a visual effect caused by light reflecting off grass blades bent in different directions. When grass blades are bent away from you, the sun reflects off the broader, lighter-colored underside of the leaf, creating a bright stripe. When blades are bent toward you, you see the darker, shadowed top side of the leaf. Understanding this light refraction is the first step to mastering how to stripe grass effectively, as it dictates the equipment weight and mowing height required for optimal results.
Mower Deck Types and Striping Potential
Reel Mowers: The gold standard. The heavy rear roller naturally bends grass, producing the sharpest, most defined lines.
Zero-Turn Mowers: Require aftermarket weighted roller kits. The light weight of standard zero-turn decks means you must add 15 to 25 lbs of downforce via a striping kit to bend the turf adequately.
Tractor/Deck Mowers: Excellent for striping due to their heavy rear axles and compatibility with OEM tow-behind rollers.
Essential Equipment for Striping Grass
Standard mower flaps (the rubber guard on the back of a push mower) are insufficient for professional-grade striping. You need a weighted roller that physically bends the turf canopy without crushing the crown of the plant. According to turfgrass management guidelines from Penn State Extension, maintaining proper mower setup and blade health is critical to preventing turf tearing when using heavy rollers.
| Product / Type | Compatibility | Weight / Downforce | Est. Price |
|---|---|---|---|
| Toro Stripe Kit (OEM) | Toro TimeCutter / Titan models | 18 lbs (Rubber/Steel core) | $130 - $150 |
| Husqvarna OEM Roller | Husqvarna MZ & Z200 series | 22 lbs (Weighted rubber) | $140 - $160 |
| Big League Mower Roller | Universal Zero-Turn (48"-60") | 25 lbs (Adjustable brackets) | $180 - $210 |
| DIY PVC / Sand Roller | Custom push/riding mowers | 15 - 30 lbs (User filled) | $30 - $50 (Materials) |
Step-by-Step Procedure: How to Stripe Grass
Executing a flawless stripe requires precision, consistent speed, and proper overlap. Follow this exact sequence to achieve stadium-quality lines.
Step 1: Prep the Canvas (Mowing Height)
Stripes pop best when there is enough blade length to bend. For cool-season grasses like Kentucky Bluegrass or Tall Fescue, set your mower deck to 3.0 to 3.5 inches. For warm-season grasses like Bermuda, set the deck to 1.5 to 2.0 inches. Never remove more than one-third of the grass blade in a single pass, as stressed grass will not hold a bend and will result in faded, patchy lines.
Step 2: The Perimeter Pass
Mow a single continuous lap around the outer edge of your lawn. This serves two purposes: it creates a clean boundary for your turning radius, and it gives you a straight edge to align your first interior pass against.
Step 3: The First Straight Line
Your first interior line dictates the straightness of every subsequent stripe. Pick a fixed focal point in the distance (a tree trunk, a fence post, or a corner of your house). Do not look down at the mower deck; keep your eyes on the focal point and drive toward it. This prevents the subtle micro-steering adjustments that cause wavy lines.
Step 4: The Overlap Technique
On your return pass, overlap the previous mowing line by exactly 2 to 3 inches. This ensures no uncut grass is left behind and guarantees that the roller bends the edge of the previous stripe, creating a seamless, sharp transition between light and dark bands.
Step 5: Turning Without Scuffing (The Y-Turn)
Zero-turn and riding mowers can tear the turf canopy during pivot turns, leaving ugly brown scuff marks at the end of your stripes. Use the Y-turn method: pull forward past the stripe line, reverse while turning the wheel sharply, and then pull forward into the next stripe. This distributes the tire friction over a wider area and protects the turf roots.
Warning: Soil Compaction on Double-Pass Patterns
Advanced patterns like the checkerboard require mowing the lawn twice at 90-degree angles. Mowing wet soil or heavy clay twice in one day drastically increases soil compaction, which restricts oxygen to the roots. Only attempt double-pass patterns when the soil is dry and the turf is actively growing.
Grass Types and Striping Potential
Not all turfgrass bends equally. The cellular structure and water content of the grass blade dictate how well it will hold a stripe. Research from the University of Minnesota Turfgrass Science program highlights that cool-season grasses generally possess higher turgor pressure (water content), making them highly pliable for bending.
| Grass Species | Season Type | Striping Quality | Required Roller Weight |
|---|---|---|---|
| Kentucky Bluegrass | Cool-Season | Excellent | Light to Medium (10-15 lbs) |
| Perennial Ryegrass | Cool-Season | Excellent | Light to Medium (10-15 lbs) |
| Tall Fescue | Cool-Season | Very Good | Medium (15-20 lbs) |
| Bermudagrass | Warm-Season | Moderate | Heavy (20-30 lbs) |
| Zoysiagrass | Warm-Season | Poor to Moderate | Heavy (25+ lbs) / Reel Mower |
| St. Augustine | Warm-Season | Poor | N/A (Stems too rigid) |
Troubleshooting Common Striping Mistakes
If your stripes look amateurish, the issue usually traces back to one of three mechanical or environmental failures.
- Wavy or Crooked Lines: Caused by looking at the mower hood instead of a distant focal point. Fix: Pick a stationary object 50+ feet away and drive directly toward it. Ensure your tire pressures are equal on both sides of the mower to prevent pulling.
- Faded or Weak Stripes: Caused by dull mower blades or insufficient roller weight. Dull blades shred the grass tip, causing it to turn white and reflect light uniformly, washing out the stripe contrast. Fix: Sharpen blades every 20-25 hours of use and add sand or lead weights to your striping kit.
- Uneven Stripe Widths: Caused by inconsistent mowing speed or erratic overlap. Fix: Engage the cruise control on your zero-turn or tractor to maintain a steady 4 to 5 MPH pace, and physically mark your overlap guide on the mower hood with a piece of neon tape.
- Brown Scuff Marks at the Ends: Caused by aggressive pivot turns on turf. Fix: Implement the Y-turn or 3-point turn method detailed in Step 5 to eliminate zero-radius spinning on the grass canopy.
Maintaining the Pattern Long-Term
To keep your lawn healthy while maintaining stripes, alternate your striping pattern every two weeks. Mowing North-South one week, and East-West the next, prevents the grass blades from permanently training in one direction (a condition known as "grain") and ensures even sunlight distribution across the turf canopy. Combining proper mowing heights, sharp blades, and the correct roller weight will yield a professional, high-contrast finish every time you mow.

