
Lawn Care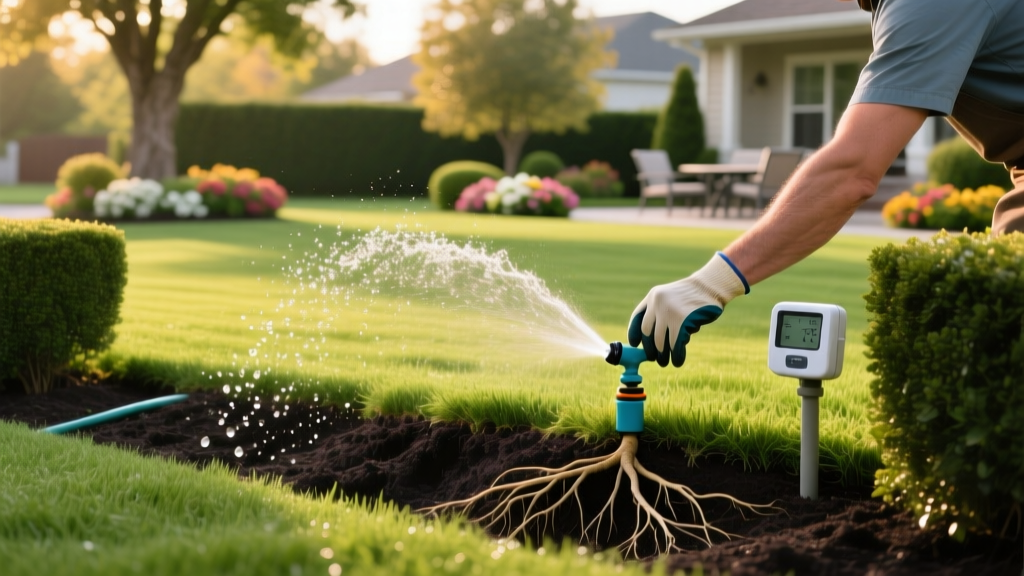
How to Water Lawn Sprinkler Zones for Deep Root Growth
Setting an irrigation timer for 15 minutes a day is the most common and destructive mistake homeowners make. Shallow, frequent watering trains grass roots to remain near the soil surface, making the turf highly susceptible to drought stress, fungal diseases, and summer heat damage. To cultivate a resilient, drought-tolerant lawn, you must force roots to chase moisture deep into the soil profile. Knowing exactly how to water lawn sprinkler zones prevents both underwatering and costly runoff, transforming a weak lawn into a deep-rooted, vigorous ecosystem.
The Evapotranspiration (ET) Baseline
Before adjusting any zone run times, you must understand Evapotranspiration (ET). ET is the combined measurement of water lost to the atmosphere through soil evaporation and plant transpiration. According to data from the EPA WaterSense program, most established lawns require between 1.0 and 1.5 inches of water per week during peak growing season to replace ET losses. This total includes both rainfall and irrigation.
The goal is to apply this weekly volume in just two or three deep watering sessions rather than daily sprinklings. Deep watering forces the root zone to expand downward. Cool-season grasses like Kentucky Bluegrass and Tall Fescue should have root zones reaching 6 to 8 inches deep, while warm-season grasses like Bermuda and Zoysia can push roots 12 inches or deeper. If your soil is only moistening the top two inches, your grass will enter dormancy or die off the moment a summer heatwave hits.
Pro Tip: The Screwdriver Test
Before calculating run times, test your current soil moisture depth. Push a 6-inch flat-head screwdriver into the lawn. If it slides in easily to the handle, your soil is adequately moistened to the root zone. If it stops at 2 inches, you are under-watering or experiencing severe runoff.
Before calculating run times, test your current soil moisture depth. Push a 6-inch flat-head screwdriver into the lawn. If it slides in easily to the handle, your soil is adequately moistened to the root zone. If it stops at 2 inches, you are under-watering or experiencing severe runoff.
The Catch Cup Test: Measuring Precipitation Rates
You cannot schedule accurate run times without knowing your sprinkler's precipitation rate (PR). PR is the volume of water your specific nozzles apply per hour, measured in inches per hour (in/hr). Different nozzle types output vastly different volumes.
Executing the Audit
- Place 6 to 8 straight-sided, flat-bottomed catch cups (or identical tuna cans) in a grid pattern across a single sprinkler zone.
- Run the zone for exactly 15 minutes.
- Measure the water depth in each cup and calculate the average.
- Multiply the average depth by 4 to determine the zone's hourly precipitation rate.
Average Precipitation Rates by Nozzle Type
If you cannot perform a catch cup test immediately, use the industry-standard averages below to estimate your zone output. Data sourced from the Irrigation Association certification standards:
| Nozzle / Head Type | Average Precipitation Rate | Best Use Case |
|---|---|---|
| Fixed Spray Heads (e.g., Rain Bird VAN) | 1.5 to 2.0 in/hr | Small, rectangular zones under 15 feet wide. |
| Gear-Drive Rotors (e.g., Hunter PGP) | 0.5 to 1.0 in/hr | Large, open areas requiring 20 to 40-foot throws. |
| Multi-Stream Rotators (e.g., Hunter MP Rotator) | 0.4 to 0.6 in/hr | Slopes, clay soils, and windy areas requiring slow absorption. |
The Bottleneck: Soil Infiltration vs. Sprinkler Output
The most frequent cause of irrigation runoff is a mismatch between the sprinkler's precipitation rate and the soil's infiltration rate. If your spray heads apply 1.5 inches per hour, but your heavy clay soil can only absorb 0.2 inches per hour, the remaining 1.3 inches will pool on the surface, run into the street, and waste water.
| Soil Type | Maximum Infiltration Rate | Watering Strategy |
|---|---|---|
| Heavy Clay | 0.1 to 0.2 in/hr | Requires Cycle and Soak; highly prone to runoff. |
| Clay Loam | 0.3 to 0.5 in/hr | Moderate run times; monitor for pooling. |
| Sandy Loam | 1.0 to 2.0+ in/hr | Accepts high precipitation rates; requires more frequent watering due to rapid drainage. |
Implementing the Cycle and Soak Method
To water lawn sprinkler zones effectively on clay or compacted soils, you must use the "Cycle and Soak" method. This involves splitting the total required run time into multiple shorter cycles, allowing the soil to absorb the water between runs.
Calculation Example:
Your Tall Fescue lawn needs 0.5 inches of water today. You have fixed spray heads (1.5 in/hr) and heavy clay soil (0.2 in/hr max intake).
Total Time Needed: 20 minutes (to apply 0.5 inches).
The Problem: Running for 20 minutes straight will cause massive runoff after minute 8.
The Fix: Program the controller to run the zone for 5 minutes, wait 30 minutes (soak time), run for 5 minutes, wait 30 minutes, and repeat until four 5-minute cycles are complete. Total applied: 0.5 inches. Total runoff: Zero.
Your Tall Fescue lawn needs 0.5 inches of water today. You have fixed spray heads (1.5 in/hr) and heavy clay soil (0.2 in/hr max intake).
Total Time Needed: 20 minutes (to apply 0.5 inches).
The Problem: Running for 20 minutes straight will cause massive runoff after minute 8.
The Fix: Program the controller to run the zone for 5 minutes, wait 30 minutes (soak time), run for 5 minutes, wait 30 minutes, and repeat until four 5-minute cycles are complete. Total applied: 0.5 inches. Total runoff: Zero.
Upgrading to Weather-Based Smart Controllers
Static timers that run the same schedule from May to September are obsolete. Modern smart controllers adjust daily run times based on local Evapotranspiration data, soil moisture sensors, and hyper-local weather forecasts. In 2026, most premium controllers also support Matter over Thread, allowing seamless integration into unified smart home ecosystems without relying on fragmented cloud hubs.
- Rachio 3e (8-Zone): Priced around $229, this controller uses local weather stations to automatically skip watering during rain events and adjusts seasonal percentages daily. It excels in user interface design and Cycle and Soak automation.
- Hunter Pro-HC with Hydrawise: Priced around $350, this is the professional-grade standard. It features flow meter integration, which detects broken pipes or leaking valves by monitoring actual water usage against expected zone flow rates, shutting down the system to prevent washouts.
While the upfront cost of a smart controller is higher than a standard $40 dial timer, the EPA notes that Weather WaterSense-labeled controllers can save the average home nearly 7,600 gallons of water annually, paying for the hardware upgrade within two irrigation seasons.
Diagnostic Troubleshooting for Uneven Coverage
Even with perfect run times, a lawn will fail if the sprinkler distribution is uneven. Diagnose these common failure modes before adjusting your timer:
1. Misting and Fogging (High Pressure)
Symptom: Water turns into a fine mist that blows away in the wind rather than falling to the turf.
Cause: Static water pressure exceeding 60 PSI at the sprinkler head.
Fix: Install pressure-regulating (PR) spray bodies, such as the Rain Bird 1800-PRS, which cap pressure at an optimal 30 PSI. Alternatively, install a master pressure-reducing valve at the point of connection.
2. Sunken Heads and Dry Spots
Symptom: Brown, circular patches radiating outward from the sprinkler head.
Cause: Over time, soil settles or thatch builds up, causing the sprinkler body to sit below the turf canopy. The water stream hits the grass blades immediately and never reaches the target radius.
Fix:Excavate around the sunken head and install a 1-inch or 2-inch PVC riser extension to elevate the nozzle above the grass canopy.
3. Head-to-Head Coverage Gaps
Symptom: Green circles of grass surrounded by dry, yellowing areas.
Cause: Sprinklers are spaced too far apart. Sprinkler heads must be designed to throw water all the way to the adjacent head, not just halfway.
Fix: Adjust the arc and radius screws on the nozzles to achieve head-to-head coverage. If the distance is too great for the nozzle's maximum throw, you must trench and add an additional sprinkler head to bridge the gap.
Mastering your irrigation system requires moving beyond arbitrary timer settings. By measuring your precipitation rate, respecting your soil's infiltration limits, and leveraging smart scheduling, you will build a root structure capable of sustaining a lush, green lawn through the most punishing summer conditions.

