
Lawn Care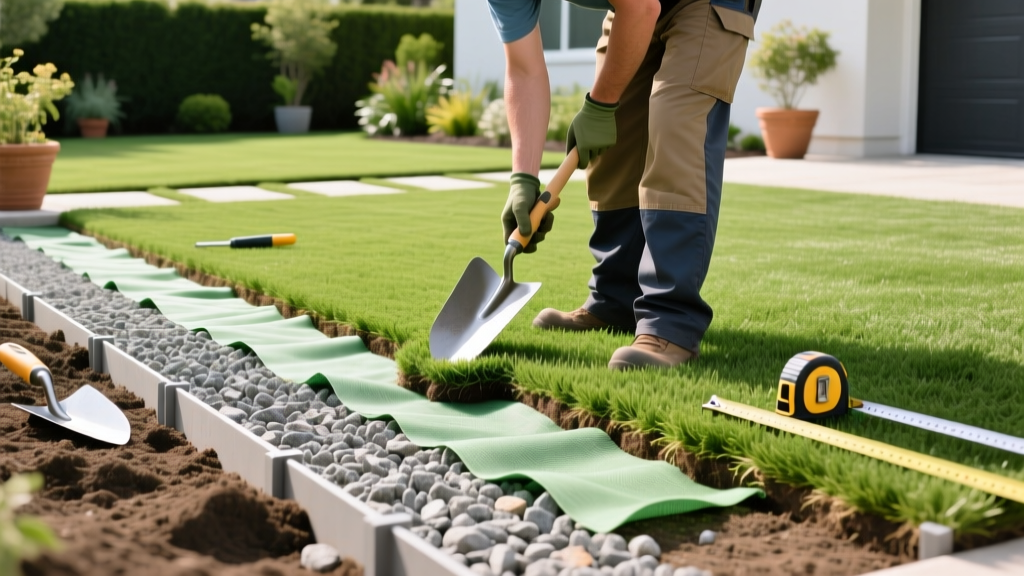
How to Install Artificial Grass: Pro Base Prep & Drainage Guide
Installing artificial grass is fundamentally a hardscaping project disguised as landscaping. While homeowners often fixate on the pile height and blade color of the synthetic turf, the actual "establishment" phase—mirroring the soil prep required for natural sod—relies entirely on subsurface engineering. A flawless synthetic lawn is only as good as the aggregate base beneath it. If you want to know how to install artificial grass that drains properly, resists heaving, and lasts 20 years, you must treat the base preparation with the same rigor as pouring a concrete foundation.
The True Cost of Artificial Grass Installation
Before breaking ground, it is critical to understand the financial breakdown of a professional-grade installation. In 2026, the national average for a complete, turnkey synthetic turf project ranges from $11 to $18 per square foot. Attempting to cut costs on base materials is the primary cause of premature turf failure.
| Material / Service Phase | Cost per Sq. Ft. | Specifications & Notes |
|---|---|---|
| Excavation & Haul Away | $1.50 - $2.50 | Removal of 3-4 inches of native soil and organic matter. |
| Base Aggregate Materials | $1.00 - $2.00 | Class II road base and decomposed granite (DG). |
| Synthetic Turf Material | $3.00 - $6.00 | Premium 60oz-80oz face weight, dual-polymer blades. |
| Infill & Adhesives | $0.75 - $1.50 | Envirofill, Zeolite, and two-part polyurethane seam glue. |
| Professional Labor | $5.00 - $8.00 | Site prep, compaction, seaming, and power brooming. |
Phase 1: Excavation and Soil Stabilization
The first step in learning how to install artificial grass correctly is the complete removal of the existing "root zone." You must excavate to a depth of 3 to 4 inches below your final desired grade. Leaving organic topsoil beneath the base invites decomposition, which leads to subsurface voids and eventual surface sinking.
Pro Tip: The Capillary Break
If your native soil is heavy clay, lay down a non-woven geotextile fabric (such as DeWitt Pro 5) directly on the subgrade before adding your aggregate base. This acts as a capillary break, preventing clay from migrating upward into your drainage base while stopping weed taproots from penetrating from below.
If your native soil is heavy clay, lay down a non-woven geotextile fabric (such as DeWitt Pro 5) directly on the subgrade before adding your aggregate base. This acts as a capillary break, preventing clay from migrating upward into your drainage base while stopping weed taproots from penetrating from below.
According to the Synthetic Turf Council (STC) Construction Guidelines, proper subgrade compaction is mandatory before introducing the aggregate base. Use a vibratory plate compactor (minimum 80 lbs, ideally 150 lbs for larger areas) to achieve a 95% Proctor density on the exposed native soil.
Phase 2: Building the Aggregate Base
The base is the "root zone" of artificial grass. A professional installation utilizes a two-tier aggregate system to balance structural integrity with surface smoothness.
- The Structural Layer (Class II Road Base): Lay down 2.5 to 3 inches of Class II road base (3/4-inch minus aggregate). This material contains a specific mix of crushed rock and fines that lock together tightly when compacted, creating a semi-permeable concrete-like slab that resists frost heave and tree root displacement.
- The Moisture Test: Before compacting, check the moisture content of the road base. Squeeze a handful; it should hold its shape without dripping water. If it crumbles into dust, it is too dry to compact properly. Lightly mist it with a hose until it reaches optimal binding moisture.
- The Smoothing Layer (Decomposed Granite): Spread a 0.5 to 1-inch layer of 1/4-inch minus Decomposed Granite (DG) over the compacted road base. This provides a fine, smooth surface that prevents the sharp edges of the road base from showing through the turf backing.
- Drainage Grading: As you compact the DG, establish a 1% to 2% slope (1/8 to 1/4 inch of drop per linear foot) away from your home’s foundation. The UC Agriculture and Natural Resources (UCANR) emphasizes that synthetic turf relies entirely on surface and base grading for water management, as the permeability rate of the base must exceed local peak rainfall intensities.
Phase 3: Laying, Seaming, and Securing the Turf
Once the base is swept clean and compacted, roll out the artificial grass. Always allow the turf to acclimate and expand in the sun for at least two hours before cutting or seaming to prevent post-installation shrinkage gaps.
The Seaming Process
Seam failure is the most visible and costly mistake in DIY installations. Do not use cheap single-part glues or staples for seams. Use a two-part polyurethane adhesive (such as SGW Superseam Pro) applied to a 12-inch wide seam tape.
- Fold back both edges of the turf to expose the seam tape.
- Apply the mixed adhesive using a 1/16-inch notched trowel for a uniform, ridge-based spread that prevents glue squeeze-out.
- Wait 5 to 10 minutes until the glue becomes tacky (it should stick to your knuckle without transferring).
- Carefully fold the turf edges back together, using a weighted roller to press the backing firmly into the adhesive ridges.
Perimeter Securing
Secure the perimeter using 5-inch or 6-inch galvanized landscape spikes. Place them 3 to 4 inches apart along all edges. In the interior "field" of the lawn, stagger nails every 12 to 18 inches to prevent the turf from shifting or rippling under thermal expansion.
Phase 4: Infill Selection and Power Brooming
Infill is not optional; it is the ballast that holds the turf down, protects the primary latex/polyurethane backing from UV degradation, and keeps the grass blades standing upright. Choose your infill based on your specific use case.
| Infill Type | Application Rate | Best Use Case | Cost per Sq. Ft. |
|---|---|---|---|
| Silica Sand (Rounded) | 2.0 - 3.0 lbs | Standard landscaping, low-traffic aesthetic zones. | $0.30 - $0.50 |
| Envirofill (Acrylic Coated) | 1.5 - 2.0 lbs | High-traffic areas, playgrounds, and pet zones (antimicrobial). | $0.80 - $1.20 |
| Zeolite (Volcanic Ash) | 1.5 - 2.0 lbs | Dedicated dog runs (neutralizes ammonia odors chemically). | $0.90 - $1.40 |
After dropping the infill with a broadcast spreader, use a motorized power broom with stiff nylon bristles to sweep the infill deep into the turf matrix. This process also stands the synthetic blades upright, completing the establishment phase.
Warning: Common Installation Failure Modes
- Anaerobic Bacteria Smell: If the base lacks proper slope or the turf backing has poor drainage holes (look for >400 inches per hour permeability ratings), trapped urine and water will breed anaerobic bacteria, causing a permanent sulfur smell.
- Tree Root Heaving: Never install synthetic turf directly over the shallow feeder roots of aggressive species like Ficus or Willow. The roots will eventually lift the rigid base, creating permanent ridges.
- Thermal Rippling: Failing to leave a 1/4-inch expansion gap against hard borders (like concrete patios) will cause the turf to buckle and ripple during peak summer heat when the synthetic materials expand.
Mastering how to install artificial grass requires shifting your mindset from gardening to civil engineering. By investing the majority of your labor and budget into a properly graded, heavily compacted aggregate base, and utilizing professional-grade polyurethane seaming methods, your synthetic lawn will remain structurally sound and visually pristine for decades.

