
Lawn Care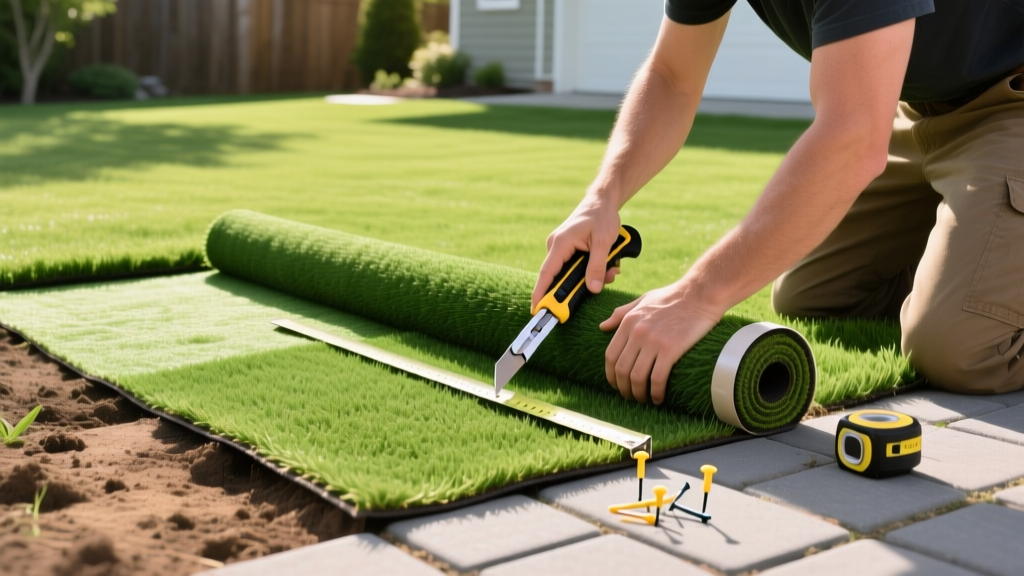
How to Put Artificial Grass: A Step-by-Step DIY Installation Guide
Transitioning from a high-maintenance natural lawn to synthetic turf is one of the most impactful landscaping upgrades a homeowner can make. However, understanding how to put artificial grass correctly requires far more than simply rolling it out over existing dirt. A successful installation hinges on meticulous sub-base preparation, precise seaming, and proper infill distribution. If you cut corners on the foundation, your turf will pool water, shift, and degrade prematurely.
This comprehensive guide breaks down the exact step-by-step procedures for installing artificial grass, utilizing 2026 industry standards for residential landscaping. We will cover material costs, base compaction metrics, thermal expansion gaps, and the ongoing maintenance procedures required to keep your synthetic lawn pristine.
Material Sourcing and Cost Breakdown
Before breaking ground, you must source the correct materials. Residential synthetic turf in 2026 typically costs between $4.00 and $9.00 per square foot, depending on the face weight (oz/sq yd) and the inclusion of a thatch zone. For high-traffic areas or homes with pets, opt for a turf with a minimum 60 oz face weight and a polyurethane backing rather than latex, as polyurethane resists moisture degradation and pet urine odors far better.
| Material | Estimated Cost (per sq. ft.) | Purpose & Specifications |
|---|---|---|
| Synthetic Turf | $4.00 - $9.00 | PE/PP blend, minimum 60 oz face weight, polyurethane backing. |
| Class II Road Base | $0.40 - $0.75 | Primary sub-base layer for structural integrity and drainage. |
| Decomposed Granite (DG) | $0.30 - $0.60 | Top leveling layer (optional but recommended for smooth finish). |
| Polyurethane Adhesive | $0.15 - $0.25 | Seaming tape glue; must be weather-resistant polyurethane. |
| Infill (Silica or Envirofill) | $0.40 - $0.80 | Weighs down turf, keeps blades upright, and aids drainage. |
| 5-Inch Turf Nails | $0.10 - $0.20 | Non-galvanized steel spikes for perimeter securing. |
According to the Synthetic Turf Council, a properly installed residential synthetic lawn should last 15 to 20 years, provided the sub-base is engineered to handle local precipitation rates.
Phase 1: Excavation and Grading
The most common failure mode in DIY artificial grass installation is inadequate excavation. You cannot lay turf directly over topsoil or existing grass; organic matter will decompose, causing severe settling and uneven dips.
- Clear the Area: Use a sod cutter to remove the existing lawn. Excavate to a depth of 3 to 4 inches below your finished grade (e.g., if your patio is at 0 inches, excavate to -4 inches).
- Establish the Grade: Synthetic grass requires a minimum slope of 1% to 2% (a drop of 1/8 to 1/4 inch per foot) away from your home's foundation to ensure surface runoff. Use a laser level or a string line with a line level to set your grade stakes.
- Cap Irrigation Lines: Cap off any existing sprinkler heads in the installation zone. If you have trees nearby, reroute drip lines to the perimeter of the turf area to prevent root heaving under the sub-base.
Warning: Tree Root Heaving
If installing under mature trees, lay a heavy-duty geotextile root barrier fabric over the soil before adding your base. Tree roots will seek out the moisture trapped beneath your turf's sub-base and can push the base upward, creating visible ridges.
If installing under mature trees, lay a heavy-duty geotextile root barrier fabric over the soil before adding your base. Tree roots will seek out the moisture trapped beneath your turf's sub-base and can push the base upward, creating visible ridges.
Phase 2: Building and Compacting the Sub-Base
Your sub-base is the engine of your artificial lawn. It dictates drainage and structural longevity. The National Association of Landscape Professionals emphasizes that a poorly compacted base is the leading cause of synthetic turf warranty voidances.
- Lay the Base Material: Spread 2.5 to 3 inches of Class II Road Base or Crushed Miscellaneous Base (CMB). This material contains a mix of crushed rock and fine dust, which locks together when compacted. Avoid using pure gravel or pea gravel, as it will not create a solid, bindable surface.
- Moisture Conditioning: Lightly spray the base material with a hose. The moisture content should be around 10%—damp enough to hold together in your fist when squeezed, but not so wet that it oozes water. This is critical for achieving maximum compaction density.
- Compact the Base: Use a vibratory plate compactor (minimum 5,000 lbs of compaction force). Make at least three overlapping passes in alternating directions. Your goal is 95% Proctor density. If you walk on the base and leave footprints, it is not compacted enough.
- Add a Leveling Layer (Optional): For a perfectly smooth finish, add a 0.5-inch layer of Decomposed Granite (DG) or fine chat over the road base, mist it, and compact it one final time.
Phase 3: Turf Acclimation and Positioning
Synthetic turf expands and contracts with temperature fluctuations. Skipping the acclimation phase will result in buckling seams during summer heatwaves.
- Unroll the turf and let it sit in the sun for a minimum of 24 hours before cutting or gluing.
- Ensure the pile direction (the direction the grass blades naturally lean) faces the primary viewing point (usually the house or the street). If you lay adjacent rolls with opposing pile directions, the turf will reflect light differently, creating a permanent checkerboard effect.
- Trim the perimeter edges using a sharp utility knife, cutting from the backing side to avoid slicing off grass fibers. Leave a 2-inch overhang around the perimeter for final trimming.
Phase 4: Seaming and Perimeter Securing
Seaming is where DIY installations often fail. Do not use nails to join two pieces of turf together in the middle of the lawn; you must use adhesive and seaming tape.
- Align the Edges: Butt the two turf edges together tightly. Ensure the stitch rows (the lines where the grass is tufted into the backing) align perfectly. Do not overlap the turf.
- Apply Seaming Tape: Fold back both edges and lay a 12-inch wide synthetic turf seaming tape directly down the center of the seam.
- Glue and Fold: Apply a continuous zigzag bead of polyurethane turf adhesive to the tape. Carefully fold the turf edges back down onto the tape.
Pro-Tip: The Thermal Expansion Gap. When folding the turf onto the glue, leave a microscopic 1/16-inch gap between the two edges. If you butt them too tightly, the turf will have nowhere to expand when it reaches 120°F in direct summer sun, causing the seam to peak and split.
Once the seams are set, secure the entire perimeter using 5-inch non-galvanized steel turf nails. Place a nail every 4 to 6 inches along the edges. Non-galvanized nails are preferred because they will rust slightly over time, creating a chemical bond with the soil that prevents them from pulling out.
Phase 5: Infill Application and Grooming
Infill is not optional. It weighs the turf down to prevent wind uplift, protects the primary backing from UV degradation, and keeps the grass blades standing upright.
| Infill Type | Application Rate | Best Use Case |
|---|---|---|
| Washed Silica Sand (16-30 mesh) | 1.5 - 2.0 lbs / sq. ft. | Standard residential lawns, low traffic areas, budget-friendly. |
| Envirofill (Acrylic-Coated Sand) | 1.5 - 2.5 lbs / sq. ft. | Pet areas, high traffic. Contains Microban to inhibit bacterial growth. |
| Crumb Rubber | 2.0 - 3.0 lbs / sq. ft. | Sports fields. Generally avoided in residential 2026 installs due to heat retention. |
Use a drop spreader to distribute the infill evenly across the surface. After spreading, you must groom the turf using a motorized power broom or a stiff-bristled push broom. Brushing drives the infill down to the base of the fibers and stands the blades up. Never use a metal-tined rake, as it will tear the backing.
Ongoing Artificial Lawn Maintenance Procedures
While artificial grass eliminates mowing and watering, it still requires a seasonal maintenance protocol to maintain its appearance and hygiene.
- Debris Removal: Use a leaf blower or a plastic-tined lawn rake to remove leaves and twigs weekly. Allowing organic matter to decompose on the turf will create a soil bed for weed seeds to germinate in the infill.
- Weed Control: If weeds do appear, pull them manually. For persistent outbreaks, apply a mild, non-toxic herbicide or a 50/50 white vinegar and water solution. Avoid harsh chemical weed killers that might degrade the polyurethane backing.
- Pet Waste Management: Remove solid waste immediately. For urine, rinse the area with a garden hose. Once a month, treat pet-heavy zones with an enzymatic turf cleaner (such as Simple Green Outdoor or Turfresh) to break down uric acid crystals and eliminate odors.
- Annual Deep Grooming: Once a year, rent a synthetic turf power broom to deeply agitate the infill, break up any compacted areas, and re-stand the fibers that have been flattened by foot traffic or snow load.
By following these precise installation and maintenance procedures, your artificial lawn will provide a flawless, low-maintenance landscape that withstands the elements and heavy use for decades.

