
Lawn Care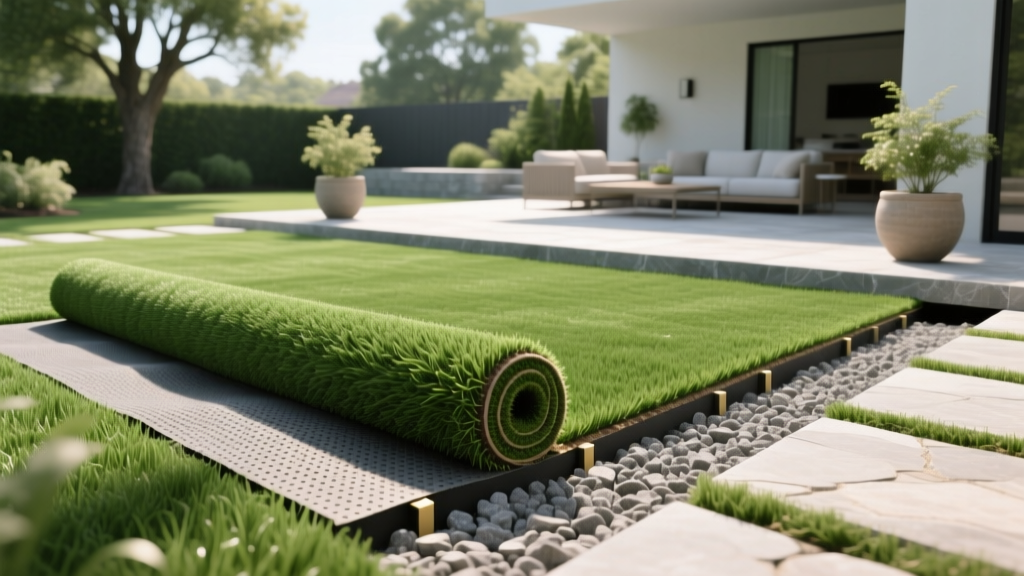
How to Install Fake Grass: Professional Base and Drainage Guide
Treating synthetic turf installation with the same agronomic rigor as natural grass establishment is the difference between a lawn that lasts 20 years and one that fails in three. When learning how to install fake grass, most homeowners focus entirely on the aesthetic blade selection. However, from an establishment perspective, the synthetic base is your soil horizon. If the subgrade drainage, aggregate layering, and compaction metrics are flawed, the turf will heave, pool water, and separate at the seams.
This guide bypasses superficial DIY advice and details the exact engineering specifications, material rates, and failure-mode preventions required for a permanent synthetic turf installation in 2026.
The Anatomy of a Synthetic Turf Base
A properly established fake grass lawn relies on a multi-tiered base system designed to mimic the percolation rates of healthy loam while preventing organic intrusion. According to industry standards outlined by Global Syn-Turf, a failing base is responsible for over 85% of synthetic turf warranty claims.
| Base Layer | Material Specification | Depth / Thickness | Primary Function |
|---|---|---|---|
| Subgrade | Native Soil | N/A (Compacted) | Load-bearing foundation |
| Drain Rock | 3/4-inch Crushed Drain Rock | 2.5 to 3.0 inches | Primary water routing and frost heave prevention |
| Fines / Leveling | 1/4-inch Minus Decomposed Granite (DG) | 0.5 to 1.0 inch | Smooth finishing grade and surface stability |
| Weed Barrier | Woven Geotextile Fabric (3 oz/sq yd) | Single Layer | Blocks organic growth while allowing permeability |
Step 1: Excavation and Subgrade Compaction
The establishment process begins with removing the existing biological lawn. You must excavate to a depth of 3.5 to 4 inches below your desired final grade. If you are installing over heavy clay soil, increase the excavation depth to 5 inches to accommodate a thicker drain rock layer.
Compaction Metrics
Do not use a hand tamper for the subgrade. You must rent a vibratory plate compactor that delivers a minimum of 3,000 lbs of centrifugal compaction force. The goal is to achieve a 95% Modified Proctor density on the native soil. If the subgrade is left loose, the weight of the aggregate and turf will cause differential settling over the first 12 months, resulting in visible depressions.
Warning: Freeze/Thaw Edge Cases
If you live in a climate with hard winter freezes, failing to compact the subgrade allows water to trap beneath the surface. When this water freezes, it expands and causes severe frost heaving, tearing the turf seams from the inside out.
If you live in a climate with hard winter freezes, failing to compact the subgrade allows water to trap beneath the surface. When this water freezes, it expands and causes severe frost heaving, tearing the turf seams from the inside out.
Step 2: Aggregate Layering and Slope Engineering
Once the subgrade is locked in, lay down your woven geotextile weed barrier. Overlap the seams by 6 inches and secure them with landscape staples every 3 feet. Next, begin building your aggregate horizons.
Routing the Drain Rock
Spread the 3/4-inch crushed drain rock evenly across the weed barrier. This layer is your primary aquifer. Run the vibratory plate compactor over the drain rock in overlapping passes. This locks the angular stones together, creating a rigid, permeable matrix.
Engineering the Slope
Synthetic turf does not absorb water; it sheds it. You must engineer a minimum 1% to 2% slope (a 1 to 2-inch drop per 10 feet of run) away from your home's foundation. Use a laser level or a string line to verify your grade before laying the final DG layer.
The Fines Layer
Apply the 1/4-inch minus DG. This layer fills the voids in the drain rock and provides a perfectly smooth surface for the turf backing to rest against. Compact the DG lightly and mist it with water to help the fines bind together. The final base should feel as hard as a concrete driveway.
Step 3: Laying, Seaming, and Securing the Turf
Roll out the fake grass and let it acclimate in the sun for 2 hours to relax the backing and remove shipping wrinkles. Ensure all turf rolls are oriented in the same direction (the blade grain should point toward the primary viewing area, usually the house).
The Seaming Protocol
Never rely on nails alone to join two rolls of turf. Nails will eventually pop under thermal expansion. You must use a chemical bond.
- Fold back both edges of the adjoining turf rolls.
- Lay down a 12-inch wide heavy-duty seaming tape centered on the joint.
- Apply a dual-component polyurethane turf adhesive (such as Turf Bond or SGW Super Seam) using a 1/4-inch notched trowel.
- Carefully fold the turf edges down onto the adhesive. Use a carpet kicker to stretch the turf tightly into the seam, ensuring no blades are trapped in the glue.
- Place heavy weights (like bags of infill or pavers) along the seam and allow 24 hours to cure.
Perimeter Securing
After the seams are cured, secure the perimeter using 40D galvanized common nails (5-inch or 6-inch length). Drive nails every 3 to 4 inches along the outer edges, keeping them 1/2 inch away from the turf edge to prevent tearing the backing. In the field (the center of the lawn), place nails every 12 to 18 inches in a staggered grid pattern.
Step 4: Infill Selection and Power Brooming
Infill is the structural support system for fake grass. It weighs down the backing, protects it from UV degradation, and keeps the blades standing upright. The EPA WaterSense program notes that proper synthetic landscaping can drastically reduce outdoor water use, but the infill choice dictates the surface temperature and longevity of the system.
| Infill Type | Cost per Sq Ft (2026) | Pros | Cons |
|---|---|---|---|
| Silica Sand | $0.40 - $0.60 | Cheap, heavy, readily available | Retains high heat, compacts over time, harbors bacteria |
| Envirofill (Acrylic) | $1.10 - $1.50 | Antimicrobial (Microban), stays 15% cooler, resists compaction | Higher upfront cost, lighter weight requires more sand base |
| Zeolite | $0.80 - $1.20 | Neutralizes pet urine ammonia, excellent cooling properties | Dusty during application, breaks down if not high-quality |
Application Rate: Apply 1.5 to 2.0 lbs of infill per square foot. Use a drop spreader for even distribution. Immediately after spreading, use a power broom with stiff nylon bristles to brush the infill deep into the thatch layer. This stands the grass blades up and locks the infill in place.
Cost Breakdown: DIY vs. Professional Installation
Understanding the financial commitment is critical for project planning. Below is a 2026 cost matrix for a standard 500-square-foot backyard installation.
Financial Summary Matrix (500 Sq Ft)
- DIY Materials Only: $2,250 - $3,500 ($4.50 - $7.00 / sq ft)
- DIY with Tool Rentals: $2,650 - $3,900 (Adds ~$400 for compactor, turf cutter, and power broom)
- Professional Installation: $5,000 - $8,000 ($10.00 - $16.00 / sq ft)
While DIY saves significant labor costs, professional installers carry liability insurance and offer 10-to-15-year workmanship warranties that cover seam separation and base settling—failures that are incredibly expensive to retrofit.
Frequently Asked Questions
Can I install fake grass directly over existing dirt or dead grass?
No. Installing directly over organic material guarantees failure. The organic matter will decompose, creating voids that lead to severe sinking and drainage pooling. You must excavate at least 3.5 inches and build an engineered aggregate base.
How does fake grass handle heavy dog urine?
Urine drains through the perforated backing into the base. However, the nitrogen and ammonia can linger in the base layer. Using an antimicrobial infill like Envirofill or Zeolite neutralizes the ammonia. You must also ensure your base has a minimum 1% slope so the liquid flows away from high-traffic pet areas rather than stagnating.
What is the lifespan of a properly installed synthetic lawn?
When the base is compacted to 95% Proctor density and UV-stabilized turf is used, a synthetic lawn will maintain its structural integrity and aesthetic for 15 to 25 years. Cheaper turf without UV inhibitors will fade and become brittle in 5 to 7 years, regardless of base quality.

