
Lawn Care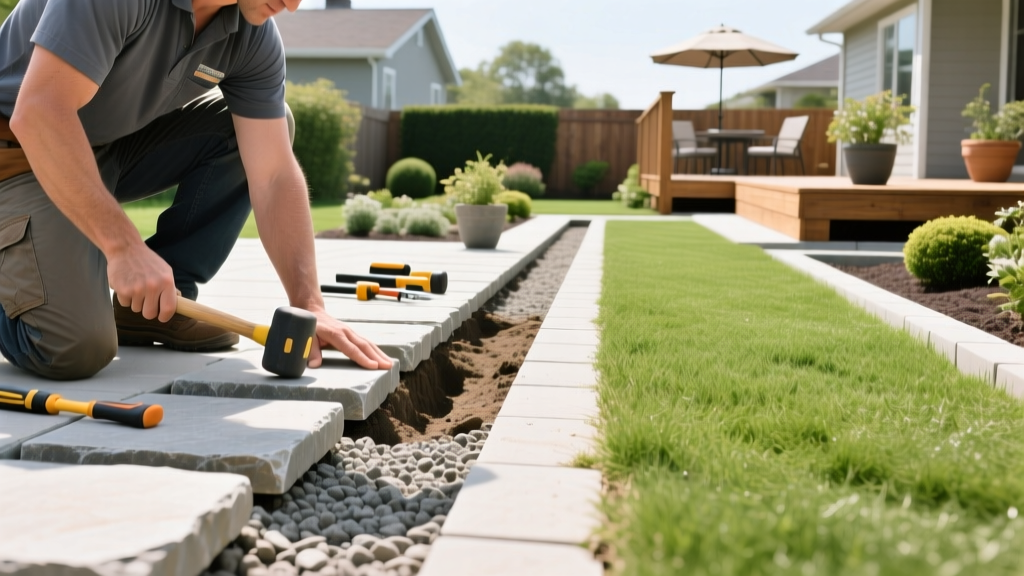
DIY Flagstone Edging Installation: Step-by-Step Guide
Flagstone edging provides a permanent, naturalistic barrier that stops aggressive warm-season grasses like Bermuda and Zoysia from invading flower beds via rhizome creep. Unlike plastic or steel edging that degrades, rusts, or heaves over time, properly installed sedimentary rock borders can last for decades while providing a clean, flat surface for mower wheels to track. According to Clemson University Extension, permanent hardscape edging significantly reduces the labor required for seasonal bed maintenance and string-trimming.
This guide details the exact measurements, base preparation techniques, and jointing methods required to install flagstone edging that remains level and weed-free through freeze-thaw cycles.
Material Selection and 2026 Cost Breakdown
Not all flagstone is suitable for ground-level edging. You need high-density stone that will not flake or spall when exposed to constant moisture and lawn equipment impact. Avoid soft sandstones; opt for bluestone or dense slate.
| Stone Type | Origin | Avg Cost (Per Ton) | Best Application |
|---|---|---|---|
| Pennsylvania Bluestone | Northeast US | $350 - $450 | Formal, straight-line borders |
| Arizona Flagstone | Southwest US | $280 - $350 | Rustic, irregular curved edges |
| Oklahoma Flagstone | Midwest US | $220 - $300 | High-traffic mower boundaries |
Base Materials Required: You will also need 3/4-inch minus crushed limestone (not round pea gravel, which fails to compact) and coarse concrete sand. Budget approximately $45 to $60 per ton for crushed limestone and $35 per ton for concrete sand.
Phase 1: Layout and Trenching
The most common failure point in stone edging is an improperly sized trench. If the trench is too shallow, aggressive grass stolons will simply grow underneath the stone.
- Mark the Boundary: Use a flexible garden hose to lay out curves. For straight lines, use a mason's line pulled taut between two steel stakes. Once satisfied, mark the edge with inverted landscaping spray paint.
- Excavate the Trench: Dig a trench exactly 5 inches deep and 2 inches wider than your selected flagstones. The extra 2 inches (1 inch on each side) provides workspace for leveling and backfilling.
- Grade the Soil Floor: Ensure the native soil at the bottom of the trench slopes slightly away from the lawn (about a 1% grade) to direct subsurface water into the garden bed rather than pooling under the grass roots.
Phase 2: Base Preparation and Compaction
According to the University of Minnesota Extension, a stable base is critical for preventing frost heave in northern climates. Water trapped beneath impermeable stones expands by 9% when freezing, pushing the edging out of alignment.
Pro Tip: The 3-Inch Rule
Always install a minimum 3-inch layer of 3/4-inch minus crushed gravel. The 'minus' designation means the gravel includes stone dust and fine particles that lock together when compacted, creating a concrete-like sub-base that still permits vertical drainage.
Always install a minimum 3-inch layer of 3/4-inch minus crushed gravel. The 'minus' designation means the gravel includes stone dust and fine particles that lock together when compacted, creating a concrete-like sub-base that still permits vertical drainage.
- Fill and Spread: Shovel the crushed limestone into the trench to a depth of 3 inches. Rake it perfectly level.
- Compact the Base: Use a mechanical plate compactor for runs longer than 20 feet. For shorter borders, a manual 10x10 inch steel hand tamper is sufficient. Compact until the gravel no longer shifts underfoot.
- Add the Setting Bed: Spread a 1-inch layer of coarse concrete sand over the compacted gravel. Do not use play sand or masonry sand; the grains are too fine and will wash out during heavy rains.
Phase 3: Stone Placement and Cutting
When dry-laying the flagstone, the top surface of the edging must sit exactly 0.5 inches above the final soil grade of the lawn. This lip prevents grass stolons from creeping over the top while allowing mower wheels to ride smoothly on the stone without scalping the adjacent turf.
Cutting Flagstone for Tight Curves
Irregular flagstone rarely fits perfectly along curved beds. To achieve tight joints without large, weed-harboring gaps:
- Score and Snap: For minor adjustments, use a 3-pound sledgehammer and a wide masonry chisel to score the stone and snap off the excess.
- Angle Grinder Cuts: For precise curves, use a 4-inch or 5-inch angle grinder equipped with a continuous-rim diamond masonry blade. Cut the stone dry, but wear an N95 respirator and safety goggles to protect against crystalline silica dust.
- Joint Spacing: Maintain a consistent 1/2-inch to 3/4-inch gap between stones to allow for polymeric sand jointing.
Phase 4: Jointing and Securing the Edge
Leaving gaps between flagstones bare guarantees weed infiltration and ant nesting. Traditional mortar is rigid and will crack during freeze-thaw cycles. Instead, use modern polymeric jointing sand.
- Sweep the Sand: Pour a high-quality polymeric sand (such as Alliance Gator Dust or Sakrete Polymeric Sand) over the dry stones. Sweep it deeply into the joints using a stiff push broom.
- Compact the Joints: Tap the stones with a rubber mallet to vibrate the sand deep into the gaps. Top off any settled joints with more sand, leaving the sand level about 1/8-inch below the stone surface to prevent erosion.
- Activate the Polymers: Use a garden hose with a fine mist nozzle to lightly spray the joints. The water activates the binding agents in the sand, turning it into a flexible, semi-rigid matrix that blocks weeds and insects while allowing the stones to shift microscopically during temperature changes.
Warning: Avoid Overwatering
When activating polymeric sand, do not use a high-pressure nozzle or soak the stones. Excess water will wash the polymers out of the joints and leave a hazy, permanent residue on the surface of your flagstone that is nearly impossible to remove.
When activating polymeric sand, do not use a high-pressure nozzle or soak the stones. Excess water will wash the polymers out of the joints and leave a hazy, permanent residue on the surface of your flagstone that is nearly impossible to remove.
Phase 5: Backfilling and Final Grading
Once the polymeric sand has cured (typically 24 to 48 hours depending on humidity), backfill the 1-inch gaps on either side of the trench. On the lawn side, pack native soil tightly against the stone and re-sod or overseed any damaged turf. On the garden bed side, backfill with your chosen mulch or soil, ensuring the mulch sits 1 inch below the top of the flagstone to prevent it from spilling over onto the lawn.
Long-Term Maintenance of Flagstone Borders
While flagstone is largely maintenance-free, the joints require periodic attention.
- Joint Replenishment: Polymeric sand degrades over time due to UV exposure and heavy rainfall. Plan to re-sweep and re-activate a fresh layer of polymeric sand every 4 to 6 years.
- Frost Heave Correction: If a stone shifts upward after a harsh winter, simply pry it up with a digging bar, remove 1 inch of the base gravel, re-level the sand bed, and reset the stone. Do not attempt to hammer a heaved stone back down, as this will fracture the rock or compromise the adjacent joints.
- Stain Removal: If grass clippings or organic mulch tannins stain the stone, clean it with a specialized stone cleaner containing oxalic acid. Avoid muriatic acid, which can etch the surface of calcium-rich flagstones like bluestone.
Frequently Asked Questions
Can I install flagstone edging directly on top of the soil?
No. Skipping the gravel base will result in severe settling and frost heave within the first year. The 3-inch crushed gravel base is non-negotiable for structural integrity and drainage.
How do I stop Bermuda grass from growing under the flagstone?
Bermuda grass rhizomes can penetrate deep into the soil. To block them, install a 6-inch deep strip of heavy-duty aluminum or galvanized steel landscape edging vertically against the lawn side of the trench before placing your flagstone. The stone hides the metal, while the metal blocks the rhizomes.
Is flagstone edging safe for use with robotic mowers?
Yes, provided the stones are laid perfectly flush with one another and the border is at least 6 inches wide. Robotic mowers require a smooth, continuous boundary to track along without triggering their bump sensors or getting their guide wheels stuck in wide joints.

