
Lawn Care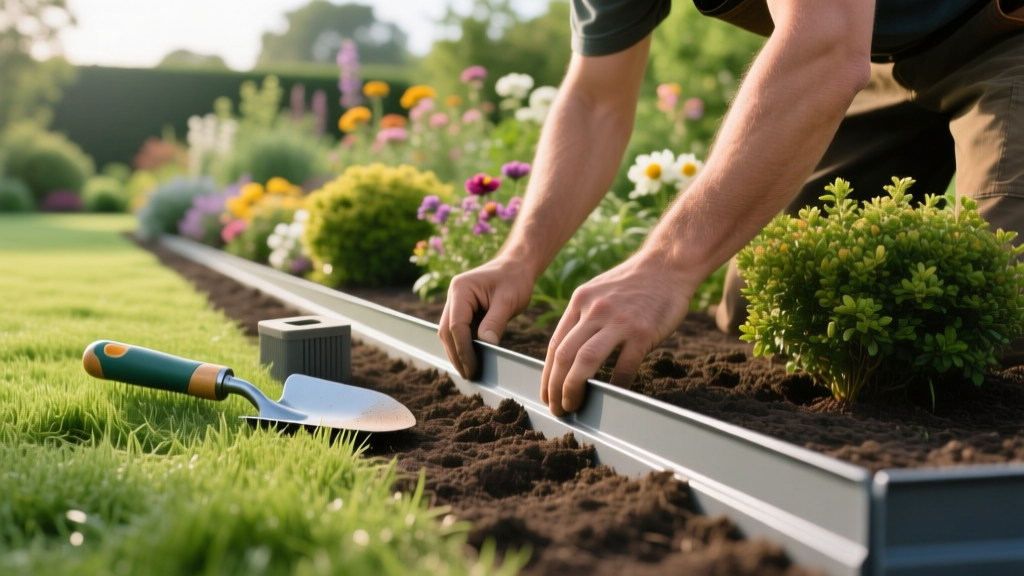
How to Install Garden Edging for Clean Lines and Healthy Plant Beds
Proper landscape edging does far more than create a crisp visual boundary between turf and planting beds. From a planting and establishment perspective, edging is a critical hardscape component that retains vital organic mulch, prevents soil erosion, and blocks aggressive turfgrass rhizomes from invading newly established shrub root zones. When learning how to install garden edging, the focus must be on subsurface depth, material longevity, and soil grading to ensure long-term plant health.
Material Selection Matrix: Metal vs. Plastic vs. Stone
The choice of edging material directly impacts bed maintenance and plant establishment. Flexible plastic often heaves during freeze-thaw cycles, spilling mulch and exposing shallow plant roots to winter desiccation. Rigid steel provides a permanent root barrier. Evaluate your options based on the specific horticultural needs of your landscape.
| Material | Specs & Dimensions | Avg. Cost (per linear ft.) | Lifespan | Plant Health Impact |
|---|---|---|---|---|
| Cor-Ten Steel | 14-gauge, 4-inch to 6-inch depth | $4.50 - $6.00 | 40+ years | Excellent rhizome barrier; retains deep mulch layers without bowing. |
| Aluminum | 1/8-inch thick, 4-inch depth | $3.00 - $4.50 | 20-30 years | Good barrier; will not rust, but can bend under heavy soil pressure. |
| HDPE Plastic | 8-inch depth, corrugated | $1.20 - $2.00 | 5-10 years | Poor long-term barrier; degrades in UV, heaves, and allows rhizome penetration at joints. |
| Poured Concrete | 6-inch wide, 8-inch deep | $8.00 - $12.00 | 50+ years | Permanent barrier; alters soil pH slightly near the edge (alkaline leaching). |
Pre-Installation Site Prep and Trenching Specs
The most common failure in edging installation is inadequate trenching. Simply pounding stakes into undisturbed soil results in a wavy, unstable edge that fails within one season. For optimal plant bed establishment, you must excavate a precise V-shaped trench.
- Trench Depth: Excavate 4 to 6 inches deep. If you are establishing beds near aggressive grasses like Bermuda or Zoysia, the edging must extend at least 6 inches below the soil surface to block subterranean rhizomes.
- Trench Width: Keep the trench narrow (2 to 3 inches wide) to minimize disruption to existing plant root systems and soil structure.
- Bed Grading: Before laying the edging, grade the planting bed soil so it sits 1 to 2 inches below the top of the edging. This creates a 'mulch basin' that prevents bark mulch and soil from washing onto the turf during heavy irrigation or rainfall.
Step-by-Step: How to Install Garden Edging (Steel and Aluminum)
Follow this sequence for rigid metal edging, which offers the best structural support for heavily mulched plant establishment zones.
- Map the Boundary: Use a garden hose to lay out smooth, sweeping curves. Avoid tight, wavy 'serpentine' curves, which complicate mowing and create acute angles where turfgrass struggles to establish.
- Cut the Trench: Use a half-moon edger or a motorized trencher to cut along the hose line. Remove the soil and toss it back into the planting bed to build up the mulch basin grade.
- Position the Edging: Drop the metal edging into the trench. Ensure the top of the edging sits exactly 1/2 inch above the final grade of the turf. This allows mower wheels to glide over the edge without scalping the grass, while keeping the mulch contained.
- Join Sections Securely: Overlap metal sections by at least 6 inches. Use the manufacturer's steel joining plates and drive 10-inch steel stakes through the pre-punched holes at a 45-degree angle away from the bed.
- Backfill and Tamp: Shovel the excavated soil back against the edging on both sides. Use a hand tamper to compact the soil firmly against the metal, eliminating air pockets that could cause the edging to lean over time.
Warning: Tree Root Girdling
Never install rigid, deep edging within the critical root zone (drip line) of established trees. Trenching 6 inches deep will sever vital lateral feeder roots. Furthermore, rigid edging can cause circling roots to girdle the trunk over time, eventually killing the tree. Use shallow, flexible edging or a simple hand-edged trench around tree rings.
The Planting Connection: Root Barriers and Soil Retention
When establishing new landscape beds, the edging acts as a microclimate manager. According to the University of Minnesota Extension, maintaining a 2- to 3-inch layer of organic mulch is critical for moderating soil temperature and retaining moisture for newly planted shrubs and perennials. Without a rigid physical barrier, wind, string trimmers, and water runoff gradually displace this mulch into the lawn.
Furthermore, if you are planting beds adjacent to warm-season turfgrasses, subsurface edging is non-negotiable. Grasses like St. Augustine and Bermuda spread via stolons and rhizomes. The Clemson University Home & Garden Information Center notes that aggressive rhizomatous plants require deep, impenetrable physical barriers to prevent them from colonizing adjacent soil. A 14-gauge steel edge driven 6 inches deep effectively severs and blocks these subterranean runners, protecting the loose, amended soil of your planting bed from being choked out by turf roots.
Curving and Corner Techniques for Clean Establishment
Sharp 90-degree corners in landscape beds create dead zones where air circulation is poor, leading to fungal issues in densely planted perennials. Always design beds with sweeping, obtuse curves.
- Bending Steel: To curve 14-gauge Cor-Ten steel, do not bend it by hand, which will kink and weaken the metal. Instead, make a series of shallow, 1-inch cuts along the bottom half of the edging with an angle grinder. This allows the steel to flex into smooth radii without compromising the top structural rim.
- Inside vs. Outside Curves: When installing on an outside curve (where the bed is convex), place stakes on the inside of the bed to pull the edging taut against the soil. On inside curves, place stakes on the outside to push the edging into the desired shape.
Common Installation Failures and Troubleshooting
Even with premium materials, improper installation techniques will compromise the bed's integrity. Watch for these specific failure modes:
- The 'Lip' Trap: If the edging is installed too high (more than 1 inch above the turf), it creates a lip that traps debris, prevents water runoff, and blocks robotic or standard mowers. Always use a string line or laser level to ensure the top edge is flush or just 1/2 inch proud of the soil.
- Stake Heave: In regions with deep frost lines, driving stakes straight down (90 degrees) allows frost heave to push the entire edging system upward. Always drive stakes at a 45-degree angle to anchor the edging laterally against vertical frost movement.
- Mulch Volcanoing: Do not use the edging as a wall to pile mulch 6 inches high against the base of shrubs. This causes stem rot and invites rodents. The edging should retain a flat, even 2-to-3-inch mulch layer, keeping the material away from plant crowns.

