
Lawn Care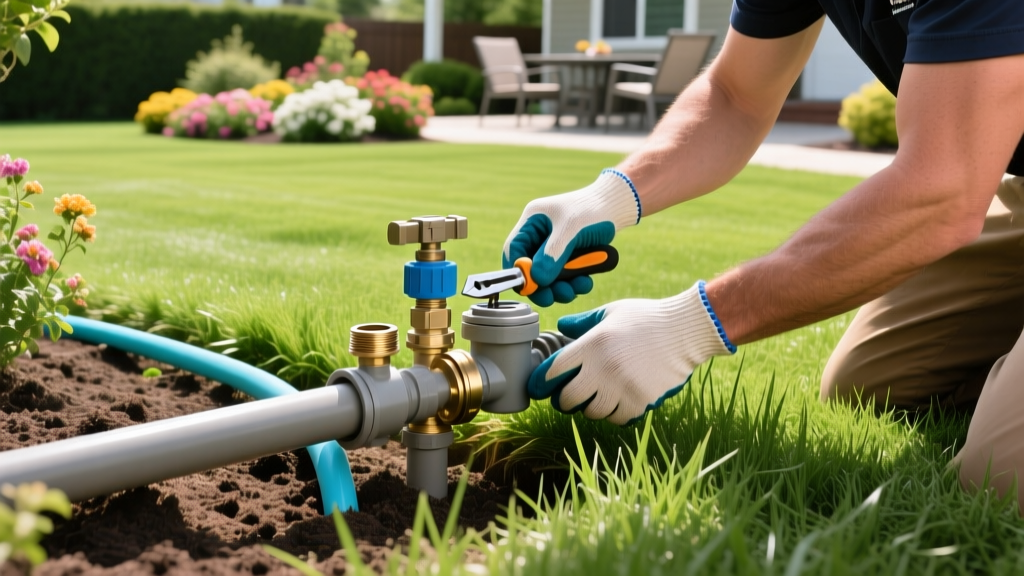
Installing a Backflow Preventer for Irrigation: Pest & Weed Chemical Safety
The Chemical Safety & Pest Nexus in Lawn Care
When executing a comprehensive pest and weed removal playbook, most homeowners focus entirely on the turf canopy, ignoring the mechanical infrastructure that delivers water and liquid treatments. Installing a backflow preventer for irrigation is not just a municipal plumbing requirement; it is a critical safety checkpoint for any lawn care regimen involving liquid herbicides, systemic insecticides, or fertigation systems. If your irrigation system lacks a properly rated backflow device, a sudden drop in municipal water pressure can cause back-siphonage, pulling toxic weed killers like 2,4-D or grub-control chemicals like imidacloprid directly into your home’s potable drinking water supply.
Furthermore, the physical footprint of a backflow assembly—often housed in a subterranean valve box or wrapped in an above-ground insulated cover—creates a distinct microclimate. The ambient moisture from condensation and minor weeping valves makes these zones prime real estate for destructive pests and stubborn weeds. This guide bridges the gap between hydraulic safety and turf management, detailing exactly how to install, select, and pest-proof your backflow infrastructure in 2026.
Expert Insight: According to the Environmental Protection Agency (EPA), cross-connections between potable water and non-potable chemical sources are a leading cause of localized water contamination. Any irrigation system tied to a chemical injection pump or even a hose-bibb used for hose-end sprayer weed treatments legally requires a verified backflow preventer.
Selecting the Right Backflow Device for Lawn Toxins
Not all backflow preventers are rated for the same level of chemical toxicity. If your weed and pest playbook includes injecting liquid fertilizers mixed with pre-emergents (like prodiamine) or post-emergents (like glyphosate) via a Dosatron or similar fertigation pump, you must install a device rated for high-hazard cross-connections.
| Device Type | Chemical Hazard Rating | 2026 Avg. Material Cost | Best Application in Weed/Pest Playbook |
|---|---|---|---|
| Pressure Vacuum Breaker (PVB) (e.g., Febco 825YD) |
Low to Moderate (Non-toxic) | $130 - $180 | Standard irrigation only. No chemical injection. Safe for standard hose-bibb connections if hose is never left submerged in chemical buckets. |
| Reduced Pressure Zone (RPZ) (e.g., Watts LF009QT) |
High (Toxic) | $350 - $550 | Required for fertigation systems injecting liquid herbicides, pesticides, or systemic grub killers directly into the mainline. |
| Double Check Valve (DCV) (e.g., Wilkins 975XL) |
Low (Non-toxic only) | $200 - $280 | Underground installations where only water (no chemical injection) is used. Banned in many municipalities for any residential lawn chemical use. |
Executing the Installation: Trenching to Torque
Installing a backflow preventer for irrigation requires precision plumbing and adherence to local frost-line codes. The most common failure mode during DIY installation is cracking the brass casing due to over-torquing or failing to support the PVC pipe weight, which stresses the threaded joints.
⚠️ CRITICAL CODE WARNING: Before cutting into your mainline, verify your local municipal water codes. Most jurisdictions require a licensed plumber to pull a permit for the mainline tap, and a certified American Backflow Prevention Association (ABPA) tester to verify the device post-installation. Fines for unpermitted cross-connections in 2026 routinely exceed $1,500.
- Shut Off and Depressurize: Close the main water shut-off valve. Open the lowest elevation hose-bibb to drain the line and relieve pressure.
- Trenching the Supply Line: Dig a trench from the mainline tap to the planned backflow location. The trench must be 12 inches below your local frost line to prevent the supply pipe from freezing and rupturing. Use 1-inch Schedule 40 PVC for the underground supply run.
- Gluing with Precision: Use a heavy-duty clear primer and cement (e.g., Oatey Heavy Duty). Apply primer to both the pipe and fitting, wait 10 seconds, then apply cement. Push and hold with a quarter-turn for 30 seconds. Improper priming leads to micro-leaks that wash away topsoil and invite weed seeds.
- Transitioning to Brass: Use a PVC-to-brass male adapter. Wrap the male threads with exactly three layers of PTFE (Teflon) tape in a clockwise direction. Pro Tip: Never use pipe dope on brass-to-plastic transitions; the petroleum solvents can degrade the PVC over time.
- Mounting and Torquing: Mount the RPZ or PVB at least 12 inches above the highest downstream sprinkler head (mandatory for PVBs). When tightening the brass unions, use two wrenches—one to hold the valve body, one to turn the union nut. Torque to 45 ft-lbs. Over-tightening will fracture the internal relief valve seats.
Pest & Weed-Proofing the Valve Box Microclimate
The area immediately surrounding your backflow preventer and downstream manifold valve boxes is a notorious hotspot in the pest and weed removal playbook. The disturbed soil from trenching, combined with the moisture from valve weeping, creates an ideal germination bed for nutsedge (Cyperus esculentus) and a nesting haven for fire ants (Solenopsis invicta).
Defeating the Valve Box Weed Nursery
Weeds like crabgrass and nutsedge will easily push through the thin plastic lids of standard valve boxes, compromising the seal and allowing debris to jam your solenoid valves.
- The Gravel Base Method: Never place a valve box directly on bare soil. Excavate an extra 4 inches below the box footprint and fill it with 3/4-inch crushed angular gravel. This ensures rapid drainage, eliminating the damp soil interface that weed seeds require to germinate.
- Pre-Emergent Perimeter Defense: During your spring lawn care routine, apply a granular pre-emergent like Prodiamine 65 WDG specifically around the 2-foot perimeter of the backflow assembly and valve boxes. Water it in immediately to create a chemical barrier that stops weed seeds from taking root in the trench backfill.
- Lid Sealing: For boxes in high-weed-pressure zones, line the inside underside of the valve box lid with a cut-to-size piece of 6-mil polyethylene sheeting to block light and physically impede nutsedge spikes.
Evicting Pests from the Assembly
Above-ground PVBs wrapped in winter insulation covers, and subterranean RPZ boxes, act as thermal magnets for pests. Rodents chew on the polyethylene wiring for your smart irrigation controllers, while ants build mounds directly over the relief valves, causing them to jam open and flood your lawn.
- Ant Bait Placement: Do not spray liquid contact insecticides directly on or near the backflow brass. The chemical residue can wash into the relief valve port and compromise the internal rubber check valves. Instead, place granular ant bait (e.g., Advion Fire Ant Bait) in a protective PVC pipe sleeve staked 3 feet away from the box.
- Rodent Deterrence: If your backflow is housed in a faux-rock landscape cover or a large plastic basin, place a commercial copper-mesh exclusion barrier around the base where the PVC enters the soil. Rodents cannot chew through copper mesh, protecting your irrigation wiring from being severed.
Long-Term Maintenance & Testing Economics
A backflow preventer is a mechanical device with internal springs and rubber diaphragms that degrade over time. Mineral scale from hard water and microscopic debris from the municipal supply will eventually cause the check valves to fail open.
As of 2026, expect to pay between $125 and $175 for an annual certified ABPA test. If your device fails the test, a standard rebuild kit (replacing the rubber seats, O-rings, and springs) costs roughly $45 to $80 depending on the model. Rebuilding a Watts LF009QT takes approximately 45 minutes with a standard metric wrench set and a food-grade silicone lubricant. Never use petroleum-based Vaseline on backflow O-rings, as it will cause the rubber to swell and bind the relief valve mechanism, leading to catastrophic flooding during your next liquid herbicide application cycle.
Frequently Asked Questions
Can I use a hose-end sprayer for weed killer if I have a backflow preventer?
Yes, but only if the hose-bibb you are connecting to is located downstream of the backflow preventer, and the hose itself features an integrated vacuum breaker at the spigot connection. Never leave a hose-end sprayer submerged in a bucket of mixed herbicide while the water is turned off, as a sudden municipal pressure drop can still siphon the chemical up the hose and past cheap plastic vacuum breakers.
Why is my backflow preventer leaking water from the bottom relief valve after applying liquid grub control?
Liquid grub control formulations often contain surfactants and wetting agents designed to break surface tension so the chemical penetrates the soil thatch. If these surfactants back-siphon into the backflow preventer, they can coat the internal rubber diaphragms, preventing them from forming a watertight seal. Flush the assembly with clean municipal water for 5 minutes immediately after any chemical injection event.

