
Lawn Care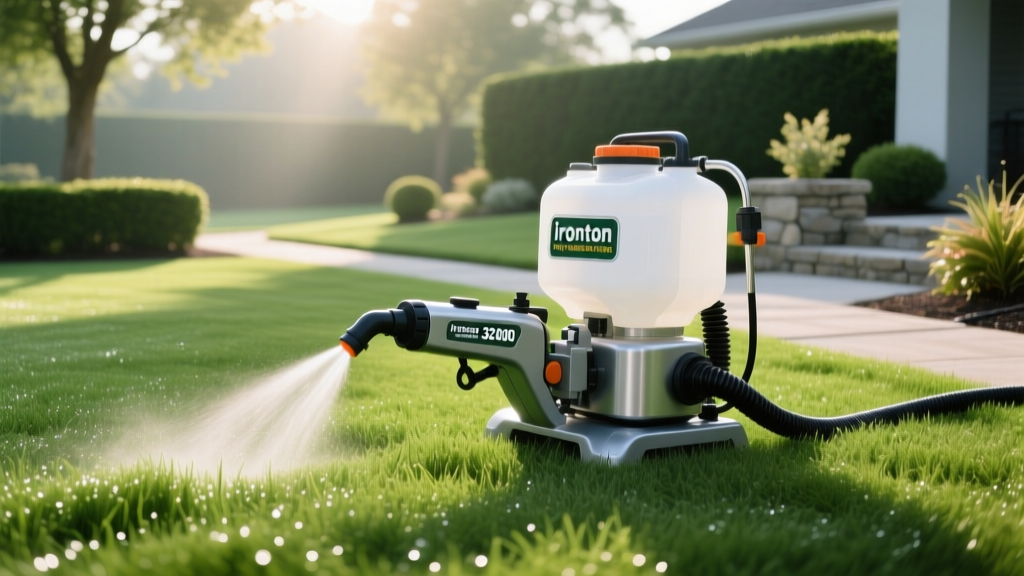
Ironton Poly Portable Sprayer 32000: Liquid Fertilizer Guide
The Shift to Liquid Turf Nutrition
The professional turfgrass industry has aggressively pivoted toward liquid nutrition programs, and by 2026, homeowners are following suit. Liquid fertilizers, biostimulants, and chelated micronutrients offer immediate foliar uptake and precise soil drenching capabilities that traditional granular spreaders simply cannot match. To execute a professional-grade liquid program on a residential lawn, your application equipment must be reliable, chemically resistant, and precisely calibrated. The Ironton Poly Portable Sprayer 32000 has emerged as a staple for lawn care enthusiasts tackling liquid urea, humic acids, and liquid aeration compounds.
Unlike cheap, big-box store pump sprayers that degrade after a single season of exposure to ammonium sulfate or 2,4-D, the Ironton 32000 series utilizes high-density, UV-stabilized polyethylene and chemical-resistant Viton seals. This guide provides a comprehensive, expert-level framework for calibrating, mixing, and maintaining the Ironton Poly Portable Sprayer 32000 specifically for soil nutrition and foliar feeding.
Expert Insight: Viton (fluoroelastomer) O-rings and pump seals are critical when handling liquid fertilizers containing solvents, adjuvants, or concentrated acids (like humic acid). Standard Buna-N rubber seals will swell and fail within weeks of contact with these compounds, leading to pressure loss and leaks.
Precision Calibration: The 1,000 Sq Ft Test
Applying liquid nitrogen (like 28% UAN) or chelated iron without calibrating your sprayer is a recipe for turf burn or ineffective treatment. The Penn State Extension recommends the 1/128th acre method for boom sprayers, but for handheld portable units like the Ironton 32000, the 1,000 square foot test area method is far more practical and accurate for residential lots.
Step-by-Step Calibration Protocol
- Mark a Test Area: Measure out a 20 ft x 50 ft section of your lawn (exactly 1,000 square feet). Use landscaping flags to mark the corners.
- Fill with Water: Fill the Ironton 32000 tank with clean water only. Do not add fertilizer yet.
- Pressurize and Spray: Pump the handle until you reach the optimal operating pressure (usually between 40 and 50 PSI, right before the pressure relief valve engages). Walk at your normal, steady application pace—typically 3 to 4 miles per hour—spraying the test area evenly.
- Measure the Output: Pour the remaining water from the tank into a large measuring pitcher. Subtract this from your starting volume to determine exactly how many ounces of water you applied to the 1,000 sq ft area.
Example Calculation: If you started with 128 oz (1 gallon) and have 48 oz left, you applied 80 oz of water per 1,000 sq ft. When mixing your liquid fertilizer, you will add the label's recommended rate for 1,000 sq ft directly into 80 oz of water in the tank.
For deeper understanding of spray mechanics and environmental safety, the EPA's guide on sprayer calibration emphasizes that consistent walking speed and pump pressure are the two highest variables affecting chemical delivery rates.
Liquid Nutrition Mixing Matrix
Different nutritional products require different carrier volumes (the amount of water used to deliver the active ingredient). A soil drench requires more water to carry the nutrients past the thatch layer and into the root zone, while a foliar spray requires less water but finer droplets to coat the grass blade without dripping off.
| Nutrient / Product | Target Application | Rate per 1,000 Sq Ft | Carrier Water Volume | Ideal Nozzle Type |
|---|---|---|---|---|
| 28% Liquid Urea (UAN) | Soil Drench / Root Feed | 3.0 - 4.0 oz | 1.5 - 2.0 Gallons | Flood Jet / Flat Fan |
| 6% Chelated Iron (Fe-EDDHA) | Foliar Spray (Darkening) | 1.5 - 2.0 oz | 0.75 - 1.0 Gallon | Hollow Cone / Fine Mist |
| Humic Acid (12% Concentrate) | Soil Drench / CEC Boost | 2.0 - 3.0 oz | 2.0 Gallons | Flat Fan (Medium Drop) |
| Liquid Kelp / Seaweed | Foliar / Stress Recovery | 1.0 - 1.5 oz | 1.0 Gallon | Hollow Cone |
| Liquid Aeration (Ammonium Laureth Sulfate) | Soil Penetration / Drench | 2.0 - 4.0 oz | 2.0 - 3.0 Gallons | Flood Jet |
Chemistry Warning: Never mix liquid iron (especially Fe-EDTA or Fe-EDDHA) with liquid phosphorus or high-pH liquid fertilizers in the same tank. The iron will precipitate out of the solution, forming a solid sludge at the bottom of your Ironton 32000 tank and clogging the pickup tube filter.
Nozzle Selection and Droplet Mechanics
The Ironton Poly Portable Sprayer 32000 typically ships with an adjustable brass or poly cone nozzle. While this is acceptable for general spot-spraying weeds, serious turf nutrition requires swapping to specialized nozzles based on your target zone.
Foliar Feeding: The Hollow Cone Nozzle
When applying biostimulants, liquid kelp, or chelated iron, the goal is foliar absorption. You need a hollow cone nozzle that produces a fine mist (droplet size between 100 to 200 microns). This maximizes the surface area of the liquid, allowing the grass blade's stomata to absorb the nutrients before the water evaporates. Apply these products in the early morning when stomata are open and wind speeds are below 5 MPH to prevent drift.
Soil Drenching: The Flat Fan or Flood Jet Nozzle
When applying liquid nitrogen, humic acids, or liquid aeration compounds, the goal is soil penetration. A flat fan nozzle (like an 8004 or 11004 TeeJet equivalent) produces larger, heavier droplets that punch through the turf canopy and thatch layer directly into the soil. Using a fine mist nozzle for soil drenches will result in the fertilizer getting trapped in the thatch, where it is useless to the root system and prone to UV degradation.
The Decontamination Protocol: Preventing Herbicide Burn
One of the most common and costly mistakes homeowners make is using the same Ironton 32000 sprayer for both broadleaf herbicides (like 2,4-D, Dicamba, or Triclopyr) and liquid fertilizers without a proper decontamination wash. Even trace amounts of ester-based herbicides left in the tank, hose, or wand will cause severe twisting, cupping, and necrosis when sprayed onto sensitive turfgrass or ornamental beds.
Triple-Rinse and Ammonia Neutralization
- Initial Flush: Drain any leftover herbicide mixture on a gravel driveway or approved waste area (never near storm drains). Fill the tank with clean water, pressurize, and spray it completely empty through the wand to clear the hose.
- The Ammonia Wash: Fill the tank 3/4 full with water and add 1 quart of household ammonia (or a commercial tank cleaner like Nutra-Sol). The ammonia raises the pH, which hydrolyzes and neutralizes 2,4-D ester residues. Let this solution sit in the tank for 15 minutes.
- Agitate and Spray: Shake the tank gently, pressurize, and spray the ammonia solution through the nozzle. This ensures the wand and internal Viton seals are neutralized.
- Final Rinse: Flush the system one last time with clean water. Remove the nozzle tip and the internal pickup tube filter, rinsing them under a high-pressure tap to dislodge any microscopic chemical crystals.
Troubleshooting Pressure and Flow Issues
If your Ironton 32000 struggles to hold pressure or sputters during application, the issue is almost always mechanical rather than chemical.
- Sputtering Flow: Check the internal pickup tube filter. Liquid fertilizers containing humic acid often contain microscopic particulate matter that will clog the mesh screen. Remove the screen, clean it with a toothbrush, and reinstall.
- Failure to Pressurize: Inspect the main lid O-ring. If it is dry or cracked, it will vent air. Remove the O-ring, wipe the groove clean, and apply a generous coat of silicone grease (never use petroleum jelly, which degrades polyethylene and rubber seals).
- Pressure Relief Valve Leaking: If the valve vents prematurely at 20 PSI, the internal spring may be fouled with mineral deposits from hard water. Soak the valve assembly in white vinegar for 30 minutes to dissolve calcium buildup.
Winterization for Longevity
Polyethylene tanks are highly resistant to cracking, but the internal pump cylinder and brass check valves are not. If you live in a climate with freezing winter temperatures, leaving even a few drops of water inside the pump chamber will cause ice expansion, permanently fracturing the pump housing. Before storing the Ironton 32000 for the winter, pump a 50/50 mixture of RV antifreeze (propylene glycol) through the system until it exits the nozzle. Store the tank with the lid loosely threaded to allow for atmospheric pressure equalization.

