
Lawn Care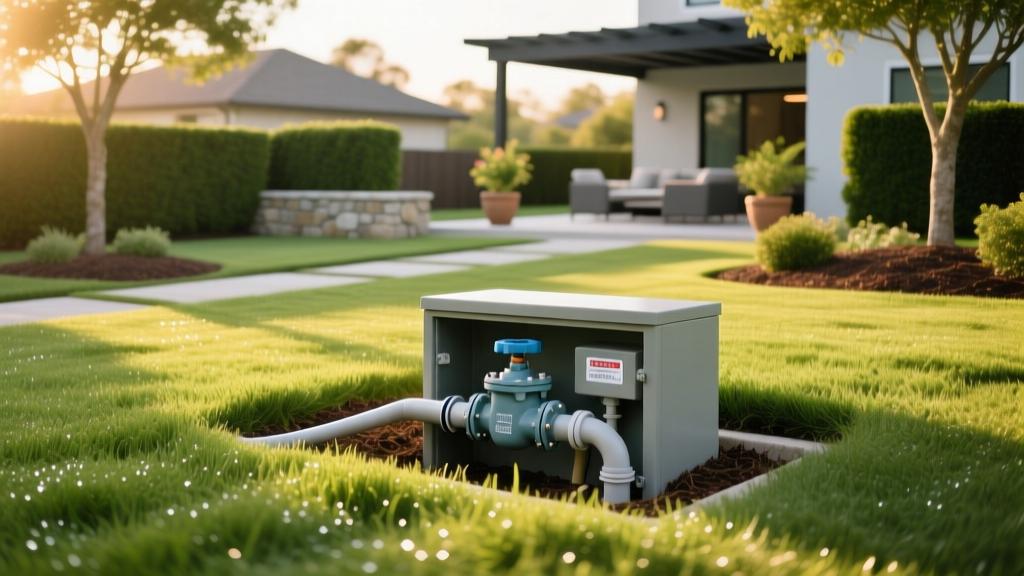
Irrigation Master Valve: Sizing, Installation, and Leak Prevention
The Hidden Hero of Sprinkler Systems
Most homeowners focus on sprinkler heads and smart controllers, ignoring the most critical mechanical safeguard in their landscaping: the irrigation master valve. Installed directly on the mainline after the backflow preventer but before the zone valves, a master valve is a normally-closed gatekeeper. It remains shut until the controller sends a 24VAC signal to open it, allowing water to pressurize the lateral lines.
Without this component, your entire underground mainline remains pressurized 24/7. If a PVC joint fails, a root intrudes, or a zone valve diaphragm ruptures, water will flow unimpeded until manually shut off at the source. According to the EPA WaterSense program, undetected irrigation leaks are a primary driver of residential water waste, often going unnoticed until a massive spike in the utility bill or severe soil erosion occurs.
WARNING: The True Cost of a Mainline Break
A 1-inch mainline leak at 60 PSI discharges approximately 15 gallons per minute. That equates to 21,600 gallons of wasted water every 24 hours. Beyond the $150–$400 monthly water bill spike, the resulting soil saturation can undermine retaining walls, drown turf roots, and cause $2,000+ in landscape restoration costs.
A 1-inch mainline leak at 60 PSI discharges approximately 15 gallons per minute. That equates to 21,600 gallons of wasted water every 24 hours. Beyond the $150–$400 monthly water bill spike, the resulting soil saturation can undermine retaining walls, drown turf roots, and cause $2,000+ in landscape restoration costs.
How an Irrigation Master Valve Actually Works
Master valves operate on the same hydraulic principles as standard zone valves but are engineered for continuous duty and higher flow volumes. When your smart controller (such as a Rachio 3 or Hunter Hydrawise) initiates a watering schedule, it simultaneously activates the zone valve solenoid and the master valve terminal (usually labeled M/V or Pump).
The electrical current energizes the master valve's solenoid, lifting the internal plunger and releasing water pressure from the upper diaphragm chamber. The incoming line pressure then pushes the diaphragm upward, opening the flow path to the zone valves. When the cycle ends, the solenoid closes, pressure rebuilds above the diaphragm, and the valve snaps shut. This depressurizes the lateral lines, meaning a downstream zone valve failure will only result in a minor trickle rather than a geyser.
Sizing Your Master Valve: The GPM & PSI Matrix
Undersizing a master valve creates severe friction loss, starving downstream zones of pressure. Oversizing it causes low-velocity issues, allowing debris to settle inside the valve body and preventing the diaphragm from sealing. The golden rule of irrigation hydraulics, endorsed by the California Water Boards and industry engineers, is to maintain water velocity below 5 feet per second (fps) to prevent water hammer—a shockwave that can shatter PVC fittings.
| Valve / Pipe Size | Max Safe Flow (GPM) | Velocity at Max Flow | Ideal Application |
|---|---|---|---|
| 3/4 Inch | 10 GPM | 4.9 fps | Small urban lawns, drip-only systems |
| 1 Inch | 18 GPM | 4.6 fps | Standard 1/4 to 1/2 acre residential |
| 1.5 Inch | 35 GPM | 3.9 fps | Large estates, multi-zone commercial |
| 2 Inch | 60 GPM | 4.5 fps | Parks, sports fields, high-flow agricultural |
Note: Always calculate your total system GPM based on your water meter's static pressure and dynamic flow capacity, not just the physical pipe diameter.
Top Master Valve Models for Residential Lawns
Selecting a high-quality valve ensures the internal diaphragm withstands years of pressure cycling. Here is a comparison of the top three 1-inch models used by professionals in 2026:
- Hunter ICV-100 (1-inch)
Price Range: $60–$75
Pros: Features a fiber-reinforced EPDM diaphragm that resists tearing under high pressure. Includes a patented bleed screw that captures debris during manual operation.
Cons: Slightly higher price point; solenoid requires exact 24VAC (can struggle on long wire runs with voltage drop). - Rain Bird PEB-100 (1-inch)
Price Range: $45–$60
Pros: Heavy-duty glass-filled nylon body handles up to 150 PSI. The scrubber mechanism on the diaphragm clears grit from the seat automatically.
Cons: The manual bleed handle is small and difficult to turn with wet or gloved hands. - Toro 2900 Series (1-inch)
Price Range: $40–$55
Pros: Excellent budget option with a reliable brass flow control stem. High tolerance for dirty water sources.
Cons: Plastic internal components wear faster than Hunter or Rain Bird equivalents in high-PSI environments.
Step-by-Step Installation and Wiring Protocol
Proper installation dictates the lifespan of your master valve. Follow this exact protocol to prevent hydraulic shock and electrical corrosion:
- Trenching and Placement: Install the master valve 8 to 12 inches downstream of the backflow preventer, but upstream of the zone valve manifold. Bury the mainline at least 12 inches deep to protect it from aeration spikes and frost heave.
- PVC Assembly: Use Schedule 40 PVC for the mainline. Apply purple primer to both the pipe and the fitting socket, followed by a uniform coat of clear PVC cement. Hold the joint firmly for 30 seconds to prevent the valve body from being pushed out by hydraulic pressure before the cement cures.
- Valve Box Setup: Place the valve inside a 10-inch round or 12x18 rectangular polyethylene valve box. Bed the bottom of the box with 2 inches of crushed gravel to ensure drainage and prevent the valve from sitting in standing mud, which accelerates solenoid corrosion.
- Wiring the Solenoid: Use 18-gauge solid copper UF (Underground Feeder) wire. Strip exactly 3/8 inch of insulation. Connect the wires using gel-filled silicone wire connectors (not standard plastic twist caps). The silicone grease displaces moisture, preventing the copper from oxidizing and breaking the 24VAC circuit over time.
- Controller Configuration: Connect the master valve hot wire to the 'M/V' or 'Pump' terminal on your controller. The common wire ties into the shared common wire bundle that services all downstream zone valves.
Troubleshooting Common Master Valve Failures
When the master valve fails, the entire irrigation system goes offline. Use this decision tree to diagnose the issue:
Symptom: No zones turn on, but the controller shows they are running.
Cause 1: Blown solenoid coil. Fix: Test the solenoid with a multimeter. A healthy coil reads between 20 and 60 ohms. If it reads infinite (open), replace the solenoid.
Cause 2: Voltage drop. Fix: Measure AC voltage at the controller terminal and then at the valve box. If the drop exceeds 10%, you must splice in a thicker gauge wire (14 AWG) for the mainline run.
Symptom: Zones continue to leak or run after the controller shuts off.
Cause 1: Debris trapped under the diaphragm. Fix: Turn off the water supply, remove the top bonnet screws, lift the diaphragm, and flush the lower valve body with water. Inspect the rubber seat for tears.
Cause 2: Manual bleed screw left open. Fix: Locate the external or internal bleed handle and turn it clockwise until it seats firmly. Do not overtighten, as this will strip the plastic threads.
Expert FAQ
Do I need a master valve if my system is fed by a well pump?
Yes. In pump systems, the master valve terminal is often wired to a pump start relay. This prevents the pump from 'dry running' or short-cycling if a downstream zone valve fails to open, saving your pump motor from burning out.
Can I install the master valve above ground?
Technically yes, but it is highly discouraged unless you live in a freeze-free climate and drain it for winter. Above-ground valves are exposed to UV degradation, which makes the plastic bonnet brittle, and they are vulnerable to accidental damage from mowers and string trimmers.

