
Lawn Care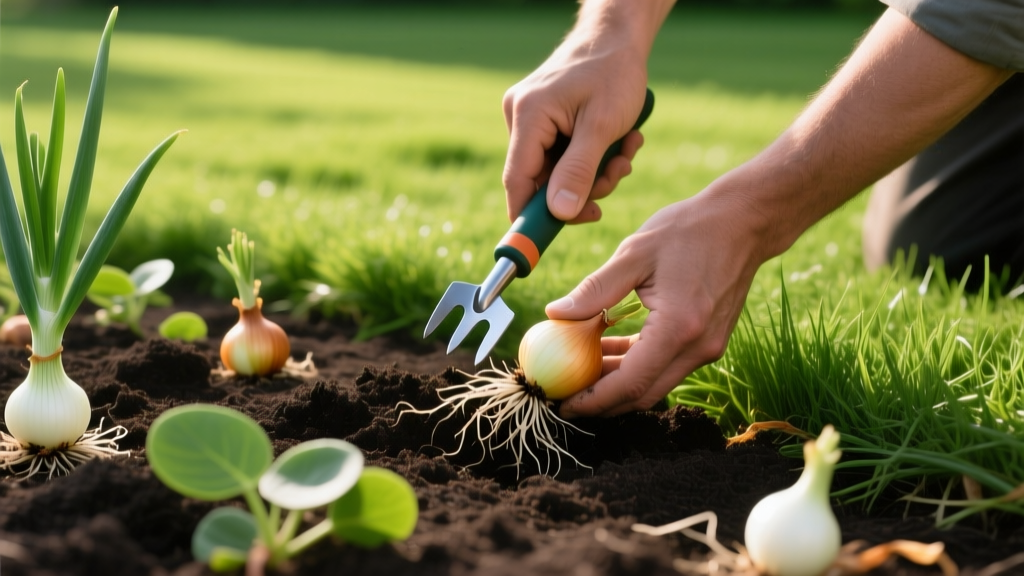
How to Kill Wild Onions in Lawn: Step-by-Step Eradication
The Challenge of Allium Canadense in Turfgrass
Few lawn weeds trigger as much frustration as wild onions in lawn environments. Scientifically known as Allium canadense (and frequently confused with its cousin, wild garlic or Allium vineale), this perennial weed thrives in cool weather, often emerging in late fall and persisting through early spring when your warm-season turf is dormant. Homeowners frequently attempt to eradicate them by mowing or pulling, only to watch the clumps multiply the following year. Eradication requires a precise, step-by-step approach that targets both the visible foliage and the complex underground bulbil network.
Identification: Wild Onion vs. Wild Garlic
Before mixing any herbicide, you must correctly identify the invader. While the eradication protocols are identical for both, knowing the difference helps you understand the plant's reproductive cycle. According to turfgrass specialists at Clemson University Extension, both species emit a strong odor when crushed, but their physical structures differ significantly.
| Feature | Wild Onion (Allium canadense) | Wild Garlic (Allium vineale) |
|---|---|---|
| Leaf/Stem Shape | Round, hollow, and arises directly from the base. | Round and hollow near the base, but becomes flat and solid higher up. |
| Bulb Structure | Thick, scaly outer coating with a dense cluster of flat-sided bulblets. | Thin, papery outer coating with a few rounded bulblets. |
| Aerial Bulbils | Rarely produces aerial bulbils on the flower stalk. | Almost always produces aerial bulbils (small bulbs) at the top of the flower stalk. |
| Odor Profile | Strong, distinct raw onion scent. | Pungent, sharp garlic scent. |
The Biology of the Bulb: Why Standard Treatments Fail
The primary reason DIY weed killers fail against wild onions is the plant's unique physical defense: a thick, waxy cuticle on its tubular leaves. When you spray a standard aqueous herbicide, the droplets simply bead up and roll off the leaf surface without penetrating the plant tissue. Furthermore, the underground bulb system reproduces via offset bulblets. If you pull the plant and snap the main stem, the remaining offsets stay in the soil and sprout multiple new shoots the next season. To win, you must break the waxy barrier and achieve systemic translocation down to the root zone.
Step-by-Step Chemical Eradication Protocol
For lawns with moderate to heavy infestations, chemical intervention is the only practical solution. Follow this precise mixing and application protocol to ensure the herbicide reaches the bulb.
Step 1: Time the Application Correctly
Wild onions are cool-season perennials. The most effective window for chemical application is in the fall (November to December) or early spring (March to April) when daytime soil temperatures are between 50°F and 65°F. During these windows, the plant is actively pulling nutrients—and herbicides—down into the bulb for winter storage or spring growth.
Step 2: Mow to Expose Fresh Tissue
Mow your lawn slightly lower than usual 24 hours before treatment. This removes the older, heavily weathered waxy tips of the wild onion leaves and exposes fresher, more porous tissue that is highly receptive to chemical absorption.
Step 3: Mix a Three-Way Herbicide with a Surfactant
Do not use single-ingredient 2,4-D; it is largely ineffective against Allium species. You need a three-way broadleaf herbicide containing 2,4-D, MCPP, and Dicamba (such as Trimec Classic or Ortho WeedClear for Lawns). For warm-season grasses like Bermuda or Zoysia, use Imazaquin (commonly sold as Image Kills Nutsedge), which is safer for the turf and highly effective on wild onions.
Critical Step: Add a Non-Ionic Surfactant
You must add a non-ionic surfactant (like Southern Ag Surfactant or Hi-Yield Spreader Sticker) to your tank mix. The surfactant breaks the surface tension of the water and dissolves the waxy cuticle on the onion leaves. Mix at a rate of 1.5 ounces of three-way herbicide plus 1 teaspoon of surfactant per gallon of water. This mixture will cover approximately 1,000 square feet.
You must add a non-ionic surfactant (like Southern Ag Surfactant or Hi-Yield Spreader Sticker) to your tank mix. The surfactant breaks the surface tension of the water and dissolves the waxy cuticle on the onion leaves. Mix at a rate of 1.5 ounces of three-way herbicide plus 1 teaspoon of surfactant per gallon of water. This mixture will cover approximately 1,000 square feet.
Step 4: Apply and Wait
Use a pump sprayer to apply the mixture directly to the wild onion clumps until the leaves are thoroughly wet, but not dripping. Do not mow for at least 48 hours after application to allow maximum translocation to the bulb. You should see the foliage begin to yellow and twist within 10 to 14 days. A second application may be required 30 days later for severe infestations.
Step-by-Step Manual Removal (For Organic Lawns)
If you maintain an organic lawn or have only a few isolated clumps, manual extraction is viable, but it requires specific tools and depth to prevent regrowth. Researchers at Penn State Extension emphasize that incomplete bulb removal guarantees a heavier infestation the following year due to the disturbance of the offset cluster.
- Hydrate the Soil: Water the target area deeply 24 hours before digging. Dry, compacted soil will cause the bulb stem to snap off at the soil line, leaving the reproductive bulblets behind.
- Select the Right Tool: Abandon standard trowels. Use a stainless steel Hori-Hori knife or a specialized deep-root weeder (like the Fiskars Stand-Up Weeder) that can penetrate narrow channels.
- Dig to the Required Depth: Insert your tool at a 45-degree angle, at least 6 inches away from the center of the onion clump, and dig down a minimum of 6 to 8 inches. Wild onion bulbs sit deeper than most turfgrass roots.
- Extract and Inspect: Lift the entire soil core. Sift through the dirt with gloved hands to ensure you have collected every tiny, pearl-like offset bulbil. Even one missed bulbil will regenerate a new plant.
- Dispose Properly: Place the extracted onions and soil in a sealed trash bag. Never place them in your compost bin or yard waste recycling, as municipal composting facilities rarely reach the sustained 140°F+ temperatures required to kill Allium bulbils.
Treatment Decision Matrix
Use the following framework to decide which eradication method fits your specific lawn scenario.
| Lawn Scenario | Infestation Level | Recommended Protocol | Estimated Cost (per 5,000 sq ft) |
|---|---|---|---|
| Organic / Edible Landscape | Low (Under 20 clumps) | Manual Extraction (Hori-Hori Knife) | $35 (One-time tool cost) |
| Cool-Season Turf (Fescue/Ky. Bluegrass) | Moderate to High | Trimec Classic + Surfactant Spot Spray | $45 - $60 (Concentrates) |
| Warm-Season Turf (Bermuda/Zoysia) | Moderate to High | Imazaquin (Image) + Surfactant Broadcast | $50 - $75 (Concentrates) |
Post-Eradication Lawn Recovery and Prevention
Once the wild onions have been eradicated, you will be left with small bare patches in your turf. These bare spots are prime real estate for new weed seeds. Rake the areas vigorously to break up the soil crust, apply a high-quality starter fertilizer (such as a 10-18-10 NPK ratio), and overseed with a grass variety that matches your existing lawn. For cool-season lawns, do this in early fall; for warm-season lawns, wait until late spring when soil temperatures consistently exceed 65°F.
To prevent future outbreaks, address the underlying soil conditions. Wild onions thrive in compacted, poorly drained, and slightly acidic soils. Conduct a soil test and apply pelletized lime if your pH drops below 6.0. Furthermore, applying a pre-emergent herbicide containing Prodiamine 65 WDG in late August will create a chemical barrier in the top inch of soil, preventing any surviving aerial bulbils or seeds from germinating as the weather cools in September. Consistent aeration and maintaining a thick, 3-inch turf canopy will ultimately shade out and outcompete any remaining Allium attempts to establish.

