
Lawn Care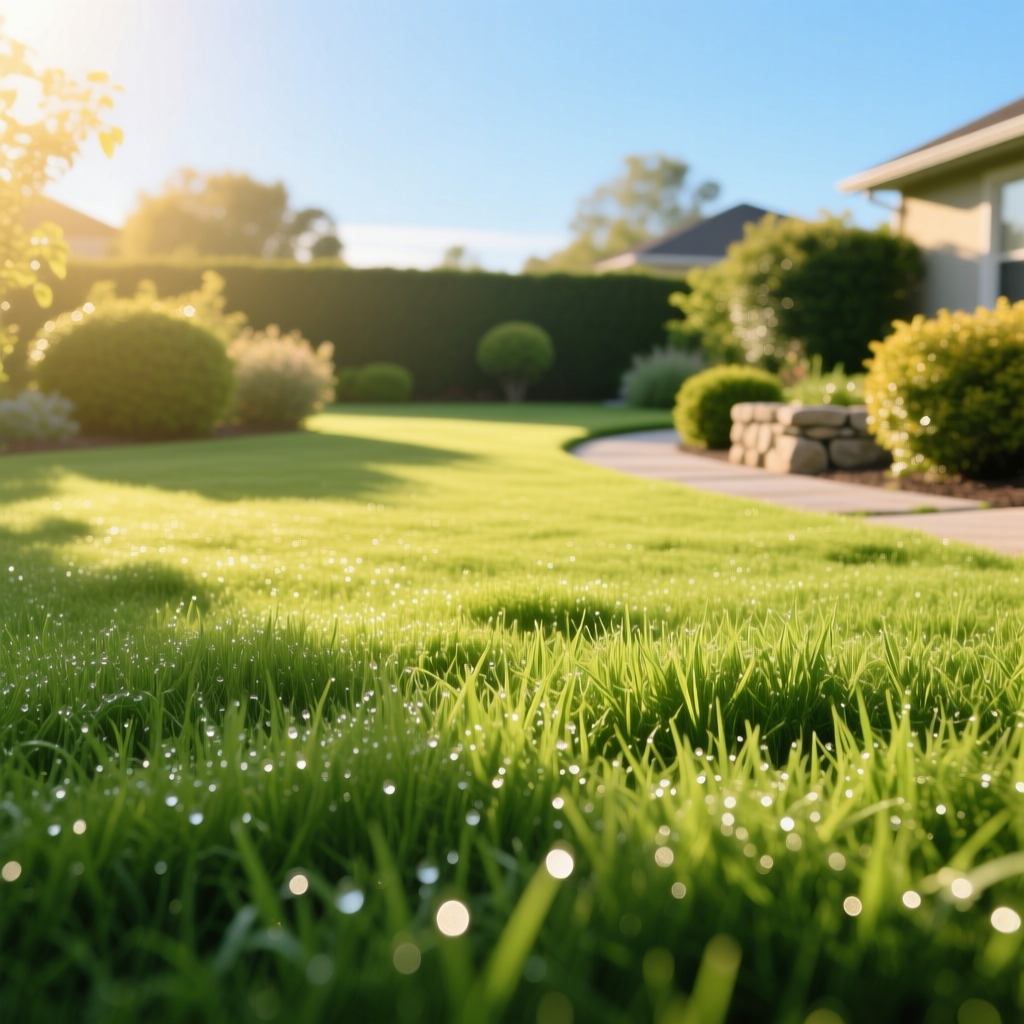
Lawn Care for Dummies: The Complete Beginner's PDF-Style
Let's face it — lawn care can feel overwhelming when you're just starting out. Between the endless product aisles at the garden center, confusing fertilizer numbers, and conflicting advice from neighbors, it's easy to wonder where to begin. If you've been searching for a lawn care for dummies PDF or a simple, no-nonsense breakdown of everything you need to know, you've landed in the right place.
This guide distills the essential principles of lawn care into a clear, step-by-step format that anyone can follow — whether you've just moved into your first home with a yard or you've been staring at a patchy, weedy lawn for years without knowing what to do about it. Think of this as your downloadable, bookmark-worthy reference that covers every fundamental aspect of maintaining a thick, green, healthy lawn.
By the time you finish reading, you'll understand the core pillars of lawn care: mowing correctly, watering wisely, feeding your grass at the right time, controlling weeds & pests, and adjusting your routine with the seasons. No jargon. No fluff. Just practical steps that actually work.
Before we dive in, it helps to know what type of grass you're working with. Cool-season grasses like Kentucky Bluegrass and Tall Fescue have very different needs than warm-season varieties like Bermuda Grass or Zoysia Grass. Identifying your grass type first will make every step in this guide significantly more effective.
Step 1: Master the Basics of Mowing Your Lawn
Mowing is the single most frequent lawn care task you'll perform, and it's also where most beginners make the biggest mistakes. Proper mowing isn't just about cutting grass short — it's about cutting it correctly to encourage deep roots, crowd out weeds, and maintain a lush appearance all season long.
The One-Third Rule
The golden rule of mowing is simple: never remove more than one-third of the grass blade in a single mowing session. If your target mowing height is 3 inches, you should mow when the grass reaches about 4.5 inches. Cutting too much at once shocks the plant, weakens the root system, and leaves your lawn vulnerable to disease, drought stress, and weed invasion.
Ideal Mowing Heights by Grass Type
Different grass species thrive at different heights. Here's a quick reference chart you can save or print:
- Cool-Season Grasses:
- Kentucky Bluegrass: 2.5–3.5 inches
- Tall Fescue: 3–4 inches
- Perennial Ryegrass: 2–3 inches
- Fine Fescue: 2.5–3.5 inches
- Warm-Season Grasses:
- Bermuda Grass: 1–2 inches
- Zoysia Grass: 1–2.5 inches
- St. Augustine Grass: 2.5–4 inches
- Centipede Grass: 1.5–2 inches
- Bahia Grass: 3–4 inches
When in doubt, err on the side of cutting higher. Taller grass shades the soil, conserves moisture, and prevents weed seeds from germinating. For a deeper dive into proper technique, check out our complete mowing tips guide.
Keep Your Mower Blade Sharp
A dull mower blade tears grass rather than slicing it cleanly. Those ragged, torn tips turn brown within days, giving your entire lawn a dull, unhealthy appearance. Sharpen your mower blade at least twice per mowing season — or more often if you notice frayed grass tips after mowing. Most homeowners can sharpen a blade themselves with a file or bench grinder, or you can take it to a local small-engine repair shop.
Mowing Patterns & Frequency
Alternate your mowing direction each time you cut. If you mow north-south one week, go east-west the next. This prevents soil compaction along the same wheel tracks and encourages grass to grow upright rather than leaning in one direction. During peak growing season, you may need to mow every 5–7 days. During slower growth periods, every 10–14 days may suffice.
Leave the Clippings (Most of the Time)
Grass clippings decompose quickly and return valuable nitrogen & organic matter to the soil. This practice, known as "grasscycling," can supply up to 25% of your lawn's annual nitrogen needs for free. Only bag clippings when the grass is excessively tall, wet, or showing signs of disease. For more on this topic, read our guide on whether to bag or mulch grass clippings.
Step 2: Water Your Lawn the Smart Way
Overwatering is just as damaging as underwatering — and it's far more common among beginners. The goal is to provide your lawn with enough moisture to sustain deep, healthy root growth without creating the soggy conditions that invite fungus, thatch buildup, and shallow roots.
How Much Water Does Your Lawn Need?
Most lawns need approximately 1 to 1.5 inches of water per week during the active growing season, including rainfall. This amount may increase during extreme heat or decrease during cool, cloudy periods. The key is consistency and depth — you want water to penetrate 6–8 inches into the soil to encourage roots to grow downward.
Water Deeply & Infrequently
Rather than giving your lawn a light sprinkle every day, water deeply 2–3 times per week. Deep watering trains roots to grow deeper into the soil profile, making your lawn more drought-resistant and resilient. Shallow, frequent watering produces shallow roots that wilt quickly the moment temperatures rise.
To measure how much water your sprinkler delivers, place several empty tuna cans or rain gauges around your yard, run the sprinkler for 15 minutes, then measure the depth. Use that data to calculate how long you need to run your system to deliver one inch of water.
The Best Time to Water
Always water in the early morning, ideally between 4 AM & 10 AM. Morning watering minimizes evaporation losses, allows grass blades to dry before evening (reducing fungal disease risk), and takes advantage of typically calmer winds. Watering in the evening leaves the lawn wet overnight, creating ideal conditions for diseases like brown patch & dollar spot. Midday watering wastes significant amounts of water to evaporation.
Signs Your Lawn Needs Water
Learn to read your lawn's signals. Grass that needs water will:
- Take on a bluish-gray tint
- Show footprints that remain visible for several minutes (the grass doesn't spring back)
- Curl or fold its leaf blades lengthwise
- Appear wilted or droopy, especially in the afternoon
If you see these signs, it's time to water. For a comprehensive breakdown by region & season, visit our lawn watering guide.
Recommended Watering Tools
- Oscillating Sprinkler: Great for rectangular lawns; provides even coverage across wide areas.
- Impact Sprinkler: Durable, covers large circular areas, ideal for bigger yards.
- Smart Irrigation Controller: Connects to local weather data to automatically adjust watering schedules, saving water & money.
- Soil Moisture Meter: A simple probe that tells you whether the soil is moist at root level — takes the guesswork out of watering decisions.
- Rain Gauge: Essential for tracking how much natural rainfall your lawn receives each week so you can supplement accordingly.
Step 3: Fertilize for Thick, Green Growth
Fertilizer is what transforms a thin, pale lawn into a thick, vibrant carpet of green. But applying the wrong product at the wrong time — or applying too much — can burn your grass, pollute waterways, and actually make your lawn more susceptible to pests & disease. Here's how to get it right.
Understanding Fertilizer Labels: N-P-K
Every fertilizer bag displays three numbers, such as 20-5-10 or 16-4-8. These represent the percentage by weight of the three primary nutrients:
- Nitrogen (N): Drives leaf & blade growth; responsible for the rich green color. This is the most important nutrient for lawn grasses.
- Phosphorus (P): Supports root development & establishment. Important for new lawns or overseeded areas; established lawns typically need very little.
- Potassium (K): Strengthens overall plant health, improving drought tolerance, cold hardiness, and disease resistance.
For most established lawns, a fertilizer with a high first number (nitrogen) and lower second & third numbers works best. A ratio like 3-1-2 or 4-1-2 is ideal for general maintenance.
When to Fertilize
Timing depends on your grass type:
- Cool-Season Grasses (Kentucky Bluegrass, Fescue, Ryegrass): Fertilize most heavily in early fall (September–October) and again in late fall (November). A lighter application in late spring (May–June) is optional. Avoid fertilizing during the heat of summer, which stresses cool-season grasses.
- Warm-Season Grasses (Bermuda, Zoysia, St. Augustine): Begin fertilizing in late spring once the grass has fully greened up (April–May). Continue with applications every 6–8 weeks through summer. Stop fertilizing 6–8 weeks before your area's expected first frost to avoid pushing tender new growth that winter will kill.
Granular vs. Liquid Fertilizer
Granular fertilizer is the most beginner-friendly option. It's easy to apply with a broadcast or drop spreader, provides slow-release nutrition over several weeks, and has a low risk of burning. Look for products labeled "slow-release" or "controlled-release" for the most consistent results.
Liquid fertilizer acts faster and is useful for a quick green-up, but it requires more frequent application and carries a higher risk of burning if mixed incorrectly. Beginners are generally better off starting with granular products.
Recommended Fertilizer Products for Beginners
- Scotts Turf Builder: Widely available, affordable, and effective for general-purpose lawn feeding.
- Milorganite: An organic, slow-release option made from heat-dried microbes. Very low burn risk, safe for beginners, and excellent for improving soil biology over time.
- Lesco Professional Fertilizer: A higher-quality option available at specialty stores; often used by lawn care professionals.
- Espoma Organic Lawn Food: A great natural option that feeds the soil ecosystem while greening your grass.
How to Apply Fertilizer Without Stripes or Burn
- Mow your lawn a day or two before fertilizing.
- Use a broadcast spreader for even coverage. Walk in one direction (e.g., north-south), then make a second pass perpendicular (east-west) at half the recommended application rate each pass.
- Keep the spreader moving before you open the hopper to avoid dumping concentrated fertilizer in one spot.
- Water the lawn lightly after applying granular fertilizer to wash granules off grass blades & into the soil.
- Sweep any fertilizer that lands on driveways or sidewalks back onto the lawn to prevent staining & runoff.
For a complete seasonal feeding calendar tailored to your grass type, see our lawn fertilizing schedule guide.
Step 4: Control Weeds, Pests & Diseases
A thick, healthy lawn is your best defense against weeds, insects, and diseases. When grass is dense and vigorous, there's simply no room for invaders. But even well-maintained lawns encounter problems from time to time. Here's how to handle the most common issues without panicking.
Weed Control Fundamentals
Weeds fall into two broad categories:
- Broadleaf Weeds: Dandelions, clover, plantain, chickweed, and thistle. These are easiest to spot because their leaves look different from grass.
- Grassy Weeds: Crabgrass, goosegrass, annual bluegrass (Poa annua), and nutsedge. These mimic lawn grass and are harder to identify & control.
Pre-emergent herbicides prevent weed seeds from germinating and are your first line of defense against crabgrass & other annual weeds. Apply pre-emergent in early spring before soil temperatures reach 55°F (the point at which crabgrass germinates). A second application in early fall prevents cool-season weeds like Poa annua.
Post-emergent herbicides kill weeds that are already growing. For broadleaf weeds, a selective herbicide containing 2,4-D, dicamba, or MCPP will kill the weed without harming your grass. Spot-treat individual weeds rather than spraying the entire lawn to minimize chemical use.
For a natural approach, hand-pulling weeds after a rain (when the soil is soft) is surprisingly effective for small infestations. Corn gluten meal is an organic pre-emergent option, though it's less potent than synthetic products.
Common Lawn Pests & How to Handle Them
- Grubs: White, C-shaped larvae that feed on grass roots. If you can peel back sections of turf like a carpet, grubs are likely the culprit. Apply a preventive grub control product (containing chlorantraniliprole or imidacloprid) in early summer, or use beneficial nematodes for an organic solution. See our grub control guide for details.
- Chinch Bugs: Tiny black & white insects that thrive in hot, sunny areas, particularly in St. Augustine lawns. Look for yellowing patches that don't respond to watering.
- Armyworms & Sod Webworms: Caterpillars that chew grass blades, leaving ragged, brown patches. Treat with Bt (Bacillus thuringiensis) for an organic option or a labeled insecticide for severe infestations.
Preventing & Treating Lawn Diseases
Most lawn diseases are fungal and thrive in specific moisture & temperature conditions. The most common include:
- Brown Patch: Circular brown areas with a dark "smoke ring" border, common in hot, humid weather on tall fescue & ryegrass.
- Dollar Spot: Small, silver-dollar-sized straw-colored spots, often appearing when nitrogen levels are low.
- Snow Mold: Gray or pink crusty patches that appear as snow melts in spring.
Prevention is always easier than treatment. Maintain proper mowing height, avoid overwatering, reduce thatch buildup, and ensure good air circulation. If disease strikes, a fungicide application may be necessary, but correcting the underlying cultural issue is more important long-term.
Essential Weed & Pest Control Tools
- Pump Sprayer (1–2 gallon): For spot-treating weeds with liquid herbicide.
- Stand-Up Weeder Tool: Allows you to pull weeds with their roots without bending over.
- Spreaders: A broadcast spreader for granular pre-emergent & insect control products.
- Soil Probe or Screwdriver: To check for grub activity beneath the turf.
Step 5: Follow a Seasonal Lawn Care Calendar
One of the biggest mistakes beginners make is doing the right task at the wrong time. Aerating in summer, overseeding at the wrong temperature, or fertilizing dormant grass wastes time, money, and effort. Here's a simplified seasonal calendar to keep you on track.
Spring Lawn Care (March–May)
- Early Spring: Rake away dead grass & debris from winter. Inspect for snow mold damage. Apply pre-emergent crabgrass preventer when forsythia bushes bloom (soil temperature around 55°F).
- Mid-Spring: Begin regular mowing as grass starts active growth. Apply the first round of fertilizer for warm-season grasses. Overseed any bare spots in cool-season lawns — see our overseeding guide for step-by-step instructions.
- Late Spring: Sharpen mower blades. Check irrigation systems for broken heads or clogged nozzles. Begin monitoring for early pest activity.
Summer Lawn Care (June–August)
- Early Summer: Raise your mowing height by 0.5–1 inch to help grass cope with heat stress. Apply grub preventive treatment. Water deeply & infrequently.
- Mid-Summer: This is a stressful period for cool-season grasses. Avoid heavy fertilization. Minimize foot traffic on drought-stressed areas. Monitor for chinch bugs, armyworms, and fungal diseases.
- Late Summer: Begin planning for fall renovation. Order grass seed & fertilizer. If you have warm-season grass, this may be the last fertilization window before fall dormancy.
Fall Lawn Care (September–November)
Fall is the most important season for cool-season lawn care. This is when your grass recovers from summer stress and builds the root reserves it needs to survive winter & explode in spring.
- Early Fall: Core aerate compacted lawns to improve air, water, and nutrient penetration. Overseed thin areas immediately after aeration. Apply the first round of fall fertilizer. Our aeration guide walks you through the process.
- Mid-Fall: Continue mowing as long as grass is growing. Apply a second round of fertilizer. Rake or mulch fallen leaves — a thick layer of leaves smothering your lawn over winter is a recipe for dead patches & snow mold.
- Late Fall: Apply a "winterizer" fertilizer high in potassium to boost cold hardiness. Perform the final mowing of the season, cutting slightly shorter than usual (but still following the one-third rule). Drain & winterize your irrigation system before the first hard freeze.
Winter Lawn Care (December–February)
- Minimize foot traffic on dormant or frozen grass to prevent crown damage.
- Keep pathways clear of salt & ice melt products that can damage lawn edges.
- Service & sharpen mower blades, clean tools, and plan your spring strategy.
- Review your lawn care notes from the past year & adjust your plan accordingly.
- Order seed, fertilizer, and soil amendments so you're ready when spring arrives.
Essential Tools Every Beginner Should Own
You don't need a garage full of expensive equipment to maintain a beautiful lawn. Here are the core tools every homeowner should invest in:
- Quality Rotary Mower: A reliable mower with adjustable height settings is your most important investment.
- Broadcast Spreader: For evenly distributing fertilizer, seed, and granular herbicides.
- Garden Hose & Sprinkler: A durable, kink-free hose paired with an appropriate sprinkler for your lawn size.
- Leaf Rake & Garden Rake: A flexible leaf rake for debris and a stiff garden rake for dethatching & soil prep.
- Soil Test Kit: Testing your soil every 2–3 years reveals exactly which nutrients your lawn needs (and which it doesn't), eliminating guesswork & wasted money. Visit our soil testing guide to learn how.
- Core Aerator: You can rent a walk-behind aerator annually or hire a professional service.
- Pump Sprayer: For applying liquid weed control, insecticides, or foliar fertilizers.
Frequently Asked Questions
How often should I mow my lawn as a beginner?
During peak growing season, plan to mow every 5–7 days. The exact frequency depends on your grass type, the season, rainfall, and how much fertilizer you've applied. The most reliable approach is to follow the one-third rule: mow whenever the grass has grown one-third taller than your target height. For example, if you want to maintain a 3-inch height, mow when the grass reaches about 4.5 inches. During slow-growth periods (drought, late fall, or extreme heat), you may only need to mow every 10–14 days. Never mow just to stick to a rigid schedule — let the grass tell you when it's time.
Should I water my lawn every day?
No. Daily watering is one of the most common beginner mistakes and actually harms your lawn over time. Frequent, shallow watering encourages roots to stay near the soil surface, making your grass dependent on constant moisture and highly vulnerable to drought. Instead, water deeply 2–3 times per week, delivering a total of about 1 to 1.5 inches per week (including rainfall). Deep, infrequent watering forces roots to grow 6–8 inches into the soil, creating a resilient, self-sustaining lawn. Always water in the early morning to reduce evaporation and prevent fungal diseases.
What is the best fertilizer for a beginner to use?
For beginners, a slow-release granular fertilizer with an N-P-K ratio around 3-1-2 or 4-1-2 is the safest & most effective choice. Products like Scotts Turf Builder, Milorganite, or Espoma Organic Lawn Food are widely available, easy to apply with a broadcast spreader, and have a low risk of burning your lawn. Slow-release formulations feed your grass gradually over 6–8 weeks, providing consistent nutrition without the surge growth that fast-release fertilizers can cause. Always follow the application rates on the bag — applying more than recommended will not green your lawn faster and can damage it.
How do I know if my lawn needs aeration?
Your lawn likely needs aeration if you notice any of these signs: water pools on the surface after rain instead of soaking in, the soil feels hard & compacted when you try to push a screwdriver into it, the lawn thins out despite proper fertilization & watering, or there's heavy foot traffic on the area (kids, pets, frequent gatherings). A simple test is to try inserting a garden fork or screwdriver into the soil — if you can't push it in at least 3–4 inches easily, compaction is a problem. Most lawns benefit from core aeration once a year, ideally in early fall for cool-season grasses and late spring for warm-season grasses.
Can I fix a patchy, weedy lawn without starting over completely?
Absolutely. Most struggling lawns can be dramatically improved without the expense & effort of a full renovation. The strategy is straightforward: first, get a soil test to identify any nutrient deficiencies or pH imbalances and correct them. Next, core aerate the lawn to relieve compaction. Then, overseed thin areas with a quality grass seed matched to your existing lawn & growing conditions — our grass type selection guide can help you choose. Follow up with proper fertilization, consistent watering, and a pre-emergent herbicide application (timed so it doesn't interfere with your new seed germination). Within one to two growing seasons of consistent care, most patchy lawns transform into thick, healthy turf. Patience & consistency matter far more than any single miracle product.
Final Thoughts: Your Lawn Care Journey Starts Here
Lawn care doesn't have to be complicated. By mastering these five pillars — proper mowing, smart watering, strategic fertilization, proactive weed & pest control, and seasonal timing — you'll be ahead of the vast majority of homeowners. The key is consistency. A little attention every week beats a frantic weekend of catch-up work every month.
Bookmark this page or save it as your personal lawn care reference. Start with the basics, build good habits, and gradually add more advanced techniques as your confidence grows. Before long, you'll be the one neighbors come to for advice.
For more in-depth guides on specific topics, explore our full library of lawn care resources, learn about different grass types, or dive into our complete lawn care schedule to plan your entire year of lawn maintenance.