
Lawn Care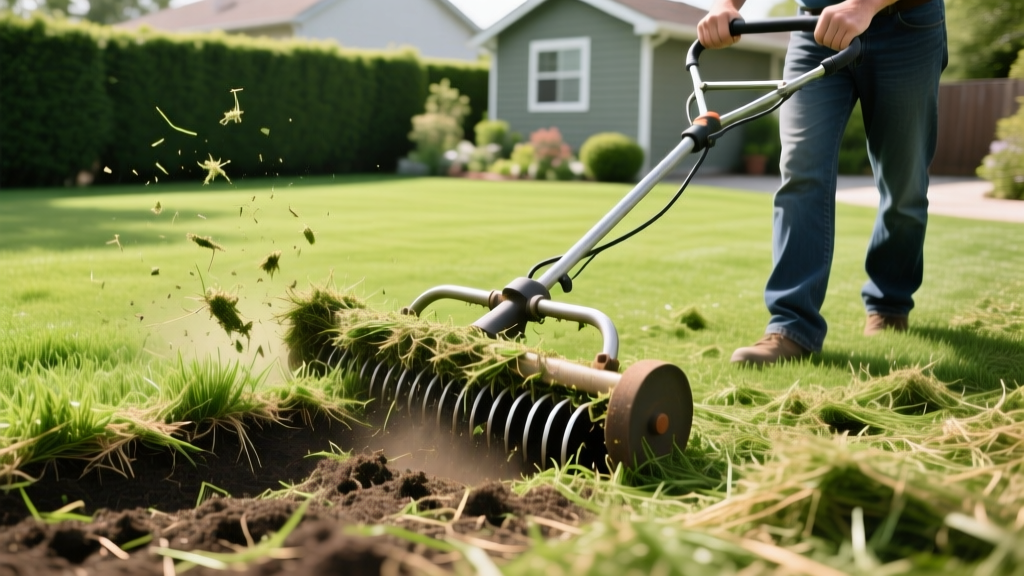
Controlling Lawn Thatching: Step-by-Step Dethatching Guide
Understanding the Thatch Layer: When Thatching Becomes a Problem
Thatch is a tightly intermingled layer of living and dead plant tissue—primarily stems, crowns, rhizomes, and roots—that accumulates between the green vegetation of your lawn and the soil surface. A common misconception is that grass clippings cause thatch. In reality, clippings are mostly water and decompose within days. True thatch is composed of lignin-rich tissues that resist rapid microbial breakdown. According to University of Minnesota Extension, a thin layer of thatch (under 1/2 inch) is actually beneficial, providing insulation against temperature fluctuations and reducing soil moisture evaporation.
However, when thatch accumulation outpaces microbial decomposition, it creates a hydrophobic barrier. This prevents water, oxygen, and liquid fertilizers from reaching the root zone. Excessive thatching also harbors turf diseases like brown patch and provides a nesting habitat for destructive pests like chinch bugs and grubs. Controlling lawn thatching requires a precise, step-by-step mechanical intervention known as dethatching or power raking, timed perfectly with your grass type's peak growth cycle.
The Threshold Rule: Cool-season grasses (Kentucky bluegrass, tall fescue, perennial ryegrass) require dethatching when the layer exceeds 1/2 inch. Warm-season grasses (Bermudagrass, Zoysiagrass) can tolerate up to 1 inch of thatch due to their dense stolon and rhizome networks before intervention is necessary.
Diagnostic Phase: Measuring Your Thatch Depth
Before renting equipment or buying a dethatcher, you must verify the actual depth of the thatch layer. Visual estimation from the surface is highly inaccurate because the thatch layer often compresses underfoot.
Step 1: Extracting a Core Sample
- Select Test Zones: Choose three representative areas of your lawn, avoiding high-traffic paths where soil compaction might skew the visual profile.
- Cut the Wedge: Using a sharp spade, a heavy-duty trowel, or a dedicated soil probe, cut a V-shaped wedge into the turf, reaching at least 3 inches deep into the mineral soil.
- Extract and Measure: Pull the wedge out and locate the spongy, brown, fibrous layer situated directly above the dark, mineral topsoil. Use a standard tape measure to measure the thickness of this specific band.
- Assess Soil pH: Thatch accumulates rapidly in acidic soils (pH below 6.0) because earthworm and microbial populations plummet. If your thatch is thick, test your soil pH; you may need to apply pelletized lime to restore microbial thatch-decay activity.
Equipment Selection: Matching the Tool to the Turf
Choosing the wrong equipment can tear out healthy grass crowns or fail to penetrate the thatch layer entirely. The Texas A&M AgriLife Extension notes that mechanical removal must be matched to the severity of the thatch and the turfgrass species.
| Equipment Type | Mechanism | Best Use Case | Estimated Cost |
|---|---|---|---|
| Manual Thatching Rake | Curved, sharp steel tines pulled by hand | Small zones (< 500 sq ft), light thatch (1/2 inch) | $40 - $65 (Purchase) |
| Electric Dethatcher | Spring-loaded stainless steel tines on a rotating drum | Medium lawns (1k - 5k sq ft), moderate thatch | $130 - $180 (e.g., Sun Joe AJ801E) |
| Power Rake | Heavy-duty flail blades that aggressively chew through tissue | Large lawns (> 5k sq ft), severe thatch (> 1 inch) | $65 - $95 / day (Rental, e.g., Billy Goat PR550) |
| Verticutter | Fixed vertical steel knives that slice down to the soil | Warm-season grasses (Bermuda/Zoysia) to cut stolons | $75 - $110 / day (Rental) |
Step-by-Step Dethatching Procedure
Mechanical dethatching is highly stressful for turf. Executing the procedure correctly minimizes damage to the living grass crowns while maximizing the extraction of dead organic matter.
Step 2: Pre-Dethatching Preparation
Do not dethatch a dry, dormant, or heat-stressed lawn. Water the lawn deeply 48 hours before the procedure. The soil should be moist but not saturated; muddy soil will cause equipment wheels to sink and tear the turf base rather than slicing the thatch. Mow the lawn to 50% of its normal recommended height. For tall fescue, mow down to 1.5 inches; for Bermudagrass, mow to 0.75 inches. This ensures the dethatcher tines can easily reach the thatch layer without getting tangled in long grass blades.
Step 3: Executing the Dethatching Passes
Set the blade or tine depth so that it barely scratches the top 1/8 inch of the mineral soil. If you are using a rental power rake, test it on a small, inconspicuous patch of lawn first. Adjust the depth lever until you see brown thatch being pulled up, but minimal green, living grass crowns.
- First Pass: Drive the machine in straight, parallel lines across the entire lawn, overlapping each pass by about 3 inches to ensure complete coverage.
- Second Pass: Make a second set of passes diagonally or perpendicular to the first set. This cross-hatching pattern lifts matted thatch that is lying flat against the soil.
Step 4: Debris Removal and Cleanup
The volume of extracted thatch is often shocking—it can easily fill multiple contractor bags for an average-sized yard. Do not leave the debris on the lawn, as it will smother the remaining grass and block sunlight. Use a heavy-duty leaf rake to gather the thatch into windrows, then tarp it or use a lawn vacuum to remove it. While some thatch can be composted, it breaks down very slowly due to its high lignin content; it is often better to use it as a base layer for brush piles or dispose of it via municipal yard waste collection.
Post-Thatching Recovery: Overseeding and Fertilization
Dethatching leaves the lawn looking temporarily torn and stressed. The immediate recovery phase is critical to prevent weed invasion and restore turf density.
Step 5: Core Aeration and Soil Contact
If your soil is compacted, follow dethatching immediately with core aeration. Pulling 3-inch soil plugs introduces oxygen to the root zone and deposits soil microorganisms onto the remaining thatch layer, accelerating natural biological decomposition. The holes created by aeration also provide perfect seed-to-soil contact for the next step.
Step 6: Seeding and Nutrient Application
Overseed the lawn immediately after cleanup. For cool-season lawns, apply a high-quality starter fertilizer with a phosphorus-heavy NPK ratio (such as 24-25-4) to stimulate rapid root development in the new seedlings. Water the lawn lightly two to three times a day for the first 14 days to keep the top inch of soil consistently moist. Keep foot traffic off the lawn entirely for at least three weeks to allow the damaged crowns to push new tillers.
Timing Warning: Never dethatch cool-season grasses in the peak heat of summer, as they lack the energy reserves to recover and will be overtaken by crabgrass. Dethatch cool-season turf in early fall (late August to September) or early spring. For warm-season grasses, dethatch only in late spring or early summer, immediately after the lawn has fully greened up and entered its most aggressive growth phase.
Frequently Asked Questions (FAQ)
Can I prevent thatching without using mechanical equipment?
Yes, through cultural practices. Avoid over-applying high-nitrogen synthetic fertilizers, which force rapid top growth that the root system cannot support, leading to excess dead tissue. Top-dressing your lawn annually with a 1/4 inch layer of compost introduces aggressive microorganisms that naturally digest thatch. Additionally, maintaining proper soil pH (6.0 to 7.0) ensures earthworm populations remain high, as earthworms naturally pull organic matter down into the soil profile.
Will a standard lawn mower bagging attachment prevent thatch?
No. As noted, grass clippings are roughly 80% water and decompose in a matter of days. They do not contribute to the lignin-heavy thatch layer. In fact, mulching your clippings back into the lawn returns valuable nitrogen to the soil and feeds the microbes required to break down existing thatch.

