
Lawn Care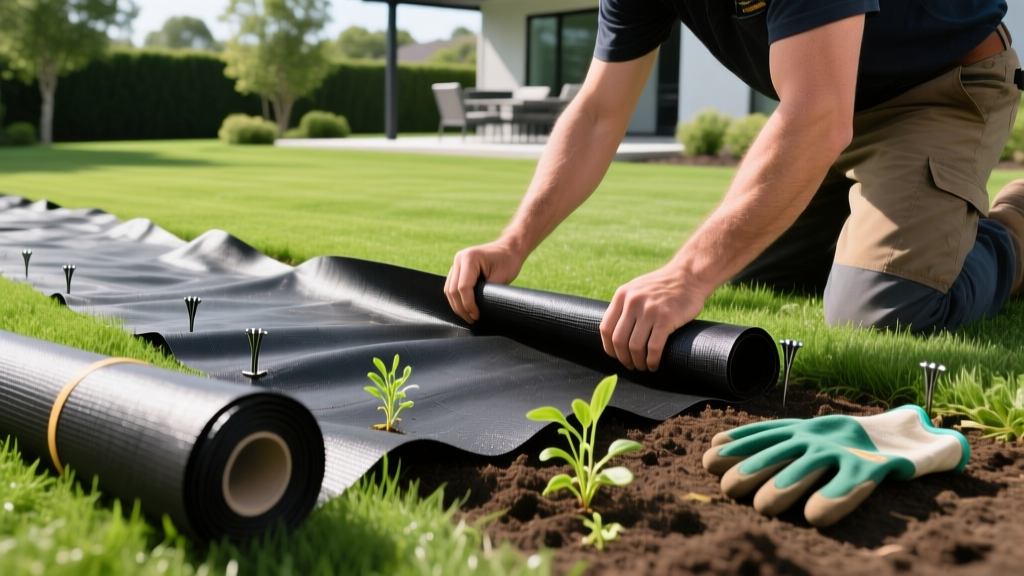
How to Lay Weed Barrier to Stop Invasive Lawn Weeds
The Transition Zone: Why Lawn Weeds Breach Garden Beds
The boundary between a maintained turfgrass lawn and an adjacent garden bed is the most vulnerable vector for invasive weed migration. Species like quackgrass (Elymus repens), bermudagrass (Cynodon dactylon), and yellow nutsedge (Cyperus esculentus) do not respect visual property lines. They utilize subterranean rhizomes and above-ground stolons to infiltrate mulched beds, bypassing standard pre-emergent herbicides. Learning how to lay weed barrier correctly at these lawn edges is not merely about suppressing surface weeds; it is about engineering a physical and chemical blockade against lateral rhizome invasion.
Phase 1: Spot-Treating Invasive Rhizomes Before Installation
Laying a physical barrier over live, aggressive rhizomatous weeds guarantees failure. The mechanical pressure of growing quackgrass or bermudagrass rhizomes will eventually pierce standard landscape fabrics. Before unrolling any material, you must eradicate the existing weed network in the transition zone.
Spot-Treatment Protocol: For non-selective eradication in an empty bed, apply a 2% glyphosate solution to the lawn edge, extending 12 inches into the grass. For selective removal of grassy weeds invading broadleaf ornamental beds, use a fluazifop-butyl product (e.g., Ortho Grass B Gon). Wait a minimum of 14 days for systemic translocation to kill the rhizomes before disturbing the soil.
According to the University of California Integrated Pest Management (UC IPM) program, physical weed barriers are only effective when installed over completely dormant or eradicated weed populations. Installing fabric over live nutsedge or bindweed simply forces the tubers to redirect growth, eventually finding gaps in the overlay.
Phase 2: Selecting the Correct Barrier Material
Not all weed barriers are engineered for lawn-edge suppression. The market is flooded with cheap spunbond fabrics that degrade under UV exposure and clog with soil particles, creating anaerobic soil conditions. For stopping aggressive lawn grasses, you need high-tensile woven polypropylene.
| Material Type | Water Permeability | Rhizome Blocking | 2026 Avg. Cost |
|---|---|---|---|
| Woven Polypropylene (4.1 oz/yd²) | High (Slitted) | Excellent | $0.55 - $0.85 / sq ft |
| Non-Woven Spunbond | Low (Clogs over time) | Poor (Tears easily) | $0.20 - $0.35 / sq ft |
| Black Plastic Sheeting (6 mil) | Zero | Good (but kills soil) | $0.15 - $0.25 / sq ft |
Professional landscapers overwhelmingly specify woven polypropylene (such as DeWitt Pro 5 or GroundCover Heavy Duty) for lawn borders. The University of Wisconsin-Madison Division of Extension notes that woven fabrics maintain their structural integrity and water permeability for up to a decade when properly covered, whereas non-woven alternatives typically fail within 24 months due to soil pore clogging.
Phase 3: Trenching and Physical Edge Creation
The most critical step in stopping lateral lawn weed migration is often skipped by DIYers: the edge trench. A weed barrier laid flat on the soil surface will be bypassed by rhizomes traveling just beneath the topsoil.
- Dig a Perimeter Trench: Using a sharp half-moon edger or a motorized trencher, cut a trench along the lawn side of the garden bed. The trench must be exactly 6 inches deep and 4 inches wide.
- Sever the Rhizomes: This 6-inch depth is crucial. Quackgrass and bermudagrass rhizomes typically travel in the top 2 to 4 inches of soil. A 6-inch trench severs the primary lateral network.
- Clear the Base: Remove all loose soil, rocks, and severed root masses from the trench and the bed surface. Rake the soil smooth to prevent sharp clods from puncturing the fabric from below.
Phase 4: How to Lay Weed Barrier (Step-by-Step)
With the soil prepped and the trench dug, you are ready to deploy the barrier. Precision in overlapping and anchoring dictates the longevity of the installation.
1. Orientation and Overlap
Unroll the woven fabric across the garden bed, ensuring the shiny, UV-treated side faces up. When multiple rolls are required to cover a wide bed, overlap the seams by a minimum of 3 inches. Never butt the seams together; soil settlement will create a gap that creeping charlie and stolons will exploit within weeks.
2. Securing the Lawn Edge
Push the lawn-side edge of the fabric down into the 6-inch trench you dug earlier. This creates a physical subterranean wall. Backfill the trench with the excavated soil and tamp it down firmly. This buried edge prevents surface stolons from sliding under the fabric.
3. Pinning Strategy
Use 11-gauge galvanized steel landscape pins (6-inch length). As of 2026, these cost roughly $0.18 each in bulk. Place a pin every 3 feet along the perimeter and every 4 feet in the interior field. On slopes or areas with heavy water runoff, reduce pin spacing to 2 feet to prevent hydraulic uplift.
4. Cutting for Existing Plants
For existing shrubs or perennials, do not cut a simple slit. Cut an "X" into the fabric, fold the flaps back around the plant stem, and secure them with a pin. This prevents the fabric from choking the plant's root flare as it grows.
Phase 5: Mulching and UV Protection
Woven polypropylene is highly susceptible to ultraviolet degradation. If left exposed to direct sunlight, the plastic polymers will become brittle and shatter within a single growing season. You must immediately cover the installed barrier with 2.5 to 3 inches of organic mulch.
Pro Tip: Mulch Selection for Weed Barriers
Avoid using fine compost or shredded leaves directly on the fabric, as they decompose rapidly and create a soil layer where wind-blown weed seeds can germinate. Instead, use coarse, double-shredded hardwood bark or medium-sized pine bark nuggets. These heavy mulches resist wind displacement and do not form a germination-friendly crust.
Avoid using fine compost or shredded leaves directly on the fabric, as they decompose rapidly and create a soil layer where wind-blown weed seeds can germinate. Instead, use coarse, double-shredded hardwood bark or medium-sized pine bark nuggets. These heavy mulches resist wind displacement and do not form a germination-friendly crust.
Common Failure Points and Troubleshooting
- Using landscape staples instead of pins: U-shaped staples (often sold for drip irrigation) lack the holding power to secure heavy woven fabric against soil heave. Always use J-hook or T-bar galvanized pins.
- Insufficient overlap: A 1-inch overlap will separate when the soil freezes and thaws. Stick to the 3-inch minimum rule.
- Ignoring the vertical drop: If you lay the fabric flat against a vertical retaining wall or concrete curb without tucking it behind the structure, weeds will migrate through the gap. Always tuck the fabric at least 2 inches behind hard vertical barriers.

