
Lawn Care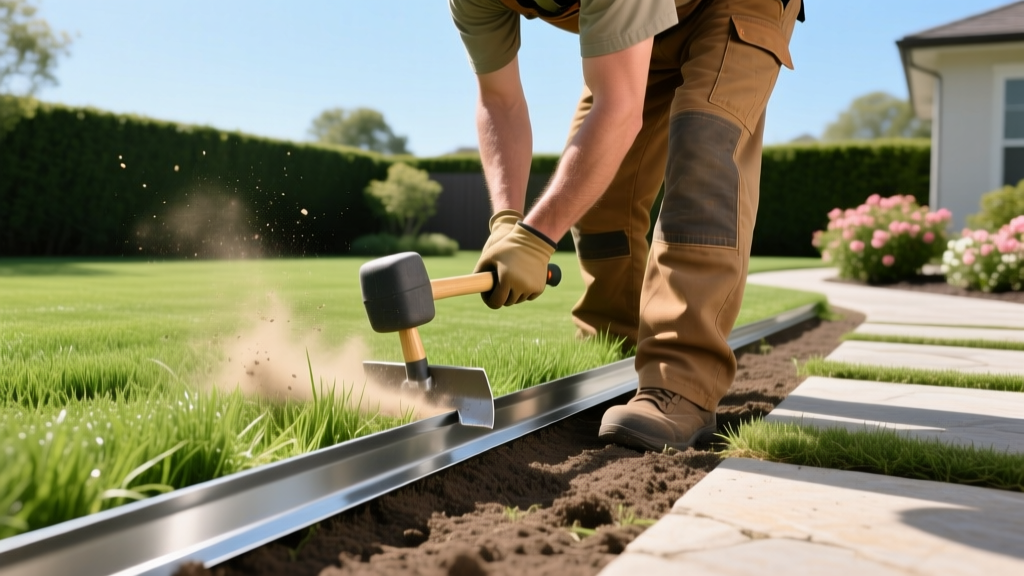
Laying Edging for Lawns: A Step-by-Step Installation Guide
The Purpose and Mechanics of Lawn Edging
Laying edging is not merely an aesthetic upgrade; it is a critical structural intervention in lawn maintenance. A properly installed edge serves three mechanical functions: it acts as a physical root barrier against invasive warm-season grasses (like Bermuda and Zoysia), it retains mulch and soil within landscape beds, and it provides a rigid guide track for mower wheels to prevent turf scalping. According to turfgrass management guidelines from the University of Minnesota Extension, failing to install a physical barrier allows aggressive rhizomes to migrate into hardscapes and garden beds, requiring up to 40% more manual trimming labor per season.
This guide details the precise engineering and step-by-step procedures for laying edging, focusing on material selection, trenching geometry, and long-term frost-heave mitigation.
Material Selection: Matching Edging to Soil and Grass Type
The most common failure in landscape edging is selecting a material incompatible with the local soil profile or turfgrass species. Polyethylene (plastic) edging is prone to UV degradation and warping in freeze-thaw cycles, while commercial-grade aluminum and steel offer permanent structural integrity.
| Material | Best Application | Required Trench Depth | Estimated Cost (2026) | Lifespan |
|---|---|---|---|---|
| Heavy-Duty Polyethylene | Curved beds, cool-season grasses (Fescue, Kentucky Bluegrass) | 4 - 6 inches | $2.50 - $4.00 / linear ft | 5 - 8 years |
| Commercial Aluminum (e.g., Permaloc) | Tight radii, aggressive warm-season grasses, clay soils | 3 - 4 inches (stake-driven) | $7.00 - $11.00 / linear ft | 20+ years |
| Corten Steel | Modern landscapes, straight lines, heavy equipment areas | 3 - 4 inches (stake-driven) | $9.00 - $15.00 / linear ft | 30+ years |
| Paver / Concrete Mower Strip | Brick patios, formal garden borders | 6 - 8 inches (base prep) | $12.00 - $22.00 / linear ft | Lifetime |
Required Tools and Material Calculations
Do not attempt this procedure with standard garden trowels. Laying edging requires specialized trenching and compaction tools to ensure the base soil is undisturbed and the backfill is locked in place.
- Flat Spade and Trenching Shovel: A V-blade trenching shovel (4-inch width) is mandatory for clean sidewalls.
- Dead Blow Mallet (3 lb to 5 lb): Essential for driving steel stakes without mushrooming the aluminum or steel edging heads.
- String Line and Line Level: For maintaining a consistent 0.25-inch sub-grade elevation over long runs.
- Hand Tamper (8x8 inch): For compacting the backfill soil to 90% Proctor density to prevent settling.
- Hacksaw or Angle Grinder: For cutting metal edging; a fine-tooth wood saw for polyethylene.
⚠️ CRITICAL WARNING: Utility Line Clearance
Before cutting any trench deeper than 4 inches, you must call 811 (the national call-before-you-dig number) to have subterranean utilities marked. Irrigation lines and shallow fiber-optic cables are frequently buried at the exact 4-to-6-inch depth required for landscape edging trenches.
Before cutting any trench deeper than 4 inches, you must call 811 (the national call-before-you-dig number) to have subterranean utilities marked. Irrigation lines and shallow fiber-optic cables are frequently buried at the exact 4-to-6-inch depth required for landscape edging trenches.
Step-by-Step Procedure for Laying Edging
Step 1: Trenching and Soil Preparation
Mark your desired border using a garden hose to visualize curves, then spray with marking paint. Using the flat spade, cut a vertical line on the lawn side of the paint mark. This vertical cut must be perfectly plumb (90 degrees to the surface) to prevent grass rhizomes from bridging the gap. Next, use the V-blade trenching shovel to excavate the soil on the bed side of the line. The trench should be exactly 1 inch wider than your edging material and 1 inch deeper than the edging height to allow for a compacted base layer.
Step 2: Setting the Grade and String Line
The most frequent error when laying edging is setting it too high. The top of the edging must sit exactly 0.25 inches below the final soil grade on the lawn side. This allows mower wheels to ride smoothly over the edge without the deck striking the material. Research from UMN Turf Science indicates that mower scalping occurs when wheels drop off raised edges, exposing the turf crown to desiccation. Stake a string line along the trench, using a line level to ensure a consistent 1% slope away from foundations for proper drainage.
Step 3: Laying Edging and Securing Anchors
Place the edging into the trench, pressing it firmly against the vertical, lawn-side soil wall. For metal edging, insert the provided steel stakes through the pre-punched loops. Drive the stakes into the subgrade using your dead blow mallet. Crucial Frost-Heave Mitigation: If you live in USDA Hardiness Zones 3 through 6, standard 8-inch stakes will fail. The freeze-thaw cycle will grip the stake and push it upward, warping the edging. You must upgrade to 12-inch or 18-inch steel stakes and drive them at a 45-degree angle away from the lawn. This angled geometry mechanically locks the edging against vertical uplift forces.
Step 4: Backfilling and Compaction
Do not simply shovel loose dirt back into the trench. Loose backfill will settle over the first few rainstorms, creating a depression that traps water against the turf edge, leading to root rot. Backfill the bed side of the trench with the excavated soil in 2-inch lifts (layers). After each lift, use the hand tamper to compact the soil firmly against the edging. On the lawn side, backfill with a mixture of topsoil and coarse sand to ensure rapid drainage and a firm base for the turf roots to anchor against the barrier.
Common Failure Modes and Troubleshooting
Even professional installations can degrade if environmental variables are ignored. Use this diagnostic matrix to identify and correct failures in your landscape borders.
- Symptom: Grass creeping over the top of the edging.
Cause: The edging was set too low, or thatch buildup has elevated the turf crown above the barrier.
Fix: Verticut the lawn edge to remove thatch, or carefully pry up the edging, add 1 inch of compacted base gravel to the trench floor, and reset the edging higher. - Symptom: Edging bowing or warping outward into the garden bed.
Cause: Hydrostatic pressure from saturated mulch or soil expanding during freezing.
Fix: Install additional stakes at 2-foot intervals (instead of the standard 4-foot spacing) and ensure the bed-side backfill is heavily compacted to resist lateral pressure. - Symptom: Bermuda or Zoysia grass invading the mulch bed underneath the edging.
Cause: The trench was not deep enough to intercept deep-traveling rhizomes.
Fix: Warm-season grasses require a minimum 6-inch subterranean barrier. You must dig a deeper trench and install a secondary flexible root barrier, or replace the current edging with 6-inch deep commercial steel.
Long-Term Upkeep and Edge Maintenance
Once the installation is complete, the physical barrier requires minimal but specific maintenance. Twice a year (early spring and late fall), run a manual half-moon edger or a motorized stick edger along the lawn side of the barrier. This severs any fine surface stolons that may have attempted to bridge the gap. According to the National Association of Landscape Professionals, maintaining a clean, 1-inch air-gap or physical shear line between the turf and the edging material reduces string-trimmer usage by up to 60%, saving time and preventing mechanical damage to the edging surface.
Inspect metal edging stakes every spring after the ground thaws. If any stake heads are protruding above the soil line, strike them back down with a mallet and add a thin layer of top dressing over the hole. Never use a weed whacker with metal blades or heavy-gauge monofilament directly against aluminum or Corten steel edging, as this will degrade the protective powder coating and accelerate oxidation.

