
Lawn Care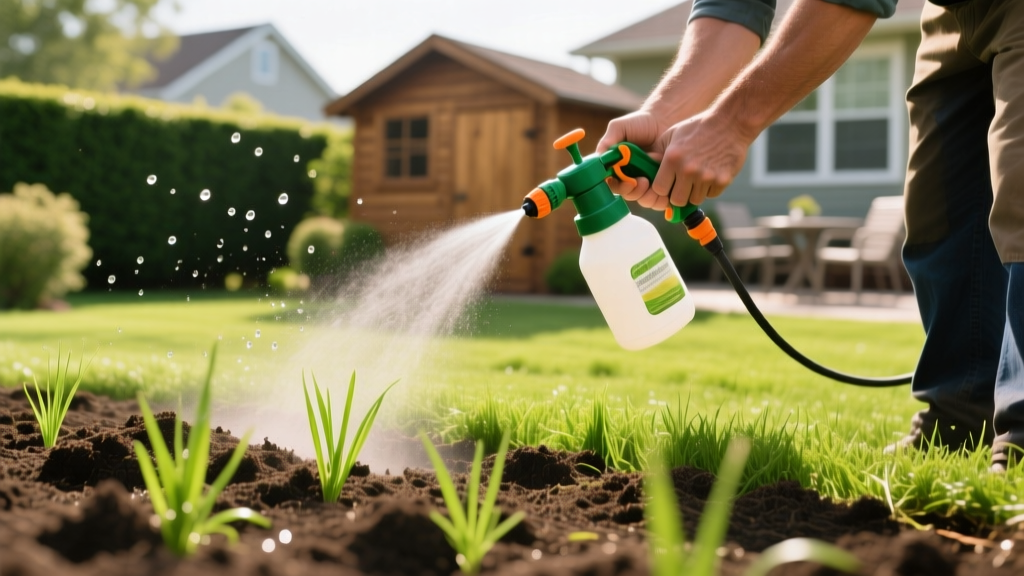
How to Apply Liquid Lawn Seed for Fast Germination
The Science Behind Liquid Lawn Seed Slurries
Liquid lawn seed, often referred to in consumer markets as hydroseeding spray or liquid grass seed, is not simply grass seed suspended in water. It is a carefully calibrated slurry designed to create an optimal microclimate for germination. According to Penn State Extension, seed-to-soil contact and consistent moisture are the two most critical factors in lawn establishment. Liquid seed formulations address both simultaneously.
A standard consumer liquid lawn seed kit (such as the Pennington Smart Seed Hydroseeding Kit or Hydro Mousse Pro) contains four primary components:
- Seed: Typically a blend of tall fescue, perennial ryegrass, or Kentucky bluegrass, coated in a fungicide to prevent damping-off disease.
- Cellulose Mulch: Recycled paper or wood fibers that hold up to 10 times their weight in water, shielding the seed from UV radiation and wind.
- Tackifier: A natural glue (often guar gum or psyllium-based) that binds the mulch to the soil, preventing the slurry from washing away during heavy rain.
- Starter Fertilizer: A high-phosphorus blend (e.g., 10-18-10) to stimulate rapid root development.
Expert Insight: The green dye included in these slurries serves a functional purpose beyond aesthetics. It acts as a visual tracer, allowing you to identify missed spots and ensure uniform coverage before the slurry dries and becomes transparent.
Pre-Application Soil Preparation (The 7-Day Protocol)
The most common failure mode for liquid lawn seed is poor soil preparation. Spraying slurry over compacted clay or existing weeds will result in a 0% germination rate. Follow this exact 7-day protocol before mixing your liquid seed:
- Day 1-2 (Vegetation Clearing): Apply a non-selective herbicide (like glyphosate) or use a solarization tarp to kill existing weeds in the target area. Do not skip this step; liquid seed cannot compete with established root systems.
- Day 3-4 (Tilling and Grading): Rototill the top 2 to 3 inches of soil. Rake the area to remove rocks and debris larger than 1 inch. Grade the soil so it slopes away from your home’s foundation at a minimum 2% drop (1/4 inch per foot).
- Day 5 (Soil Amendment): Test your soil pH. Grass seed requires a pH between 6.0 and 7.0. If your soil is acidic, apply pelletized limestone at a rate of 50 lbs per 1,000 square feet. If alkaline, apply elemental sulfur.
- Day 6 (Pre-Watering): Lightly water the bare soil to a depth of 1 inch. This triggers any dormant weed seeds to germinate (which you will kill later) and settles the soil to prevent post-application sinking.
- Day 7 (Final Rake): Lightly scarify the top 1/4 inch of soil with a stiff rake to create microscopic grooves for the tackifier to grip.
Mixing and Spraying: Exact Ratios and Coverage
Consumer liquid lawn seed kits are generally sold in 500 sq. ft. and 1,000 sq. ft. capacities. A standard 500 sq. ft. kit costs between $25 and $35, making it highly cost-effective compared to professional hydroseeding ($0.15–$0.25 per sq. ft.) or sod ($0.40–$0.80 per sq. ft.).
When connecting a hose-end sprayer to your garden hose, water pressure dictates the dilution rate. Most municipal water supplies deliver 40–60 PSI, which is ideal. If you are on a well system with low pressure (under 30 PSI), the slurry may clog the sprayer nozzle.
| Target Area | Water Volume Required | Seed Rate (Tall Fescue) | Spray Time (at 50 PSI) |
|---|---|---|---|
| 250 sq. ft. (Spot Repair) | 10–12 Gallons | 1.5 – 2.0 lbs | 3–4 Minutes |
| 500 sq. ft. (Standard Kit) | 20–25 Gallons | 3.0 – 4.0 lbs | 6–8 Minutes |
| 1,000 sq. ft. (Large Area) | 40–50 Gallons | 6.0 – 8.0 lbs | 12–15 Minutes |
Application Technique: Spray in a sweeping, overlapping motion, similar to painting a wall. Apply the first coat horizontally, and the second coat vertically. The mulch layer should be roughly 1/8 to 1/4 inch thick when wet. If the soil is still visible through the green slurry, you are spraying too thin.
Common Failure Modes and How to Avoid Them
Liquid lawn seed is highly effective, but it is unforgiving of user error. The University of Minnesota Extension notes that moisture fluctuation is the leading cause of seed death in the first 14 days. Here is a troubleshooting matrix for common issues:
- Slurry Washes Away After Rain: Cause: Tackifier did not cure. Fix: You must allow the slurry to dry and cure for 24 hours before any heavy rain occurs. Check the weather forecast; do not apply if rain is expected within 24 hours.
- Seed Germinates but Quickly Turns Brown: Cause: Damping-off fungus or fertilizer burn. Fix: Ensure your kit includes fungicide-coated seed. Do not apply additional granular starter fertilizer over the liquid seed, as the slurry already contains sufficient nutrients for the first 30 days.
- Patchy, Uneven Germination: Cause: Inconsistent spray overlap or low water pressure causing seed to settle at the bottom of the canister. Fix: Shake the sprayer canister vigorously every 2 minutes during application to keep the heavy seed suspended in the mulch matrix.
Post-Application Watering and Establishment Schedule
Once the liquid seed is applied, the cellulose mulch will dry into a crusty, papier-mâché-like shell within 2 to 4 hours. This shell is your moisture barrier. Your watering schedule must keep the top 1 inch of soil beneath this shell constantly damp, but never saturated.
Warning: Never use a high-pressure nozzle or a sprinkler that delivers heavy, localized drops during the first 10 days. The physical impact will break the tackifier bond and displace the seed. Use a fine mist or oscillating sprinkler set to a low flow rate.
Days 1–10 (Germination Phase): Water 3 to 4 times daily for 5–10 minutes per session. The goal is to keep the mulch matrix damp. If the green mulch turns light yellow or white, it is too dry. Perennial ryegrass will sprout in 5–7 days; tall fescue in 7–12 days.
Days 11–15 (Root Establishment): Reduce watering to twice daily (morning and early afternoon) for 15 minutes. This encourages the new roots to push deeper into the soil profile to chase the receding moisture line.
Days 16–21 (Hardening Off): Transition to watering once daily, then every other day, applying roughly 1/2 inch of water per session. By day 21, the grass should be 2 to 3 inches tall.
First Mow: Wait until the grass reaches 3.5 inches in height. Set your mower deck to 2.5 inches and ensure the blade is razor-sharp. A dull blade will rip the shallow-rooted seedlings completely out of the liquid mulch matrix.
Expert FAQ: Liquid Seed vs. Traditional Methods
Q: Can I apply liquid lawn seed over my existing thinning lawn?
A: No. Liquid seed requires direct soil contact. The tackifier will bind to existing grass blades and thatch, suspending the seed in the air and causing it to desiccate and die. It is strictly for bare soil, patch repair, or complete renovations.
Q: How long does the green dye last?
A: The dye is UV-sensitive and will naturally fade to a pale, translucent brown within 7 to 10 days. This coincides perfectly with the emergence of the new grass blades, which will quickly hide the fading mulch.
Q: Is liquid seed better than broadcasting dry seed and laying straw?
A: For small to medium bare spots (under 2,000 sq. ft.), liquid seed is vastly superior. It eliminates the mess of blowing straw, prevents seed displacement by birds and wind, and retains moisture 40% longer than straw mulch, significantly reducing the daily water volume required for establishment.

