
Lawn Care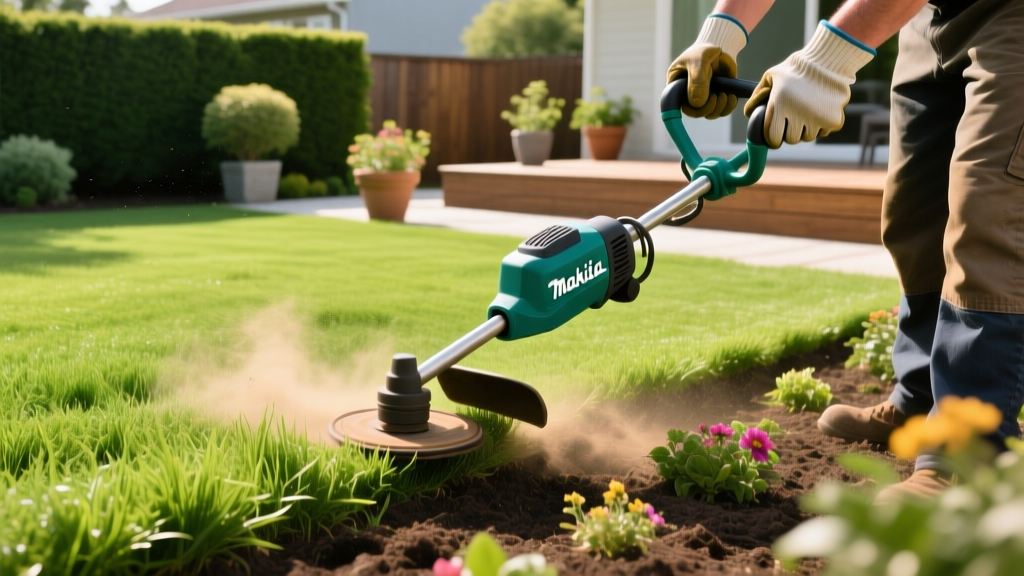
Master Lawn Borders: Practical Makita Edger Setup and Use Guide
The XRU02 Advantage: Dedicated Blade vs. String Trimmer
While many homeowners attempt to edge their lawns using a string trimmer turned sideways, dedicated blade edgers deliver a fundamentally superior cut. The Makita XRU02Z 18V LXT Cordless Edger utilizes a 9-inch steel blade spinning at 7,000 RPM, creating a crisp, vertical shear line that nylon string simply cannot replicate. String trimmers fray grass tips and leave a ragged edge that browns within 48 hours, whereas a steel blade slices cleanly, promoting healthier lateral growth and a professional-grade aesthetic.
| Feature | Makita XRU02 (Blade Edger) | Makita XRU13 (String Trimmer w/ Guide) |
|---|---|---|
| Cut Quality | Clean shear, vertical wall | Frayed tips, angled cut |
| Trenching Capability | Excellent (up to 2" deep) | Poor (string deflects in soil) |
| Hardscape Contact | Blade damage if hitting concrete | String wears down safely |
| Avg. Runtime (5.0Ah Battery) | ~35 minutes | ~45 minutes |
Pre-Run Calibration and Safety Protocols
Before engaging the trigger, you must calibrate the machine to your specific terrain. The XRU02 features a 3-position depth adjustment lever. Never operate the edger at maximum depth on your first pass if the border is heavily overgrown; this will overload the brushless motor and trigger the battery's star-protection thermal shutoff.
⚠️ Critical Safety Warning: According to OSHA landscaping safety guidelines, flying debris from steel-blade edgers can exceed 150 mph. You must wear ANSI Z87.1-rated wraparound safety glasses, heavy denim or canvas pants, and steel-toe or composite-toe boots. Never operate the XRU02 in shorts or open-toed shoes.
Blade Selection: High-Carbon Steel vs. Carbide-Tipped
The stock blade on the XRU02 is a standard high-carbon steel 9-inch blade with a 5/8-inch arbor. However, upgrading your blade based on your soil composition is a high-ROI modification.
- Standard High-Carbon Steel (e.g., Oregon 22-810): Costs around $12. Ideal for soft, loamy soils and regular maintenance. Expect to replace it every 1 to 2 seasons depending on usage.
- Carbide-Tipped (e.g., Freud LM9000): Costs around $45. Essential if you are edging through heavy clay, rocky soil, or areas with aggressive tree root encroachment. The carbide teeth resist dulling from silica in the soil, lasting up to 4x longer than standard steel.
The Depth Framework: Trenching for Warm vs. Cool-Season Grasses
Setting the correct depth is the most common failure point for DIY edging. Cutting too shallow leaves rhizomes intact, allowing grass to creep back over hardscapes within weeks. Cutting too deep severs vital lateral roots and destabilizes the soil wall.
Pro-Tip from Turfgrass Experts: Data from NC State Turfgrass Extension indicates that warm-season grasses possess deeper, more aggressive rhizome networks than cool-season varieties. Adjust your Makita depth lever accordingly to sever the creeping stolons without destroying the primary root zone.
Target Depth Settings by Grass Type
- Bermuda & Zoysia (Warm-Season): Set lever to Position 3 (2.0 inches). These grasses send thick rhizomes deep under sidewalks. A 2-inch trench creates a physical barrier that delays encroachment by several months.
- St. Augustine (Warm-Season): Set lever to Position 2 (1.5 inches). St. Augustine spreads primarily via above-ground stolons, so extreme depth is unnecessary and risks damaging irrigation lines.
- Fescue & Kentucky Bluegrass (Cool-Season): Set lever to Position 1 (1.0 inch). Cool-season grasses rely on shallow, fibrous lateral roots. Deeper cuts will cause the turf edge to brown and recede from the hardscape.
Field Execution: The "Roll-and-Plunge" Technique
Dragging an edger like a shovel causes the blade to bind in the soil, stalling the motor and draining the 18V battery rapidly. Instead, use the Roll-and-Plunge method to maintain the XRU02's optimal 7,000 RPM operational speed.
- Align the Guide Wheel: Place the front guide wheel directly on the hardscape (driveway or sidewalk), allowing the wheel to track the concrete edge while the blade drops into the soil.
- The Plunge: Start the motor and let it reach full speed. Tilt the handle back slightly to lift the blade, walk to your starting point, and gently lower (plunge) the blade into the soil to your preset depth.
- Maintain a 1.5 MPH Pace: Walk forward at a steady, brisk walking pace (approx. 1.5 mph). Do not push down on the handle; let the weight of the machine and the momentum of the spinning blade do the cutting.
- Handling Overgrowth: If the grass is severely overgrown, do not force the blade. Make a first pass at the 1-inch depth setting to clear the bulk of the topsoil and turf, then adjust to the 2-inch setting for a final finishing pass.
Troubleshooting Motor Stalls and Blade Bind
The Makita XRU02 is equipped with Star Protection Computer Controls, which communicate directly with the BL1850B 5.0Ah battery to prevent over-discharge and overheating. If the tool suddenly stops, consult this diagnostic matrix before assuming a hardware failure.
| Symptom | Root Cause | Field Fix |
|---|---|---|
| Motor cuts out abruptly, LED on battery blinks red. | Thermal overload / Star Protection triggered due to excessive soil resistance. | Remove battery, wait 3 minutes for cooling. Reduce depth setting by one notch and clear packed soil from the blade guard. |
| Blade spins but throws large clods of dirt onto hardscape. | Blade installed backwards or soil is overly saturated from recent rain. | Verify blade directional arrows match motor rotation. If soil is wet, wait 24 hours; wet clay will pack the guard and stall the motor. |
| Excessive vibration and loud rattling noise. | Blade arbor is warped, or the mounting flange nut is loose. | Stop immediately. Use the included Makita shaft lock and wrench to tighten the flange nut to 15 ft-lbs. Replace blade if warped. |
Post-Edging Maintenance Schedule
Cordless edgers operate in high-debris environments. To ensure the brushless motor and bearings survive for years, implement this 5-minute post-use routine:
- Clear the Guard: Use a stiff bristle brush (never your hands) to knock loose soil and grass clippings out of the lower blade guard. Packed grass holds moisture against the arbor, causing rust.
- Wipe the Arbor Shaft: Apply a single drop of 3-in-One oil or silicone spray to the exposed arbor shaft to prevent the blade from seizing to the metal spindle.
- Battery Storage: Do not leave the BL1850B battery attached to the XRU02 in the shed. Store the battery indoors at room temperature. Lithium-ion cells degrade rapidly when subjected to extreme heat or freezing temperatures while mounted to a tool.
For further technical specifications and warranty information on Makita's 18V LXT lineup, always refer to the official Makita Tools resource center. Mastering the physical technique combined with proper depth calibration will transform your lawn's hardscape borders from ragged and overgrown to sharply defined and professional.

