
Lawn Care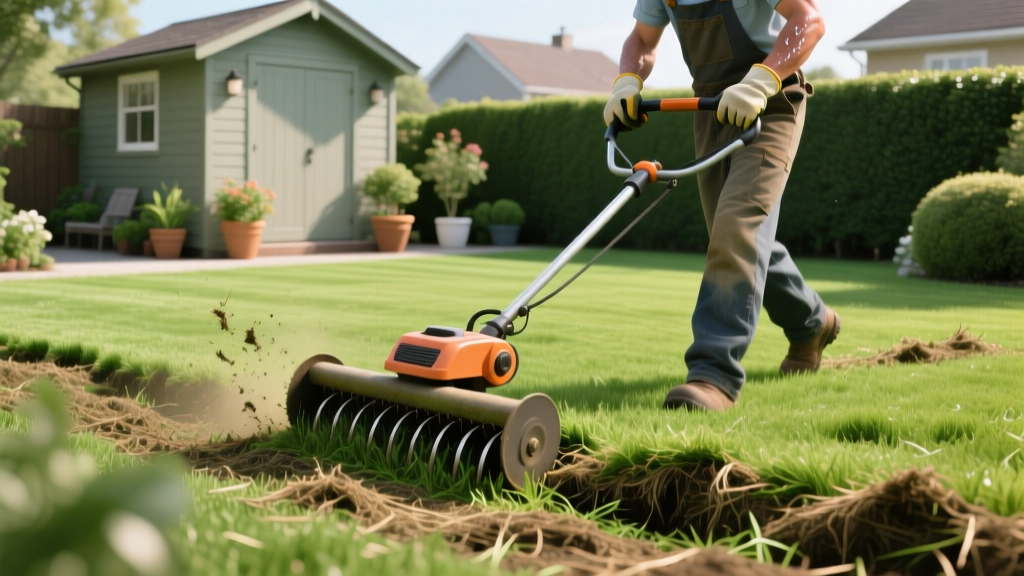
Managing Thatching Grass: Step-by-Step Dethatching Guide
The Science of Thatching Grass: Why It Happens
Thatch is the interwoven layer of living and dead stems, roots, and crowns that accumulates between the green vegetation of your lawn and the soil surface. While a thin layer (under 0.5 inches) acts as beneficial organic mulch that regulates soil temperature and retains moisture, excessive thatching grass creates an impermeable barrier. This barrier suffocates the root zone, blocks water infiltration, and harbors turf diseases like brown patch and dollar spot.
Mythbuster: Grass Clippings Cause Thatch
A persistent landscaping myth blames grass clippings for thatch buildup. According to University of Minnesota Extension, clippings are composed of roughly 85% water and decompose rapidly. True thatching grass is primarily composed of lignin-rich tissues like rhizomes, stolons, and crowns that resist rapid microbial breakdown. Over-fertilization with high-nitrogen synthetic feeds and excessive pesticide use (which harms earthworm populations) are the actual primary culprits of rapid thatch accumulation.
A persistent landscaping myth blames grass clippings for thatch buildup. According to University of Minnesota Extension, clippings are composed of roughly 85% water and decompose rapidly. True thatching grass is primarily composed of lignin-rich tissues like rhizomes, stolons, and crowns that resist rapid microbial breakdown. Over-fertilization with high-nitrogen synthetic feeds and excessive pesticide use (which harms earthworm populations) are the actual primary culprits of rapid thatch accumulation.
Diagnostic Phase: Measuring Your Thatch Layer
Before renting equipment or tearing up your lawn, you must verify that dethatching is actually necessary. Many homeowners mistake soil compaction for thatch. Perform this diagnostic test in three distinct zones of your lawn to get an accurate average.
- Extract a Core Sample: Use a soil knife or a 1-inch diameter soil probe to cut a vertical wedge at least 3 inches deep into the turf.
- Identify the Layers: You will see green grass blades at the top, followed by a spongy, brown, fibrous mat (the thatch), and finally the dark mineral soil at the bottom.
- Measure with Calipers or a Ruler: Measure the brown fibrous layer exclusively. If it measures 0.5 inches or less, your lawn does not need dethatching. If it exceeds 0.75 inches, aggressive mechanical removal is required. If it sits between 0.5 and 0.75 inches, core aeration and microbial thatch decomposers may suffice.
Decision Matrix: Dethatching vs. Core Aeration
Choosing the wrong procedure can damage your turf. Use this comparison framework to select the correct intervention based on your soil profile and thatch depth.
| Feature | Power Dethatching | Core Aeration |
|---|---|---|
| Target Problem | Thatch layer > 0.75 inches | Soil compaction, shallow roots, minor thatch |
| Equipment Used | Power rake (vertical slicer) | Core aerator (hollow tines) |
| Turf Stress Level | High (tears living tissue) | Low to Moderate |
| Ideal Timing (Cool-Season) | Late August to Early September | Early Fall or Early Spring |
| Average Cost (DIY Rental) | $75 - $110 per day | $60 - $90 per day |
Step-by-Step Dethatching Procedure
If your diagnostic test confirms a thatch layer exceeding 0.75 inches, follow this mechanical removal protocol. This guide assumes the use of a walk-behind power rake (e.g., Billy Goat PR550H or similar class), which is standard for residential lawn renovation.
Step 1: Moisture and Mowing Preparation
Never dethatch a bone-dry lawn or a waterlogged lawn. Two days before the procedure, apply exactly 0.25 inches of water to soften the thatch without turning the soil to mud. On the morning of dethatching, lower your mower deck to 1.5 inches and bag the clippings. This exposes the thatch layer and prevents the power rake tines from tangling in long grass blades.
Step 2: Calibrate the Power Rake
The most common failure mode in DIY dethatching is setting the blades too deep, which scalps the lawn down to bare dirt. Place the power rake on a flat, paved surface like your driveway. Adjust the blade depth so the tines barely kiss the concrete. When moved to the lawn, the blades will penetrate the thatch and scratch the top 1/8-inch of soil, which is optimal for seed-to-soil contact later.
Warning: Warm-Season Grass Caution
If you are managing thatching grass in warm-season varieties like Bermuda or Zoysia, be highly aggressive with mowing prior to power raking. These grasses have above-ground stolons that can be severely damaged if the rake blades catch and rip them out by the roots. Set blades slightly higher for warm-season turf.
If you are managing thatching grass in warm-season varieties like Bermuda or Zoysia, be highly aggressive with mowing prior to power raking. These grasses have above-ground stolons that can be severely damaged if the rake blades catch and rip them out by the roots. Set blades slightly higher for warm-season turf.
Step 3: Execute the Grid Pattern
Run the power rake over the lawn in a strict grid pattern. Make your first pass horizontally across the yard, and your second pass vertically. Overlap each pass by 2 inches to ensure no strips of thatch are missed. Expect the machine to pull forward aggressively; maintain a firm grip and walk at a steady pace of roughly 2 miles per hour.
Step 4: Debris Extraction
After the two passes, your lawn will be covered in windrows of dead, brown organic matter. You must remove 100% of this debris. Use a heavy-duty leaf blower (minimum 150 MPH air speed) to pile the thatch, then rake it into tarps for disposal. Leaving the extracted thatch on the lawn will smother the remaining living turf and invite fungal pathogens.
Post-Dethatching Recovery Protocol
Dethatching is highly stressful to the turf. According to Michigan State University Extension, the exposed soil and remaining living grass require immediate intervention to prevent weed invasion and desiccation. Implement this 14-day recovery schedule:
- Immediate Overseeding (Cool-Season Lawns): Apply a premium turf-type tall fescue or Kentucky bluegrass blend at a rate of 5 to 6 lbs per 1,000 square feet. The grooves cut by the power rake provide perfect seed furrows.
- Starter Fertilizer Application: Apply a high-phosphorus starter fertilizer (such as a 24-25-4 NPK ratio) at a rate of 1.0 lb of actual Nitrogen per 1,000 square feet. Phosphorus is critical for rapid root establishment in the newly exposed soil profile.
- Hydration Schedule: Water the lawn lightly 2 to 3 times daily for the first 10 days to keep the top 1 inch of soil consistently moist. Do not apply heavy, deep watering, which will wash away seeds and fertilizer.
- Traffic Restriction: Keep all foot traffic, pets, and heavy equipment off the lawn for a minimum of 21 days to allow the torn crowns to heal and new seedlings to anchor.
"The ultimate cure for chronic thatching grass isn't just mechanical removal; it's biological. After dethatching, apply a liquid humic acid and sea kelp treatment to stimulate the soil microbiome. A robust population of soil fungi and bacteria will naturally digest future thatch accumulation before it reaches the critical 0.5-inch threshold."
By following this precise diagnostic and execution framework, you will eliminate the suffocating thatch layer, restore vital gas exchange to the root zone, and establish a dense, resilient turf canopy capable of resisting future organic buildup.

