
Lawn Care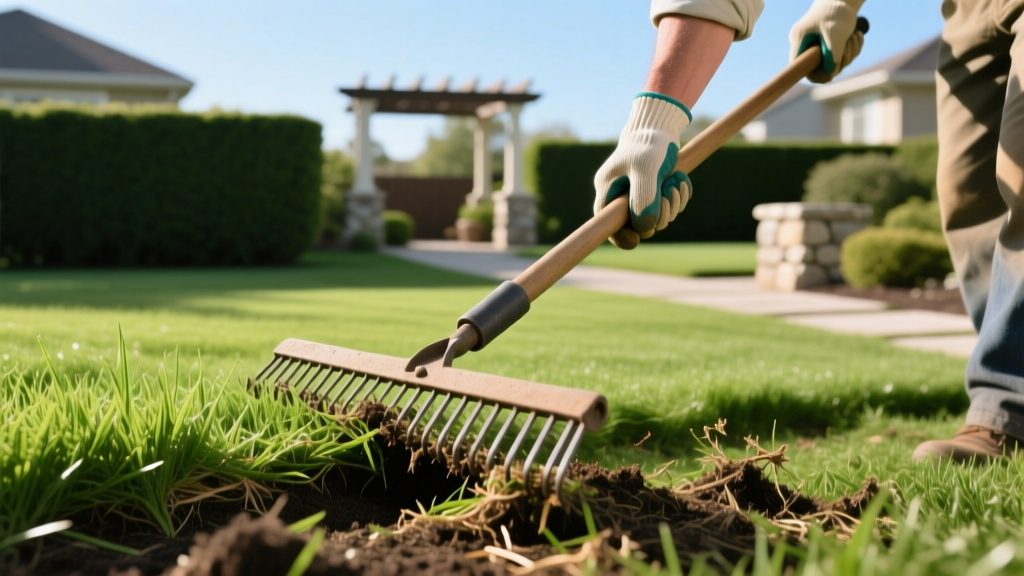
Manual Dethatching Rakes: Step-by-Step Lawn Care Guide
Diagnosing Thatch Depth: Do You Actually Need a Manual Dethatching Rake?
Thatch is the intermingled layer of living and dead stems, roots, and crowns that develops between the soil surface and the green vegetation of your lawn. According to the University of Minnesota Extension, a thatch layer of 1/2 inch or less is beneficial, acting as a natural mulch that regulates soil temperature and retains moisture. However, when thatch exceeds 1/2 inch, it becomes a hydrophobic barrier, preventing water, oxygen, and fertilizer from reaching the root zone.
Before purchasing a tool or dedicating a weekend to yard work, you must quantify your thatch layer. Use a sharp spade or a soil probe to extract a 3-inch deep wedge of turf. Measure the spongy, brown layer situated directly above the mineral soil. If the measurement exceeds 0.5 inches, mechanical removal is required. For lawns under 5,000 square feet, or for targeted patch treatments, manual dethatching rakes offer superior precision and prevent the severe turf tearing often caused by motorized power dethatchers.
Selecting the Right Manual Dethatching Rake
Not all rakes are engineered for thatch removal. Standard leaf rakes feature flexible poly-tines or thin bamboo that will simply glide over compacted thatch without penetrating it. A true manual dethatching rake (often called a thatching rake or scarifier rake) requires rigid, sharpened tines designed to slice through the mat and pull it to the surface.
| Feature | Standard Leaf Rake | Entry-Level Thatching Rake | Heavy-Duty Scarifier Rake |
|---|---|---|---|
| Tine Material | Bamboo / Flexible Poly | Stamped Steel | 14 to 16-Gauge Spring Steel |
| Tine Shape | Fanned, flat | Straight, blunt | Curved, sharpened blades |
| Head Width | 24 - 30 inches | 15 - 17 inches | 15 - 20 inches |
| Avg. Cost (2026) | $15 - $25 | $35 - $50 | $60 - $95 |
| Best Application | Autumn leaf clearance | Light thatch on Zoysia | Thick thatch on Fescue/Kentucky Bluegrass |
When selecting a tool, prioritize models from established agricultural brands like Ames True Temper, Bully Tools, or Razor-Back. Look for a reinforced steel head bracket and a fiberglass or hardwood handle to withstand the high torque required during the pulling motion.
Pre-Dethatching Lawn Preparation Checklist
Proper preparation reduces physical strain and prevents damage to your irrigation system and turf crown. Complete these steps 48 hours before dethatching:
- Mark Obstructions: Use high-visibility landscaping flags to mark all sprinkler heads, shallow valve boxes, and invisible dog fence lines.
- Adjust Mowing Height: Mow the lawn to half of its recommended summer height. For Tall Fescue, mow down to 1.5 inches; for Bermudagrass, mow down to 0.75 inches. This exposes the thatch layer and prevents the rake tines from tangling in long grass blades.
- Optimize Soil Moisture: Water the lawn deeply two days prior. The soil should be moist but not saturated. If the soil is too dry, the tines will bounce off the surface; if it is muddy, you will tear out healthy root systems and cause severe soil compaction.
Timing Warning: Cool-Season vs. Warm-Season Grasses
Dethatching stresses the turf. Never dethatch during peak summer heat or winter dormancy. According to UC Davis Integrated Pest Management, cool-season grasses (Fescue, Bluegrass, Ryegrass) must be dethatched in late summer or early fall (late August to September). Warm-season grasses (Bermuda, Zoysia, St. Augustine) should be dethatched in late spring to early summer, immediately after they have fully greened up and entered active growth.
The Step-by-Step Manual Dethatching Procedure
Using a manual dethatching rake is a physically demanding process that requires specific biomechanics to extract thatch without scalping the lawn.
- Establish Your Stance: Stand with your feet shoulder-width apart. Grip the handle with your dominant hand near the base and your non-dominant hand near the middle.
- Set the Tine Depth: Position the rake head flat on the lawn. Tilt the handle forward until the curved tines penetrate exactly 1/4 inch into the soil surface beneath the thatch. Do not dig deeper, or you will sever healthy roots.
- The Pull-and-Lift Motion: Pull the rake backward toward your body using your shoulders and back, not just your arms. As you pull, slightly lift the handle at the end of the 12-inch stroke to lever the thatch upward and out of the turf.
- Overlap Your Passes: Step back and repeat the motion, overlapping your previous stroke by 2 inches to ensure uniform extraction.
- Cross-Hatch for Severe Thatch: If the thatch layer exceeds 3/4 inch, complete your first pass in a North-South direction, then rotate 90 degrees and complete a second pass East-West.
Expert Insight: Do not attempt to remove 100% of the thatch in a single session if the layer is thicker than one inch. Removing too much organic matter at once exposes the soil to extreme UV radiation and weed seed germination. For lawns with 1.5 inches of thatch, remove the top 3/4 inch this season, maintain proper watering, and plan a second dethatching session for the following year.
Post-Dethatching Recovery and Overseeding
Once the thatch is pulled to the surface, use a standard leaf rake or a lawn sweeper to remove the debris. Leaving the extracted thatch on the lawn will smother the remaining grass and invite fungal pathogens like Pythium blight.
Manual dethatching creates ideal seed-to-soil contact, making it the perfect precursor to overseeding. The Penn State Extension recommends applying a starter fertilizer immediately after dethatching and overseeding to fuel rapid root development.
| Action | Specification / Measurement | Timing |
|---|---|---|
| Debris Removal | Remove all extracted brown thatch mats | Immediately after raking |
| Core Aeration (Optional) | Pull 3-inch plugs if soil is compacted | Same day as dethatching |
| Overseeding | Apply 4-6 lbs of seed per 1,000 sq ft | Within 24 hours |
| Fertilization | Apply 10-18-10 Starter Fertilizer (1 lb N / 1k sq ft) | Same day as seeding |
| Irrigation | Water lightly 2x daily for 10 mins to keep seed moist | Days 1 through 14 |
Frequently Asked Questions
Can I use a manual dethatching rake on St. Augustine grass?
St. Augustine grass spreads via thick, above-ground stolons. Using a steel-tined manual dethatching rake aggressively can sever these vital stolons, causing severe turf damage. For St. Augustine, rely on aggressive verticutting attachments on a standard mower, or use a specialized bamboo thatch rake with blunt tines to gently lift the mat without slicing the runners.
Why is my manual rake bending during use?
If the tines on your rake are bending or splaying outward, you are likely using a standard leaf rake masquerading as a thatching tool, or the soil is too dry. Ensure the soil has adequate moisture to soften the thatch mat, and verify your tool features 14-gauge or thicker spring steel tines. Entry-level stamped steel rakes often fail under the torque required for dense Kentucky Bluegrass thatch.
Should I bag my grass clippings to prevent thatch?
No. This is a persistent lawn care myth. Grass clippings are composed of 80% water and decompose within days, returning nitrogen to the soil. Thatch is primarily composed of lignin-rich tissues like stems, crowns, and roots that decompose slowly. Over-fertilization with high-nitrogen synthetic fertilizers and poor soil aeration are the true culprits behind thatch accumulation, not mulched grass clippings.

