
Lawn Care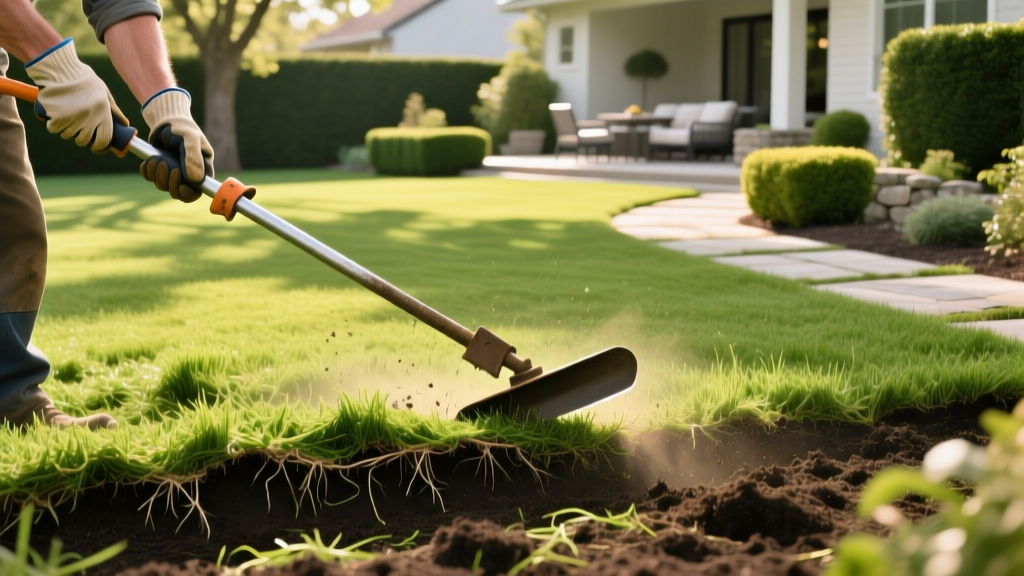
How to Use a Grass Removing Tool for Lawn Renovation
Lawn renovation requires precise execution, and stripping existing turf is often the most physically demanding phase. Whether you are clearing invasive creeping bentgrass, removing drought-damaged patches, or prepping a grade for new Kentucky Bluegrass sod, selecting and operating the correct grass removing tool dictates the success of your project. Relying on rototillers to break up existing lawns introduces severe weed seed banks to the surface and destroys soil structure. Instead, clean extraction preserves the subsoil and provides a pristine seedbed.
Choosing the Right Grass Removing Tool for Your Project
The term 'grass removing tool' encompasses several implements, each engineered for specific square footages and soil densities. Selecting the wrong tool leads to blade binding, excessive fatigue, and jagged subgrade tearing.
| Tool Type | Example Models | Estimated Cost (2026) | Best Application | Physical Effort |
|---|---|---|---|---|
| Manual Step Edger | Fiskars 39-Inch Steel Edger | $35 - $45 | Patch removal, edging, <500 sq ft | High |
| Manual Kick Sod Cutter | Truper 34-Inch Sod Kicker, Bully Tools | $45 - $65 | Medium lawns, 500 - 2,000 sq ft | Medium-High |
| Motorized Sod Cutter | Billy Goat SC1801H, Classen SC-18 | $95 - $130 / day (Rental) | Full yard renovations, >2,000 sq ft | Low-Medium |
For most residential DIY renovations under 2,000 square feet, a manual kick sod cutter provides the optimal balance of cost and precision. These tools feature a weighted, angled blade that slices horizontally beneath the thatch layer, severing roots while leaving the topsoil intact.
Pre-Renovation Prep: Moisture Calibration and Utility Marking
Operating a grass removing tool in dry, compacted soil will bend the blade and cause severe lower back strain. Conversely, operating in saturated mud causes the tool to sink below the root zone, gouging out valuable topsoil and creating an uneven subgrade.
CRITICAL SAFETY WARNING: Before breaking ground, you must contact your local utility marking service. In the United States, dialing 811 or visiting call811.com connects you to the national 'Call Before You Dig' registry. Subsurface irrigation lines, shallow fiber-optic cables, and gas lines are frequently buried less than 6 inches deep in residential lawns.
The Soil Ribbon Test
Water the target area to achieve exactly 1 to 1.5 inches of moisture penetration 48 hours before extraction. To verify field capacity, perform a ribbon test: grab a handful of soil and squeeze it. It should hold its shape tightly but crumble slightly when poked. If water drips out, wait 24 more hours. If it immediately turns to dust, apply another half-inch of water.
Step-by-Step Procedure: Operating a Manual Kick Sod Cutter
Proper biomechanics are essential when using a manual grass removing tool. The power must come from your leg drive and body weight, not your lower back or shoulders.
- Set the Blade Depth: Adjust the tool to cut exactly 1.5 to 2 inches deep. This depth severs the primary root zone of most cool-season and warm-season grasses without excavating the nutrient-rich topsoil beneath it.
- Establish the Starting Trench: At the edge of your work area, use a flat spade to manually cut and remove a 12-inch by 12-inch starter square. This gives the sod cutter blade an exposed vertical face to slide into.
- Position the Tool: Place the blade into the starter trench. Tilt the handle forward so the blade rests flat against the soil profile at a 30-degree angle.
- Execute the Kick: Stand behind the tool with your dominant foot on the crossbar or kick-plate. Drive your foot forward in a sharp, controlled motion. The momentum of the weighted head will slice the roots.
- Leverage and Roll: After each kick, pull the handle backward slightly to lever the cut strip of sod upward, breaking the remaining root hairs.
- Roll and Slice: Once you have a 3 to 4-foot strip of loose sod, use a flat spade to slice it into manageable 18-inch rolls for transport.
Pro-Tip: Keep a wire brush and a can of food-grade silicone lubricant nearby. Wiping the blade every 10 minutes prevents clay and thatch buildup, reducing the friction coefficient and saving significant physical energy over a multi-hour project.
Troubleshooting Common Extraction Failures
Even with perfect soil moisture, specific soil compositions present unique challenges when using a manual grass removing tool.
Blade Binding in Heavy Clay Soils
Clay soils possess high shear strength and tend to adhere to carbon steel blades. If the tool refuses to glide forward, do not force it with excessive kicking, which can snap the wooden or fiberglass handle. Instead, remove the tool, sharpen the leading edge with a 10-inch bastard file to restore the 30-degree bevel, and apply a dry graphite lubricant. Avoid wet oils, which act as a magnet for clay particles.
Shallow Cuts and Root Tearing
If the grass strips are tearing rather than slicing cleanly, the blade is likely riding above the root crown. This occurs when the soil is too dry or the thatch layer is excessively thick (over 0.75 inches). Dethatch the area with a power rake before attempting sod removal, or increase the blade depth by 0.5 inches to bypass the thatch mat.
Calculating Removal Volume and Disposal
One of the most overlooked aspects of lawn renovation is the sheer volume and weight of the extracted material. Failing to calculate this leads to overflowing dumpsters and unexpected disposal fees.
A standard extraction depth of 1.5 inches over a 1,000 square foot lawn yields approximately 4.6 cubic yards of solid sod. Because sod contains dense root structures and retained moisture, it weighs roughly 40 to 50 pounds per square foot. This means a 1,000 square foot project generates nearly 2.5 tons of material.
- Composting: Stack the removed sod strips in a corner of your property, grass-side down. Cover with a dark tarp to block sunlight and accelerate decomposition. According to the EPA's composting guidelines, this 'sod composting' method breaks down the organic matter while trapping the weed seeds, yielding rich topsoil in 12 to 18 months.
- Off-Site Disposal: If you must haul the sod away, rent a 10-yard roll-off dumpster. Standard 20-yard dumpsters are often overkill for the volume but necessary if you are also disposing of old hardscaping or concrete.
- Repurposing: Sell or give away the extracted sod to local landscaping projects. Freshly cut sod remains viable for up to 48 hours if kept moist and shaded.
Post-Removal Soil Management
Once the grass is removed, the exposed subgrade must be prepped immediately to prevent erosion and crusting. Avoid walking on the bare soil to prevent compaction. Use a landscaping rake to grade the surface, ensuring a 1% to 2% slope away from your home's foundation.
According to soil health frameworks outlined by the Natural Resources Conservation Service (NRCS), exposed soil is highly vulnerable to microbial die-off and moisture loss. If you are not laying new sod or seed within 48 hours, apply a 1-inch layer of screened compost over the bare dirt. This acts as a thermal buffer, retains subsoil moisture, and begins the process of inoculating the sterile subgrade with beneficial mycorrhizal fungi before the new turf arrives.
Frequently Asked Questions
Can I use a grass removing tool to level an uneven lawn?
No. A grass removing tool is designed for horizontal extraction, not vertical grading. To level a lawn, you must remove the sod first, grade the exposed subsoil using a box blade or landscaping rake, and then replace the topsoil and new turf.
How often should I sharpen the blade of a manual sod cutter?
For high-carbon steel blades, sharpen the edge with a metal file after every 400 to 500 square feet of cutting. If you are working in soil with high gravel or shale content, inspect the edge every 100 square feet for micro-chips and rolling.

