
Lawn Care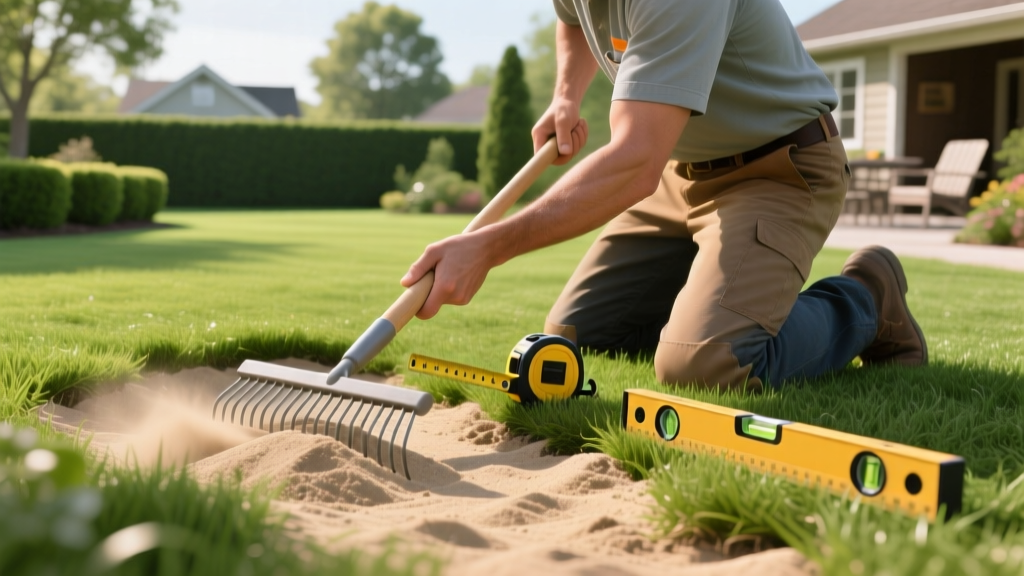
Using Masonry Sand for Lawns: Step-by-Step Leveling Guide
Masonry sand is a highly effective, cost-efficient material for lawn leveling and topdressing, provided it is applied with precise technique. Unlike play sand, which is often too fine and prone to compaction, or concrete sand, which is too coarse and jagged, masonry sand is washed and screened to a uniform particle size (typically 0.25mm to 0.5mm). This specific grading allows it to integrate seamlessly into the turf canopy, filling low spots and improving soil percolation without smothering grass blades or creating a hardened crust.
According to turfgrass researchers at Penn State Extension, incorporating properly graded sand into heavy soils can significantly reduce surface pooling and mitigate localized dry spot issues. However, success depends entirely on preparation, mixing ratios, and application depth. Below is the exact step-by-step protocol for using masonry sand to renovate and level your lawn.
Sand Selection Matrix: Why Masonry Sand?
Before purchasing bulk material, it is critical to understand how masonry sand compares to other common hardware store sands. Using the wrong variant is the leading cause of topdressing failure.
| Sand Type | Particle Size | Silt/Clay Content | Avg. Cost (2026) | Best Lawn Application |
|---|---|---|---|---|
| Masonry Sand | 0.25mm - 0.5mm | Washed (Very Low) | $30 - $45 / ton | General topdressing, minor leveling |
| Concrete Sand | 0.5mm - 2.0mm | Washed (Low) | $25 - $40 / ton | Deep hole filling, base drainage |
| Play Sand | 0.1mm - 0.25mm | Unwashed (High) | $5 - $8 / 50lb bag | Avoid (causes severe compaction) |
| Silica / Horticultural Sand | 0.5mm - 1.0mm | Washed (Zero) | $12 - $20 / 50lb bag | Golf greens, elite sports turf |
Phase 1: Lawn Preparation and Scalping
Masonry sand must reach the soil surface to be effective. If it sits on top of a thick thatch layer, it will create a barrier that repels water and invites fungal diseases.
Step 1: Mow and Scalp
Lower your mower deck to the lowest safe setting for your grass species. For warm-season grasses like Bermuda or Zoysia, scalp the lawn down to 0.5 inches. For cool-season grasses like Kentucky Bluegrass or Tall Fescue, mow down to 1.5 inches. Bag the clippings entirely to expose the soil and thatch layer.
Step 2: Core Aeration (Optional but Recommended)
If your soil is heavily compacted, run a core aerator over the lawn before applying sand. The University of Nebraska-Lincoln Turfgrass Program notes that sand dragged into aeration holes drastically improves deep-soil oxygen exchange. Pull plugs that are at least 3 inches deep and leave them on the lawn to break down naturally.
Pro Tip: Never apply masonry sand to a wet lawn. Moisture causes the fine sand particles to clump together, making it impossible to achieve a smooth, even grade. Wait for at least 48 hours of dry weather before starting.
Phase 2: Calculating Volume and Mixing Ratios
Applying pure masonry sand is only appropriate for filling deep divots or animal holes. For general lawn topdressing and minor undulations, you must cut the sand with organic matter to prevent nutrient leaching and maintain soil biology.
The 70/30 Topdressing Blend
For overall lawn leveling, mix 70% masonry sand with 30% finely screened compost. The compost provides the necessary microbial life and moisture retention that pure sand lacks.
- For a 1,000 sq. ft. lawn: You will need approximately 1.5 cubic yards of the 70/30 mix to achieve a standard 1/4-inch topdressing depth.
- For deep ruts (1 inch or more): Fill the bottom 3/4 of the rut with 100% masonry sand, then cap the top 1/4 inch with the 70/30 blend to ensure the grass stolons have organic matter to root into.
Phase 3: Application and Leveling Technique
The physical application process dictates the final smoothness of your turf. Do not attempt to spread sand by hand or with a standard garden rake.
Step 1: Distribute in Windrows
Dump your mixed sand/compost blend in small, evenly spaced piles (windrows) across the lawn. Do not dump the entire wheelbarrow in one spot, as the weight will smother the grass beneath it and make the pile difficult to move.
Step 2: Use a Leveling Rake
Invest in a 30-inch aluminum lawn leveling rake (such as the Accu-Level or Rocklin models, typically priced between $70 and $120). Push the sand forward to fill low spots, then pull the flat edge backward to scrape excess sand off the high spots.
Critical Depth Warning: Never apply more than 1/2 inch of topdressing material over actively growing grass in a single application. Burying the grass crown deeper than 1/2 inch will block sunlight, deplete the plant's carbohydrate reserves, and cause widespread turf death. If your lawn requires 1.5 inches of leveling, you must split the application into three separate 1/2-inch passes, spaced 4 to 6 weeks apart during the peak growing season.
Step 3: Broom or Drag the Canopy
After leveling, use a stiff push broom or a piece of chain-link fence dragged behind a mower to work the sand down through the grass blades and into direct contact with the soil. Any sand left resting on top of the grass blades will block photosynthesis and burn the tissue under direct sun.
Phase 4: Post-Application Recovery and Watering
Once the sand is worked into the canopy, immediate watering is required to settle the material and wash residual dust off the grass blades.
- Initial Settling Watering: Apply 0.5 inches of water immediately after application. This heavy watering collapses air pockets in the sand and locks the grade into place.
- Follow-up Irrigation: For the next 10 days, water lightly (0.1 to 0.2 inches) every morning to keep the grass blades clean and the soil surface consistently moist, encouraging stolons to root into the new sand matrix.
- Fertilization: Apply a fast-release nitrogen fertilizer (such as 24-0-6) at a rate of 0.5 lbs of nitrogen per 1,000 sq. ft. three days after topdressing. This fuels the rapid vertical growth needed for the grass to push through the new sand layer.
Troubleshooting Common Masonry Sand Failures
Problem: The Sand Hardened into a Crust
Cause: You likely purchased unwashed masonry sand or 'bank run' sand that contained high levels of silt and clay. When wet, silt acts as a binder, turning the sand into a brick-like surface.
Fix: You must aggressively core aerate the lawn to fracture the crust, then topdress with a pure, washed coarse sand to reopen the soil profile.
Problem: Grass Turned Yellow and Thinned Out
Cause: The application depth exceeded 1/2 inch, smothering the crown, or the sand was applied during the grass's dormant season, preventing recovery.
Fix: Rake out excess sand manually with a thatching rake to expose the grass crowns to sunlight. Apply a liquid kelp extract to reduce plant stress and stimulate root recovery.
Problem: Water Pools on Top of the Sand
Cause: Masonry sand was applied directly over a heavy, unamended clay base without prior aeration. The fine 0.25mm particles created a perched water table at the sand-clay interface.
Fix: Incorporate gypsum (calcium sulfate) at a rate of 40 lbs per 1,000 sq. ft. to flocculate the underlying clay, and perform deep-tine aeration to physically connect the sand layer to the subsoil.

