
Lawn Care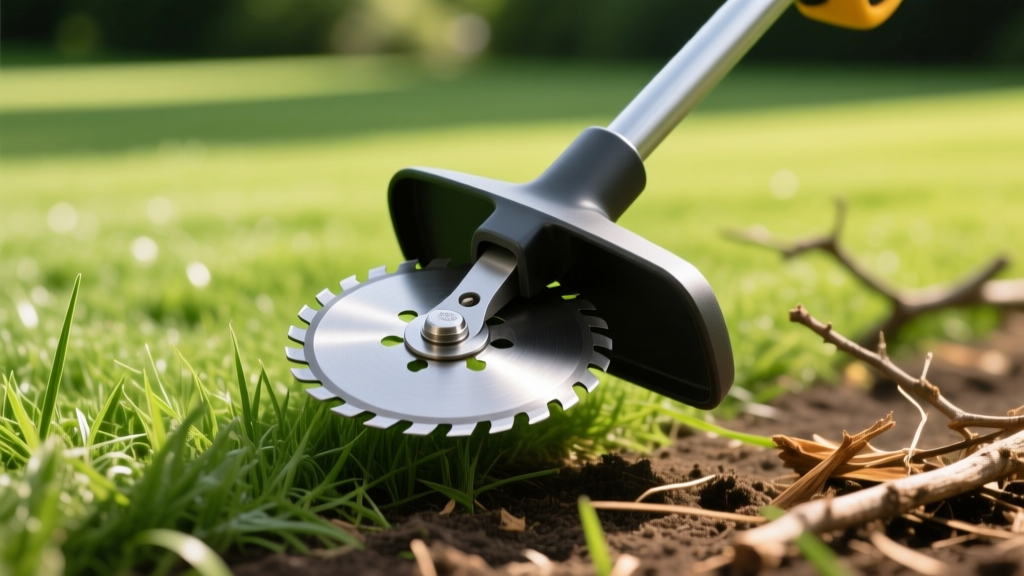
Metal Blade for String Trimmer: Brush Clearing Selection Guide
Transforming Your String Trimmer into a Brush Cutter
Standard nylon monofilament string is highly effective for maintaining turfgrass edges and dispatching soft, annual weeds. However, when confronted with woody saplings, thick-stemmed perennials like kudzu, or dense blackberry brambles, nylon string rapidly disintegrates. Upgrading to a metal blade for string trimmer setups fundamentally changes the tool's capabilities, converting a basic edger into a formidable brush cutter capable of clearing stems up to 1 inch in diameter.
Making this upgrade requires more than simply bolting on a piece of stamped steel. The physics of high-RPM rotational mass, arbor compatibility, and thread directionality dictate both the performance and safety of the modification. According to the Consumer Product Safety Commission (CPSC), improper attachment of cutting accessories is a leading cause of laceration and projectile injuries in landscaping. This guide provides the exact technical specifications, compatibility matrices, and safety protocols required to correctly select, install, and maintain a metal trimmer blade.
Decision Matrix: Nylon String vs. Metal Blades
Before swapping your cutting head, evaluate the specific vegetation you are targeting. Using a metal blade on soft turfgrass will scalp the lawn and damage the soil structure, while using nylon string on woody brush will stall the engine and melt the spool.
| Cutting Medium | Target Vegetation | Max Stem Diameter | Optimal Attachment | Typical RPM Range |
|---|---|---|---|---|
| Nylon String (0.095"+) | Turfgrass, soft annual weeds | 1/4 inch | Bump-feed or fixed-line head | 7,000 - 8,500 RPM |
| 3-Tooth Metal Blade | Thick brush, briars, brambles | 1/2 inch | Steel brush knife | 8,000 - 10,000 RPM |
| 4-Tooth Grass Blade | Tall, dense meadow grasses | 3/8 inch | Stamped steel grass blade | 8,500 - 10,000 RPM |
| 8-Tooth Brush Blade | Saplings, woody shrubs, reeds | 1 inch | Heavy-duty steel cutter | 9,000 - 10,000 RPM |
| 40-Tooth Carbide | Hardwood saplings, thick roots | 2 inches | Carbide-tipped saw blade | 10,000+ RPM (Requires specific gearbox) |
Decoding Arbor Sizes and Thread Directionality
The most common point of failure when purchasing a metal blade for string trimmer gearboxes is mismatching the arbor hole and the retention nut thread. Trimmer gearboxes are not universally standardized.
Arbor Hole Diameters
- 20mm (0.787 inches): The global standard for professional and prosumer straight-shaft trimmers. Brands like Stihl, Husqvarna, Echo, and Shindaiwa predominantly use 20mm arbor gearboxes.
- 25.4mm (1 inch): Common on North American consumer-grade and older trimmers, including many Troy-Bilt, Craftsman, and Ryobi models.
- Adapters: Never use a plastic or loose-fitting metal bushing to adapt a 25.4mm blade to a 20mm arbor. The micro-vibrations at 10,000 RPM will cause the blade to wobble, destroying the gearbox bearings and creating a severe projectile hazard.
The Critical Thread Direction Rule
Trimmer retention nuts utilize reverse threading to prevent the rotational force of the blade from loosening the nut during operation. Straight-shaft trimmers typically rotate counter-clockwise (when viewed from the bottom), meaning they require a Left-Hand (LH) thread retention nut. Curved-shaft trimmers, which use a flexible drive cable, often rotate clockwise, requiring a standard Right-Hand (RH) thread nut. Always verify your gearbox rotation before ordering replacement flange nuts.
Step-by-Step Installation Protocol
Proper installation requires a specific washer stack order to distribute the clamping force and prevent the blade from slipping on the arbor under heavy load.
- Lock the Spindle: Locate the small locking hole on the side of the gearbox casing. Insert the manufacturer-provided locking pin (or a clean 3/16-inch drill bit) to immobilize the output shaft. Never use your hand to hold the blade while tightening the nut.
- Inspect the Deflector Guard: Metal blades require a specific brush-cutter shield. If your current plastic deflector is designed only for string, the blade's wider cutting swath will extend past the guard, exposing your legs to debris and kickback.
- Assemble the Washer Stack: Slide the thrust washer onto the spindle (beveled side facing down toward the gearbox). Next, slide on the metal blade, ensuring it seats flat against the thrust washer. Follow with the flange washer (flat side against the blade), and finally thread on the retention nut.
- Torque the Nut: Use the provided socket wrench to tighten the nut firmly. Do not use an impact wrench, as the sudden torque can strip the soft threads on the gearbox shaft.
CRITICAL SAFETY WARNING: Circular Saw Blades
NEVER attach a standard woodworking circular saw blade to a string trimmer. Woodworking blades lack the lateral stability required for brush cutting and have aggressive hook angles that will cause violent kickback if the teeth catch on a hidden root or rock. Furthermore, the carbide tips can shatter upon impact, turning into high-velocity shrapnel. The Occupational Safety and Health Administration (OSHA) strictly advises against using modified or non-OEM cutting attachments that lack proper guarding and kickback mitigation.
Top Metal Blade Recommendations for 2026
When selecting a blade, prioritize high-carbon steel with proper heat treatment. Cheap, unbranded blades found on e-commerce marketplaces often warp or lose their edge within minutes of hitting woody stems.
- Oregon 20-306 (3-Tooth Brush Blade): Featuring a 20mm arbor and 9-inch diameter, this is the industry standard for clearing light brush and briars. The aggressive tooth geometry slices through fibrous stems without wrapping. Price range: $14 - $18.
- Husqvarna 578447001 (Grass Blade): A 4-tooth, 10-inch blade optimized for dense, wet meadow grasses. The wider surface area creates a lifting effect, ensuring an even cut height similar to a lawn mower. Price range: $25 - $32.
- Renegade T3 Heavy Duty: Constructed from thicker 0.12-inch gauge steel, this 3-tooth blade is designed for high-torque commercial trimmers tackling woody saplings and thick reeds. Price range: $20 - $26.
Maintenance: Sharpening and Balancing
Unlike nylon string which is simply advanced and cut off when frayed, metal blades require periodic maintenance. A dull metal blade will batter woody stems rather than slicing them, transferring immense shock loads back into the trimmer's gearbox and clutch.
The Filing Technique
Do not use an angle grinder or bench grinder to sharpen trimmer blades. The extreme heat generated by high-speed grinding will ruin the temper of the high-carbon steel, causing the teeth to roll over instantly upon contact with wood. Instead, use a 10-inch mill bastard file.
- Secure the blade in a bench vise using soft jaws to prevent marring the steel.
- Identify the original factory bevel (typically between 30 and 45 degrees).
- File only the top edge of each tooth, pushing the file away from you in smooth, even strokes.
- The Balancing Rule: You must apply the exact same number of file strokes to every tooth. If you remove more material from one tooth than the others, the blade will become unbalanced. An unbalanced blade spinning at 10,000 RPM will rapidly destroy the gearbox needle bearings and cause severe operator fatigue.
Cleaning and Storage
After clearing brush, sap and plant resins will bake onto the metal. Spray the blade with a citrus-based solvent or specialized sap remover (like STIHL Resin Remover) and wipe it clean. Before storing for the winter, coat the bare steel with a light layer of 3-in-One oil or WD-40 Specialist Corrosion Inhibitor to prevent oxidation.
Frequently Asked Questions
Can I use a metal blade on a curved-shaft trimmer?
Generally, no. Curved-shaft trimmers rely on a flexible braided cable inside an aluminum tube. The rotational mass and shock loads of a metal blade hitting woody stems will quickly snap the drive cable and strip the plastic drive gears. Metal blades should only be used on straight-shaft trimmers equipped with a solid steel drive shaft and a heavy-duty bevel gearbox.
Why is my trimmer vibrating excessively after installing the blade?
Excessive vibration indicates either an unbalanced blade, a bent gearbox shaft from a previous impact, or debris trapped between the thrust washer and the blade. Remove the blade, clean the mating surfaces, and check the blade's balance using a dedicated magnetic blade balancer or a simple nail through the arbor hole to see if it rests perfectly level.

